Last updated March 30, 2026
A pipeline is a group of Heroku apps that share the same codebase. Each app in a pipeline represents one of the following stages in a continuous delivery workflow:
- Development
- Review
- Staging
- Production
Pipelines are extremely useful for managing multiple environments for your app. A common pipeline workflow has the following steps:
- A developer creates a pull request to make a change to the codebase.
- Heroku automatically creates a review app for the pull request, allowing developers to test the change.
- When the change is ready, it’s merged into the codebase’s master branch.
- The master branch is automatically deployed to the pipeline’s staging app for further testing.
- When the change is ready, a developer promotes the staging app to production, making it available to the app’s end users.
A pipeline’s overview page illustrates the stages of this flow and provides meta-information about the status of each stage. For example, you can see if your production app is running different code than staging.

Creating Pipelines
From the Heroku Dashboard
Click the New button in the top right of your app list and select Create new pipeline:

Alternatively, you can navigate to an app’s Deploy tab and create a new pipeline to include that app.

From the Heroku CLI
You can use the pipelines:create command to create a pipeline from the CLI. Note that the command must specify an existing app that you want to add to the pipeline.
$ heroku pipelines:create -a example-app
? Pipeline name: example-pipeline
? Stage of example-app: production
Creating example-pipeline pipeline... done
Adding example-app to example-pipeline pipeline as production... done
The CLI prompts you to specify a name for the pipeline and a stage for the app you’re adding to it (development, staging, or production).
Use heroku help pipelines:create to see a full list of options for this command.
Accessing Pipelines
Apps in a pipeline do not appear as individual apps in the Heroku Dashboard. Instead, they appear as part of a single pipeline entry with a drop-down to view individual apps:

Adding Apps to a Pipeline
A Heroku app can belong to exactly one stage of exactly one pipeline. A pipeline can only contain apps from the same generation. You can’t add a Fir-generation app to a pipeline that already contains a Cedar-generation app, or vice versa.
From the Heroku Dashboard
From your pipeline’s overview page, click + Add app next to a deployment stage to add an existing application to that stage of the pipeline.
From the Heroku CLI
Add an app to your pipeline with the heroku pipelines:add command:
$ heroku pipelines:add example-pipeline -a example-staging-app
? Stage of example-staging: staging
Adding example-staging to example pipeline as staging... done
Multiple Apps in a Pipeline Stage
Pipeline stages can include more than one app. For example, the production stage might have the main production app and an admin app running the same version of code, but with different configurations.

Deployment with Pipelines
Pipelines let you define how your deployed code flows from one environment to the next. For example, you can deploy code to your staging app, which builds it into a build-artifact and later promote that same artifact to production. This promotion flow ensures that production contains the exact same code that you tested in staging, and it’s also much faster than rebuilding the artifact.
Promoting
After you’ve fully tested a change in a particular pipeline stage, you can promote its associated build artifact to the app(s) in the downstream stage.
Downstream refers to the next environment stage in a pipeline. For example, given a development --> staging --> production pipeline, staging is downstream of development, and production is downstream of staging.
From the Heroku Dashboard
You promote a particular stage’s build artifact by clicking its associated Promote button on your pipeline’s overview page:

If there are multiple apps in the downstream stage, you can specify which ones you want to promote the build artifact to.
The Promote button will only be available if there are apps in the subsequent stage(s). In other words, if staging has an app to be promoted to production but the production stage doesn’t contain any apps, there will be nothing in which to promote the staging app, and thus no promotion target.
From the Heroku CLI
From the CLI, you can promote a build artifact with the heroku pipelines:promote command. The command must specify the name (-a) or Git remote (-r) of the source app:
$ heroku pipelines:promote -r staging
Promoting example-staging to example (production)... done, v23
Promoting example-staging to example-admin (production)... done, v54
By default, this command promotes the source app’s build artifact to all apps in the downstream stage. You can specify a subset of these apps to promote to with the --to option:
$ heroku pipelines:promote -r staging --to my-production-app1,my-production-app2
Starting promotion to apps: my-production-app1,my-production-app2... done
Waiting for promotion to complete... done
Promotion successful
my-production-app1: succeeded
my-production-app2: succeeded
Release Phase During a Promotion
Release Phase does run when you promote a build artifact, despite the fact that no new build is created.
Pipelines Ownership and Transfer

The Pipelines web interface and CLI encourage and require that apps in a Pipeline be owned by the Pipeline owner. This owner can be assigned in the Settings tab of the Pipelines web interface.
Electing to assign a Pipeline owner, typically a Heroku Team, will prevent common permissions-related issues in collaborative workflows. This is especially important when owners wish to assign team members differing access to production, staging, and development apps.
This feature encourages better structure and administrative hierarchy in Pipelines.
A user is eligible to own a Pipeline if the user owns app(s) in a Pipeline. Once a user assumes ownership of the Pipeline, the web UI will highlight Pipeline apps not owned by that user and provide a UI to transfer the foreign apps in the Pipeline to the Pipeline owner.
Pipelines owned by an individual can only be transferred to a Heroku Team (or Enterprise Team) in which that individual is a member. Team-owned Pipelines can be transferred to any individual that is a member of that Team. However, for billing security, individual Pipelines cannot be transferred directly to other individuals.
GitHub Sync
Promoting from staging to production is great, but you can further optimize your flow by automatically deploying to staging using GitHub integration. For example, whenever the master branch is updated on GitHub and continuous integration (CI) tests pass, staging can be auto-deployed.
Review Apps
If you’re using GitHub, we highly recommend using pull requests and setting up corresponding review apps. Dynos and add-ons used by review apps are charged in exactly the same way as for normal apps. See Review App Management and Costs for more info.
Pipelines and Heroku CI
Heroku CI is currently unavailable for Fir-generation pipelines. Subscribe to our changelog to stay informed of when we add new features to Fir.
If you’re using GitHub, you can turn on Heroku CI, Heroku’s visual, low-configuration Test Runner that integrates easily with Heroku Pipelines. Any Heroku Pipeline is already CI-ready–just turn it on in the pipeline’s Settings tab. Dyno and add-on run time for the duration of the test run is charged at the normal rate prorated to the second.
Ephemeral App Permissions
Review apps and CI apps are short-lived, “ephemeral” apps. You can set user permissions and manage access to all ephemeral apps within a pipeline via the pipeline’s access tab. The access tab is available to “admin” users in Heroku Teams and Enterprise Teams, and to pipeline owners in personal accounts.
Permissions in the pipeline access tab are only applied to review apps and CI apps.
With the new version of Review Apps, all users with “member” role in the Enterprise Teams and Heroku Teams are automatically added to Review Apps via auto-join with “View”, “Operate” and “Deploy” permissions. The pipelines access tab makes it possible to manage and modify auto-join access. Modifying auto-join permissions are only possible for Enterprise Teams. For Heroku Teams, the “View”, “Operate” and “Deploy” permissions that “members” get via auto-join are static and can’t change.
To edit permission for existing pipelines in an Enterprise Team, select the small pencil icon in the “Default permissions for new team members” section of the pipeline access tab. You can also disable auto-join completely. Permission changes and turning off/on auto-join will only be effective for new apps and doesn’t change previous settings.

Auto-join is when users with “member” role in the Enterprise Team and Heroku Teams are automatically added to the pipeline with “View”, “Operate” and “Deploy” permissions on Review Apps and CI Apps. Via the pipeline access tab, you can disable auto-join, or modify auto-join permissions for Enterprise Team “members”. For Heroku Teams, permissions are static and can’t change.
Any changes to user permissions in the pipeline access tab, turning on and off auto-join, and editing exiting auto-join permissions will only be applied to new apps from the time you make those changes. They won’t be applied to existing apps.
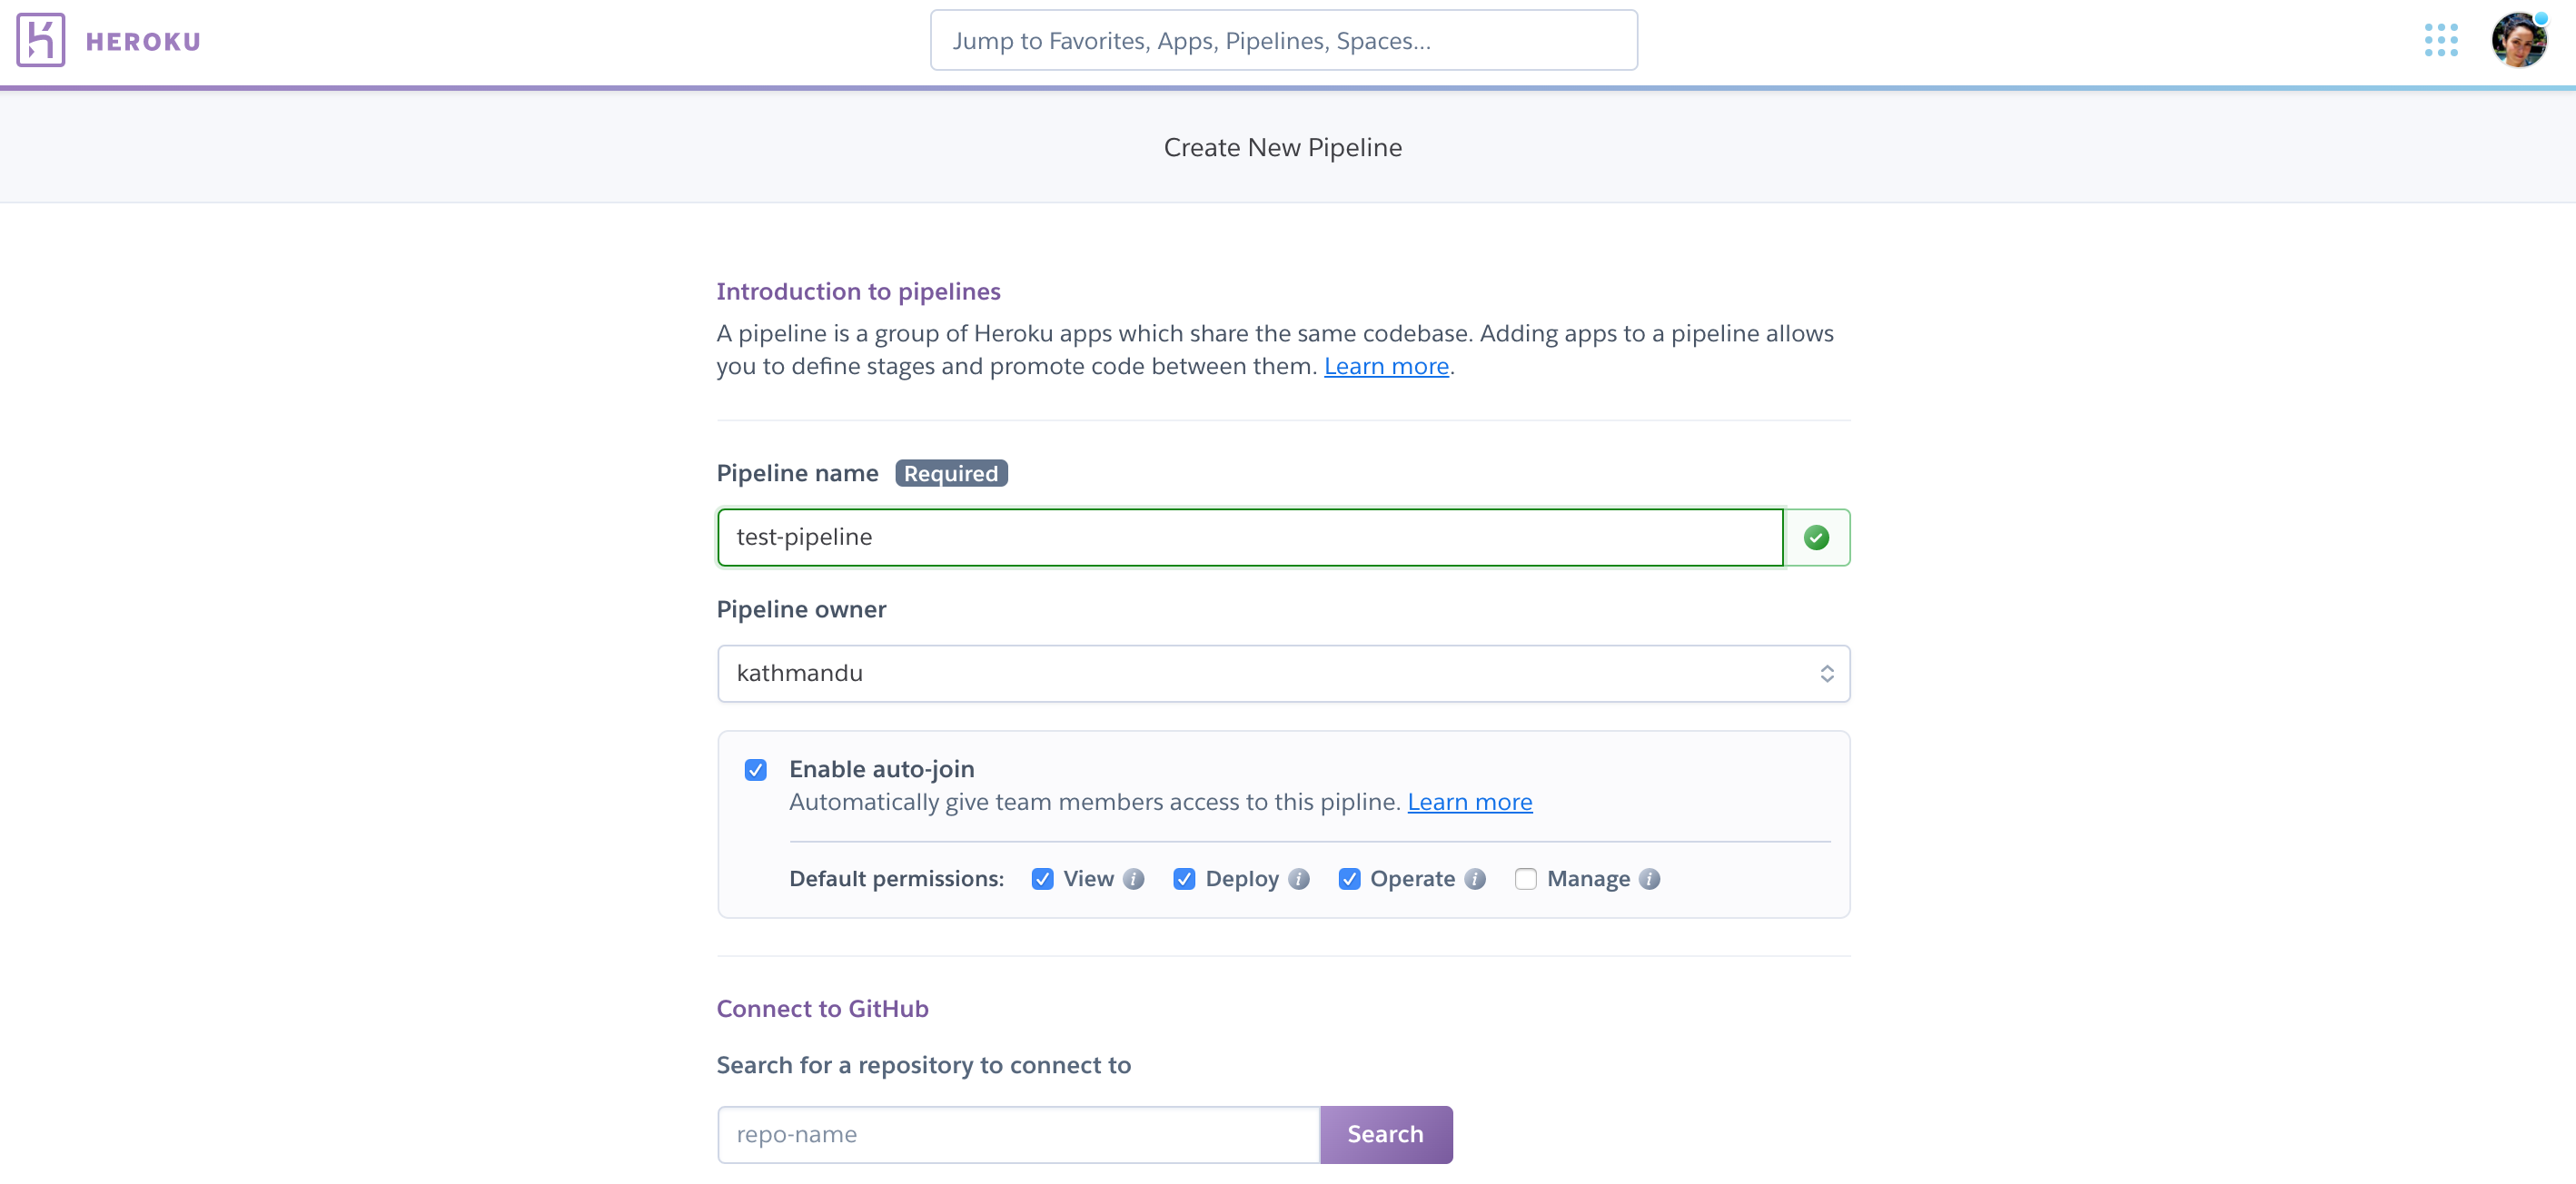
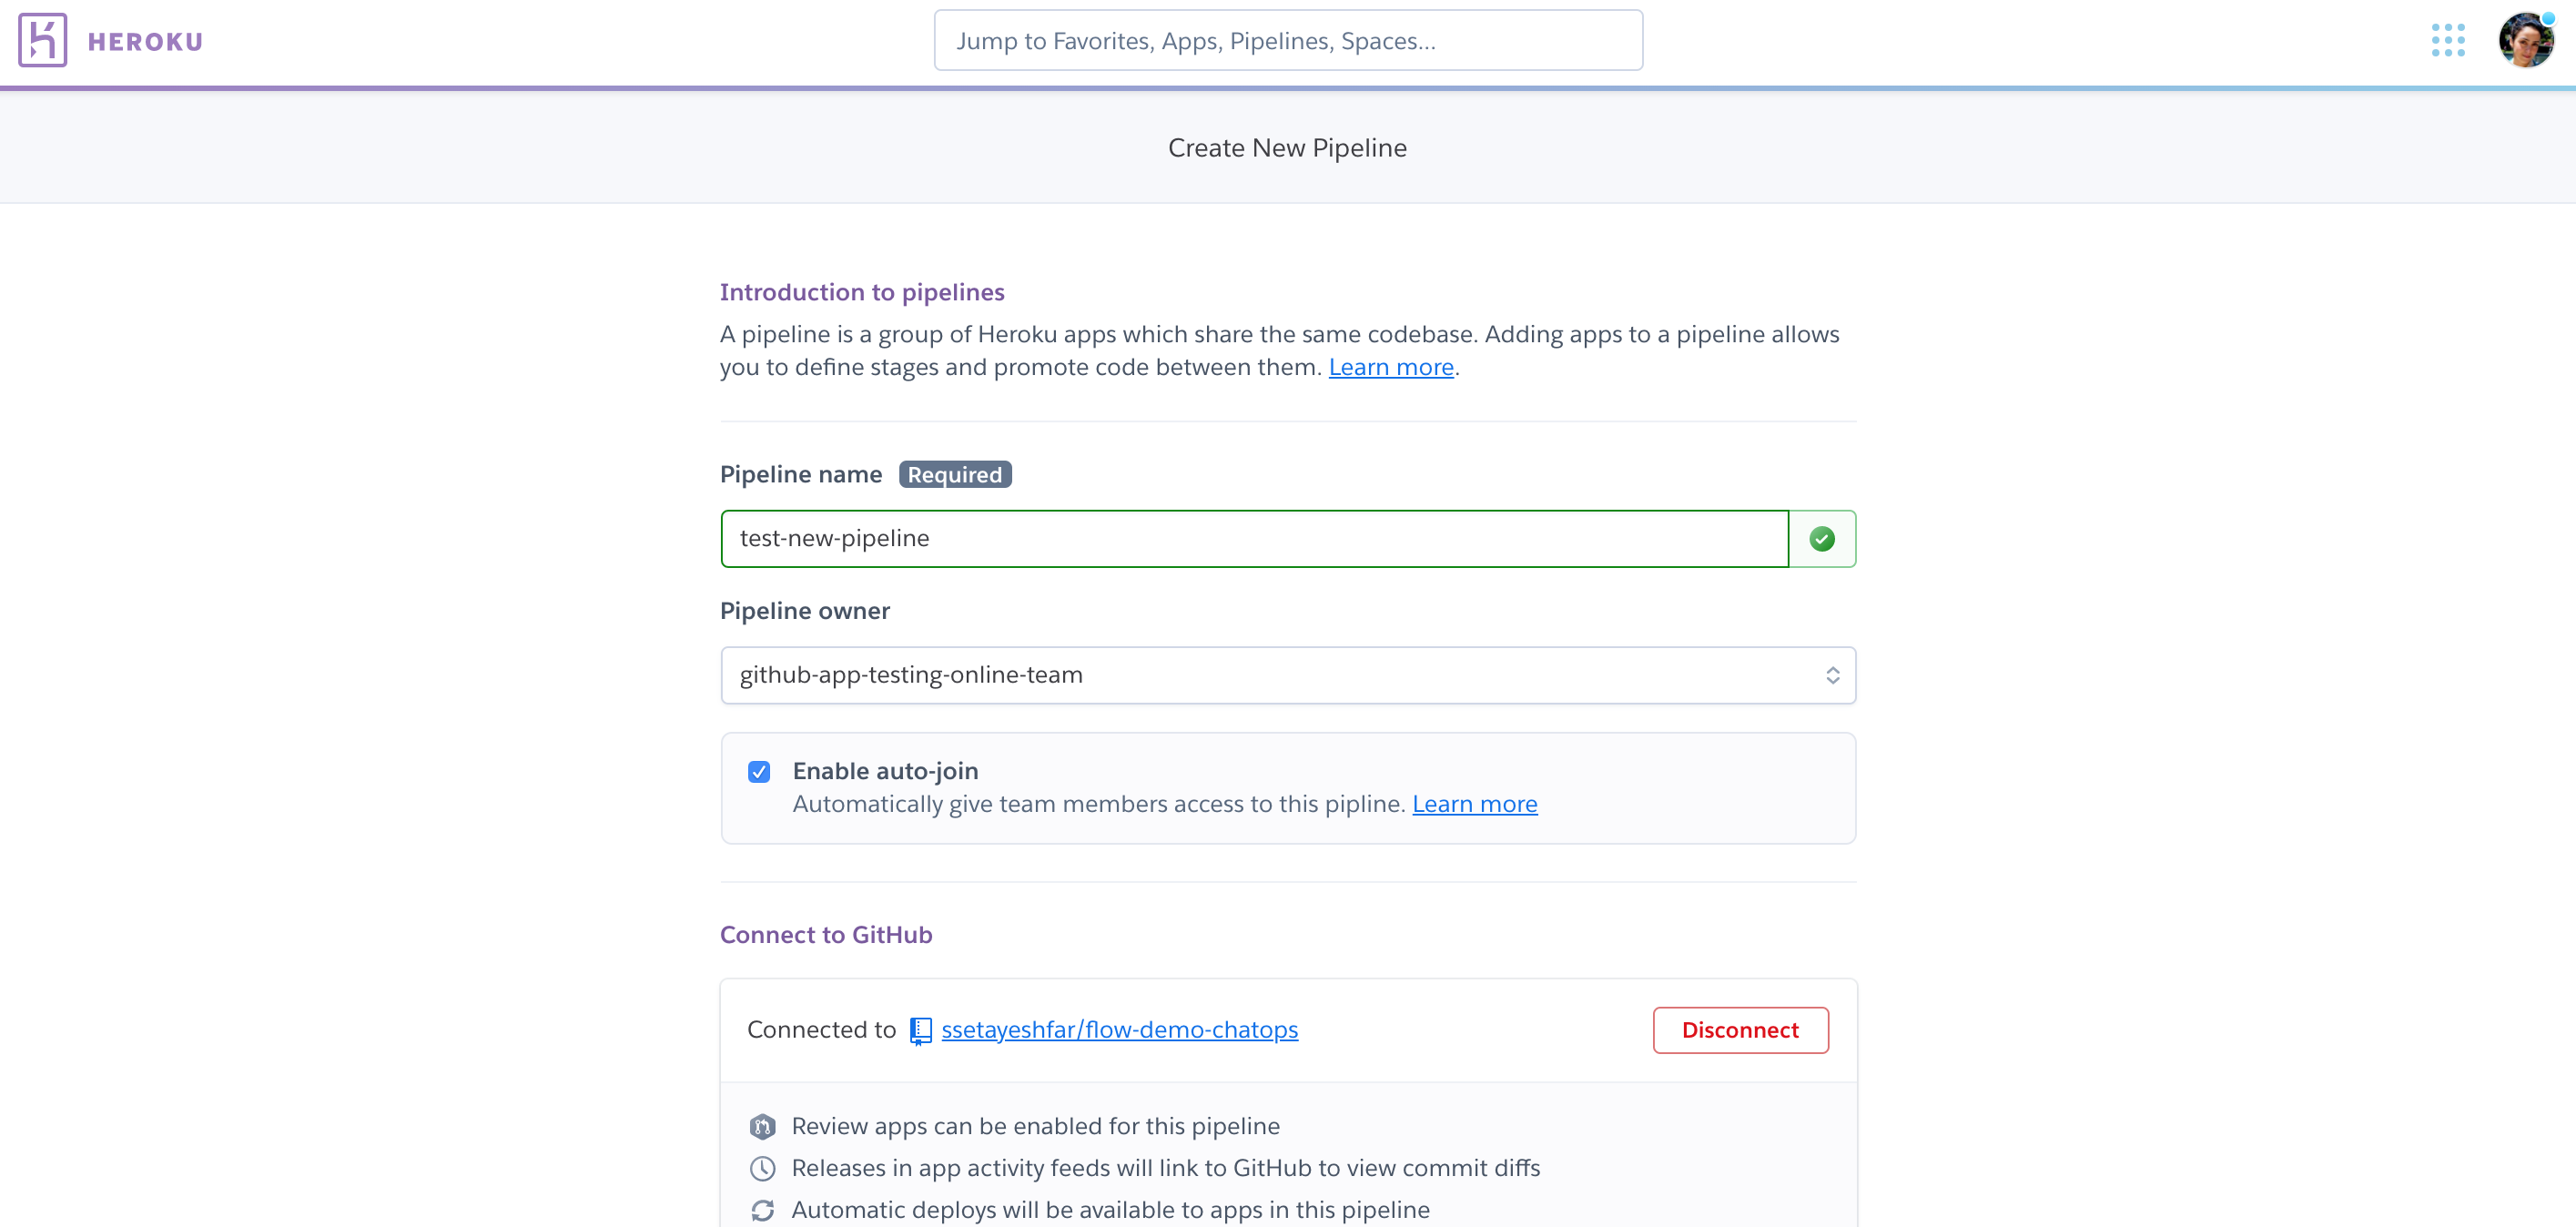
For new pipelines, the default is set to auto-join enabled with “View”, “Operate” and “Deploy” permissions selected. You can turn auto-join off or modify permissions when creating the pipeline.
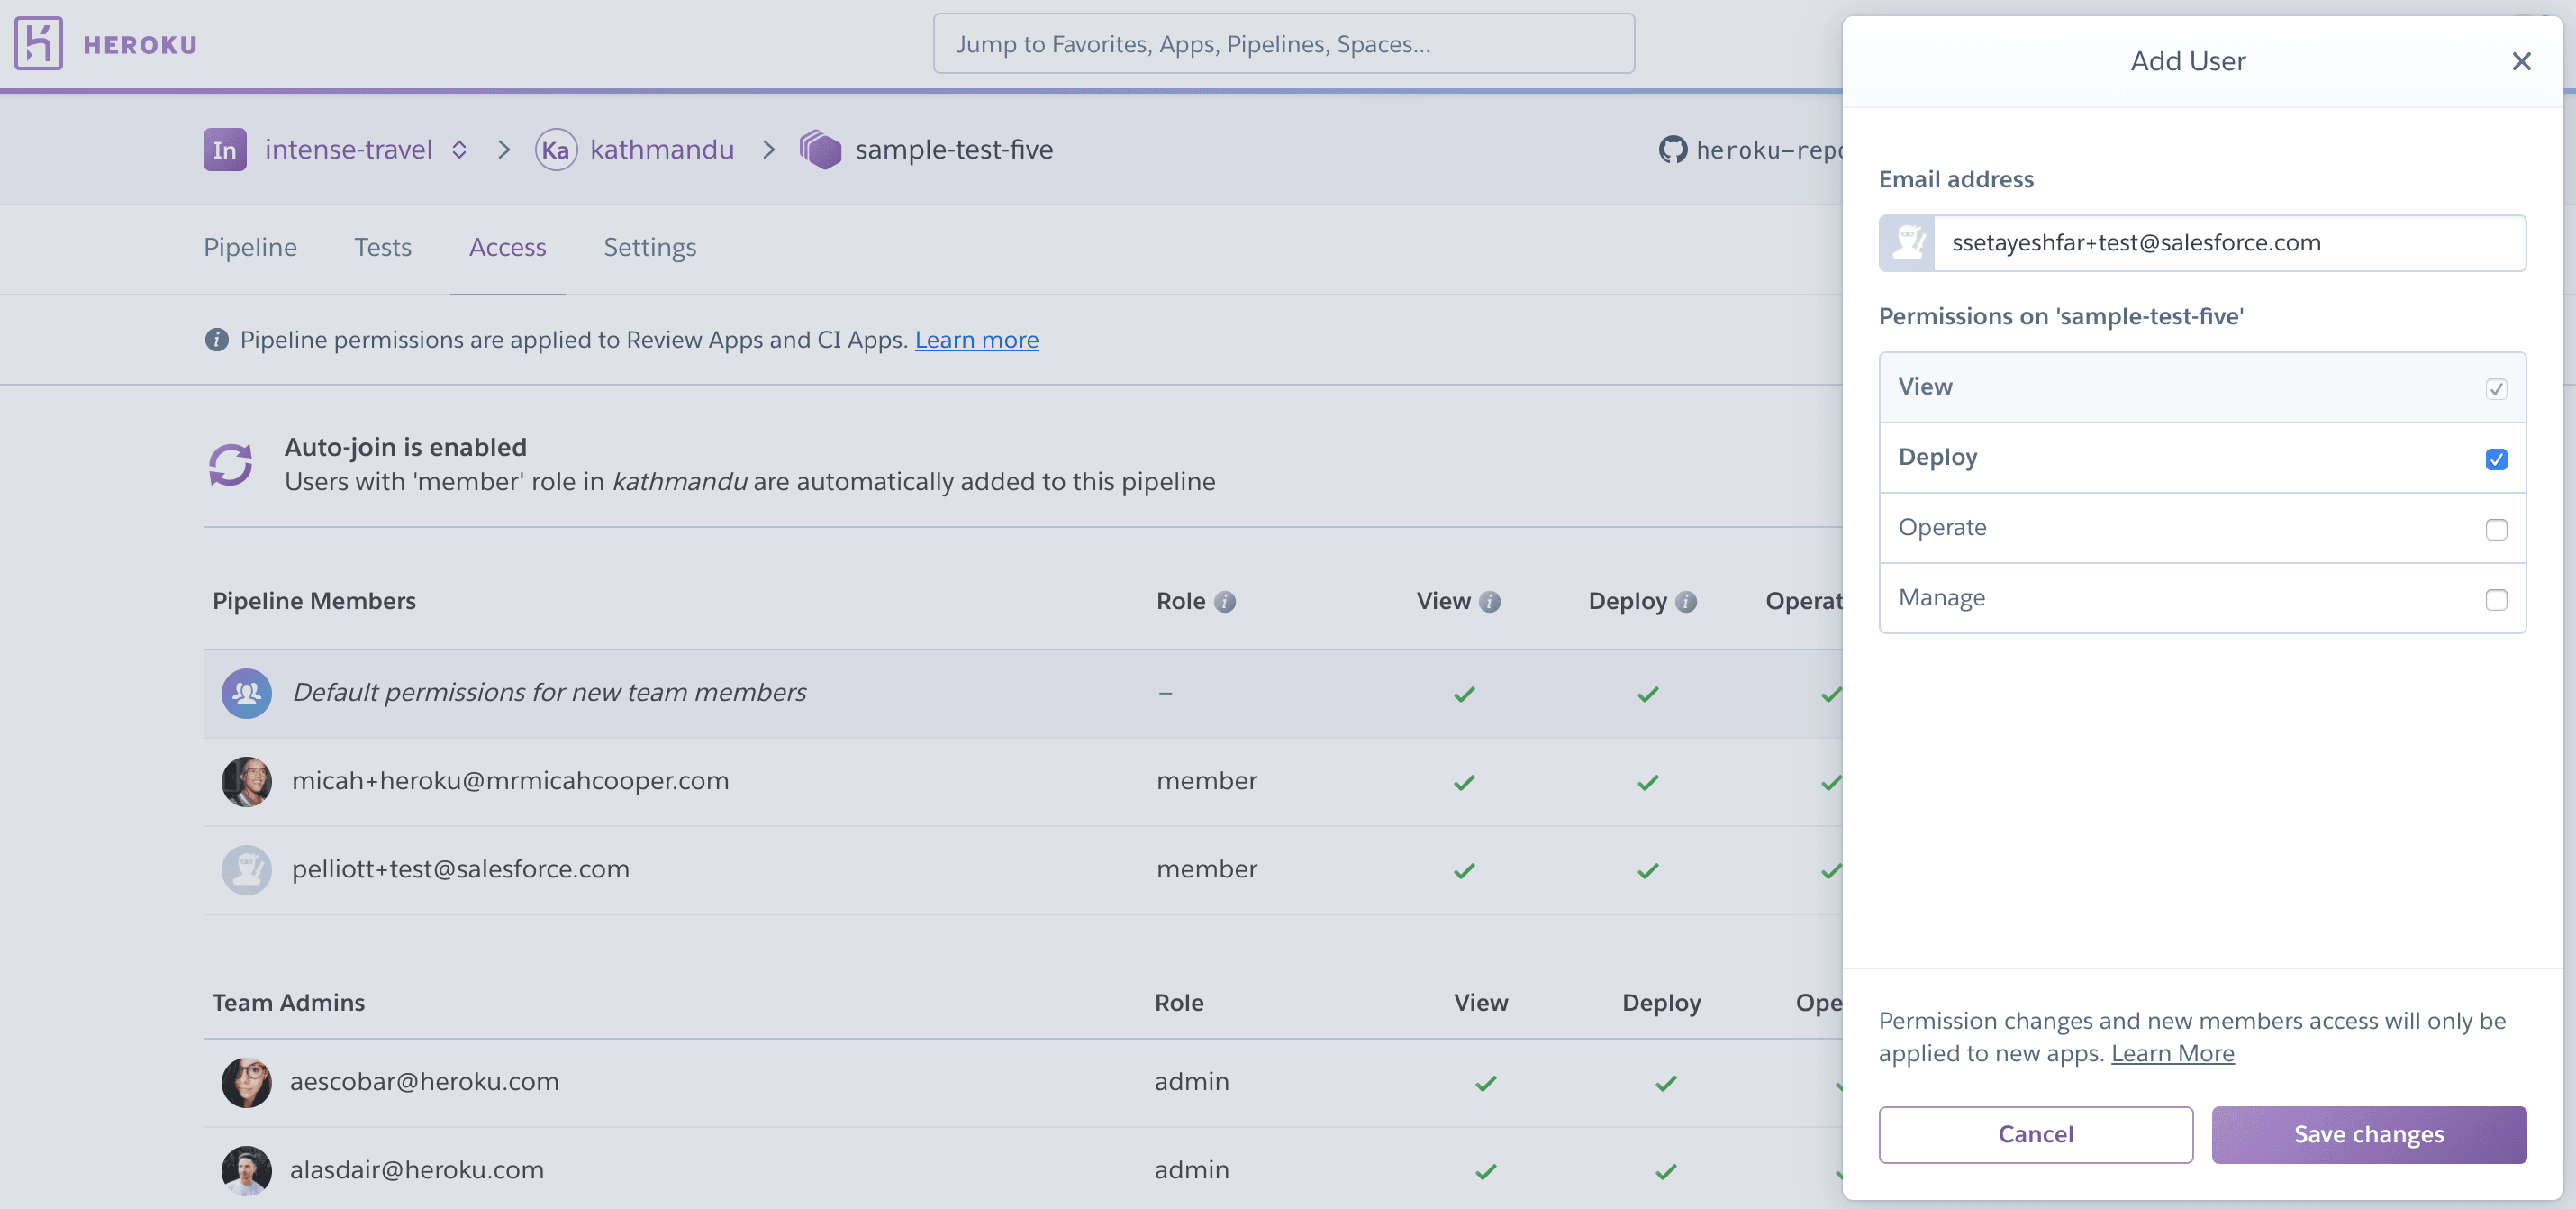
For all other users that are not added automatically via auto-join, you can add them manually. As an example, if you want a “collaborator” user to have “operate” access to the Review Apps and CI Apps within the pipeline, add the user manually under the pipeline access tab with “operate” permission selected.
For Heroku Teams, permissions are static and can’t be modified, so there are no options to select permissions when enabling auto-join:
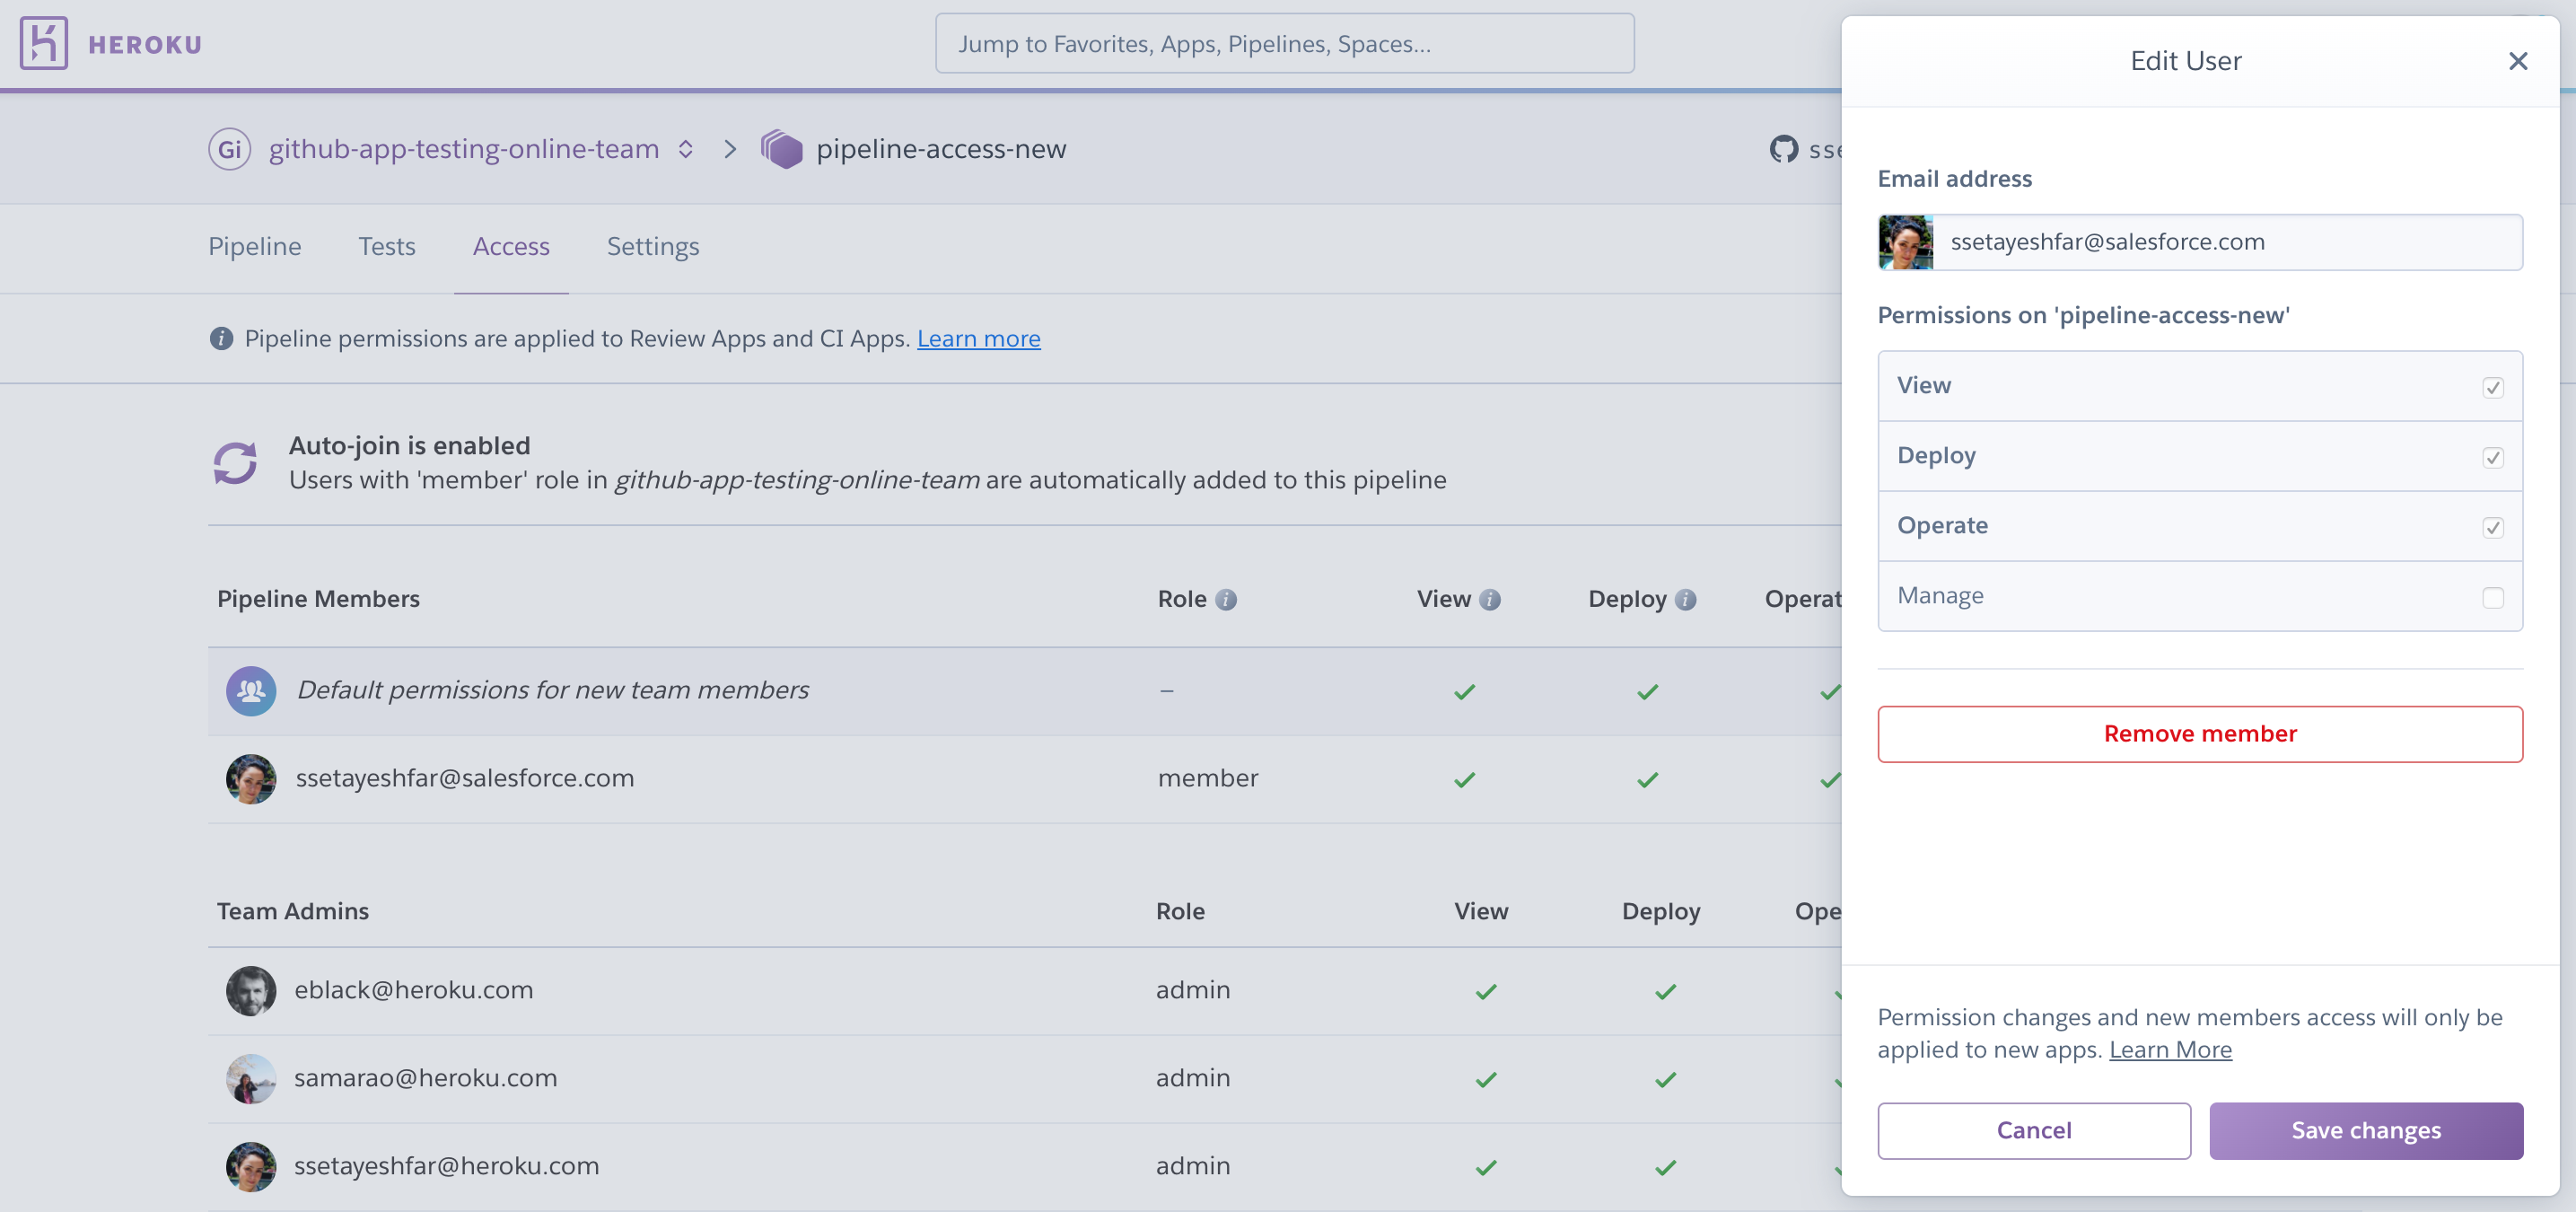
And no options to edit existing user permissions. User’s get pre-set static permissions based on their role in the team:
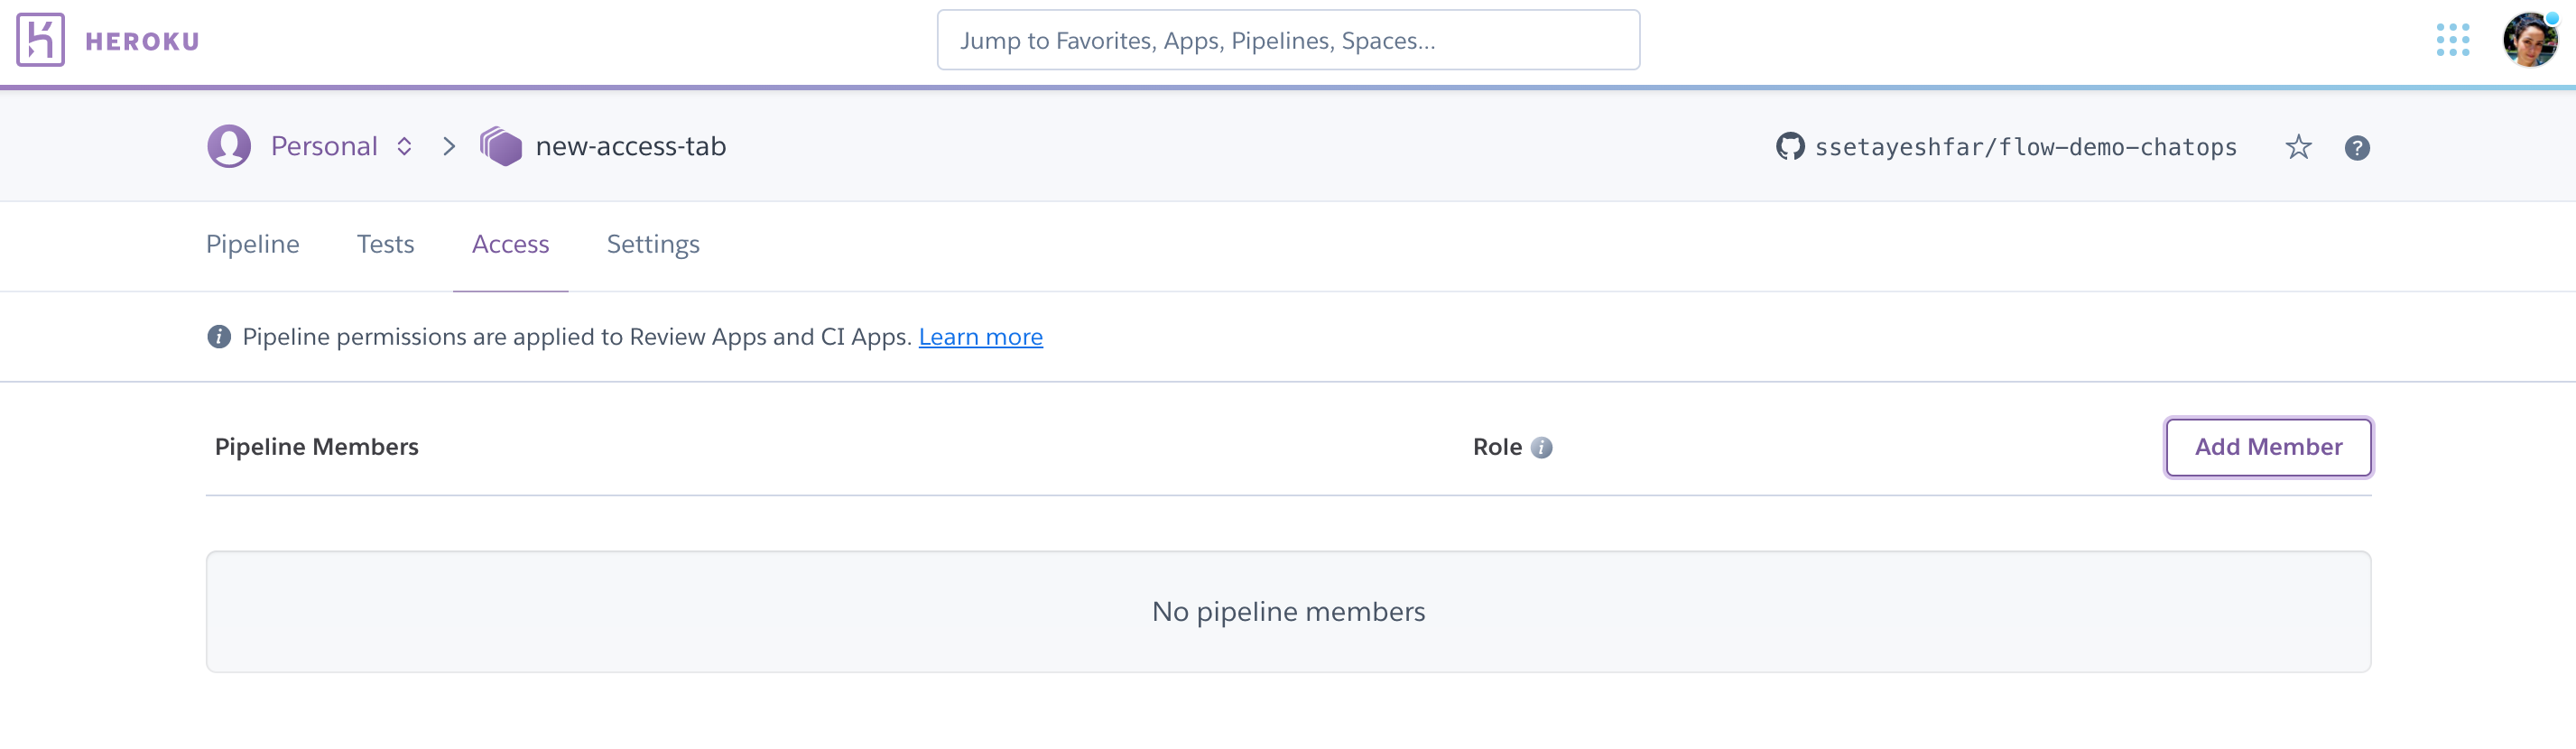
For personal accounts there is no concept of auto-join since there is no higher team layer, but each pipeline has the access tab via which you can add users that you want to have access to Review Apps and CI Apps within the pipeline:
Permissions and Capabilities
While pipeline level permissions look the same as Heroku app permissions, their capabilities are different and specific to actions users can take on Review Apps and CI Apps.
Only users with “admin” role in Enterprise Teams and Online Teams, and pipeline owners in personal account can access and modify pipeline level permissions.
Even if a user has no permissions on a pipeline, they can still view and perform actions on the individual apps within a pipeline if they have app-level or team-level permissions enabled.
| Action | View | Deploy | Operate | Manage |
|---|---|---|---|---|
| Review Apps | ||||
| View pull requests | X | X | X | X |
| View Review Apps | X | X | X | X |
| Open Review Apps | X | X | X | X |
| Create Review Apps | X | X | X | X |
| Delete Review Apps | X | X | X | X |
| See build information | X | X | X | |
| Edit config vars | X | X | X | |
| CI | ||||
| View tests | X | X | X | X |
| Create CI apps | X | X | ||
| Enable CI | X | |||
| Cancel CI runs | X | |||
Design Considerations
Pipelines manage the flow of application build artifacts only. Your app’s Git repo, config vars, add-ons, and other environmental dependencies must be managed independently.
Deploying via pipeline promotion is recommended only for apps with stateless builds. Builds that compile configuration variable values into the build artifact (i.e., stateful builds) can encounter issues when promoted. For apps with stateful builds, use Heroku’s standard Git-based deployment or GitHub deploys instead.
When a build artifact is promoted, Heroku copies it without making any changes. It is not rebuilt for the environment of the target app. If your builds bake in environment from the build-app context, then your artifacts are not portable between pipeline stages. This may be the case, for example, if you’re using Ruby on Rails and the asset pipeline to build assets hosted at a CDN defined by a URL in your build environment. This is because URLs specific to the build-app will be baked into css and js-files, and those will not work correctly when promoted. See this article for instructions on how to configure this with Rails.
For Cedar-generation apps, build artifacts are associated with the stack they were built on, since they typically contain binaries compiled against the system libraries in that stack. As such, promoting an artifact from one app to another updates the stack of the target app to match that of the originating app.
FAQ
What else can I do with the pipelines CLI?
A complete list of Pipelines commands with usage details is available in the console:
$ heroku help pipelines
Can I have pipelines stages other than development, staging and production?
No, only those three stages are currently supported, plus the special stage, review.
Can I run scripts, such as rake db:migrate when promoting?
Heroku Release Phase lets you perform common tasks like schema migrations before a new version of your app is deployed to any step of the continuous delivery flow. See its documentation for more information.
Can I have more than one app in a pipeline stage?
Yes.
Do pipelines always require a app?
Yes, pipelines must always contain one application. Pipelines that do not contain any apps are not accessible via our dashboard and will be scheduled to be deleted. It is highly recommended you have at least one permanent app in your pipeline as you cannot always guarantee that a review app will exist within the pipeline.
Do pipelines work without GitHub?
Yes. Pipelines are very well integrated with GitHub, but this integration is not required.
I don’t see a “development” stage, how do I add a development app?
You can add the app to any other stage, and then using the context menu on the app card, move the app to “development”. Alternatively, you can go to the Deploy tab of the app and add it to a pipeline from there, while specifying the “development” stage.
Do Pipelines work with Heroku Enterprise Teams?
Yes, Pipelines are fully supported for Enterprise Teams. However, in some cases team members may find they cannot operate on a given app in a pipeline due to the access control, such as that described in Using App Permissions in Heroku Enterprise Teams. Users must have adequate permissions to perform the relevant operations on the app.
Do Pipelines work with Private Spaces?
Yes, a Pipeline can span apps in the Common Runtime and in multiple different Private Spaces. This allows you to have test and staging apps in the Common Runtime or in a separate Private Space while promoting to a Private Space with only production apps.
How much do Pipelines cost?
While the use of the Pipelines feature itself is free, you still incur costs for any dynos or add-ons used by your apps in the pipeline.