Last updated December 23, 2025
This feature is available in Heroku Enterprise.
Roles and Permissions
Each user in an Enterprise Team has one of the following roles:
adminmemberviewercollaborator
Enterprise Teams must have at least one user with the admin role. If a team has only one admin user, their role can’t change until another admin is added to the team.
Admins can manage users and application access. Admins can assign specific permissions to multiple users and allow them to perform a set of actions based on their role. See Enterprise Teams Permissions and Allowed Actions for the permissions available to each role.
In addition to admins, team users with the manage permission on an app can add and manage other users to that particular app
Add, Remove, or Modify Enterprise Team Users in the Heroku Dashboard
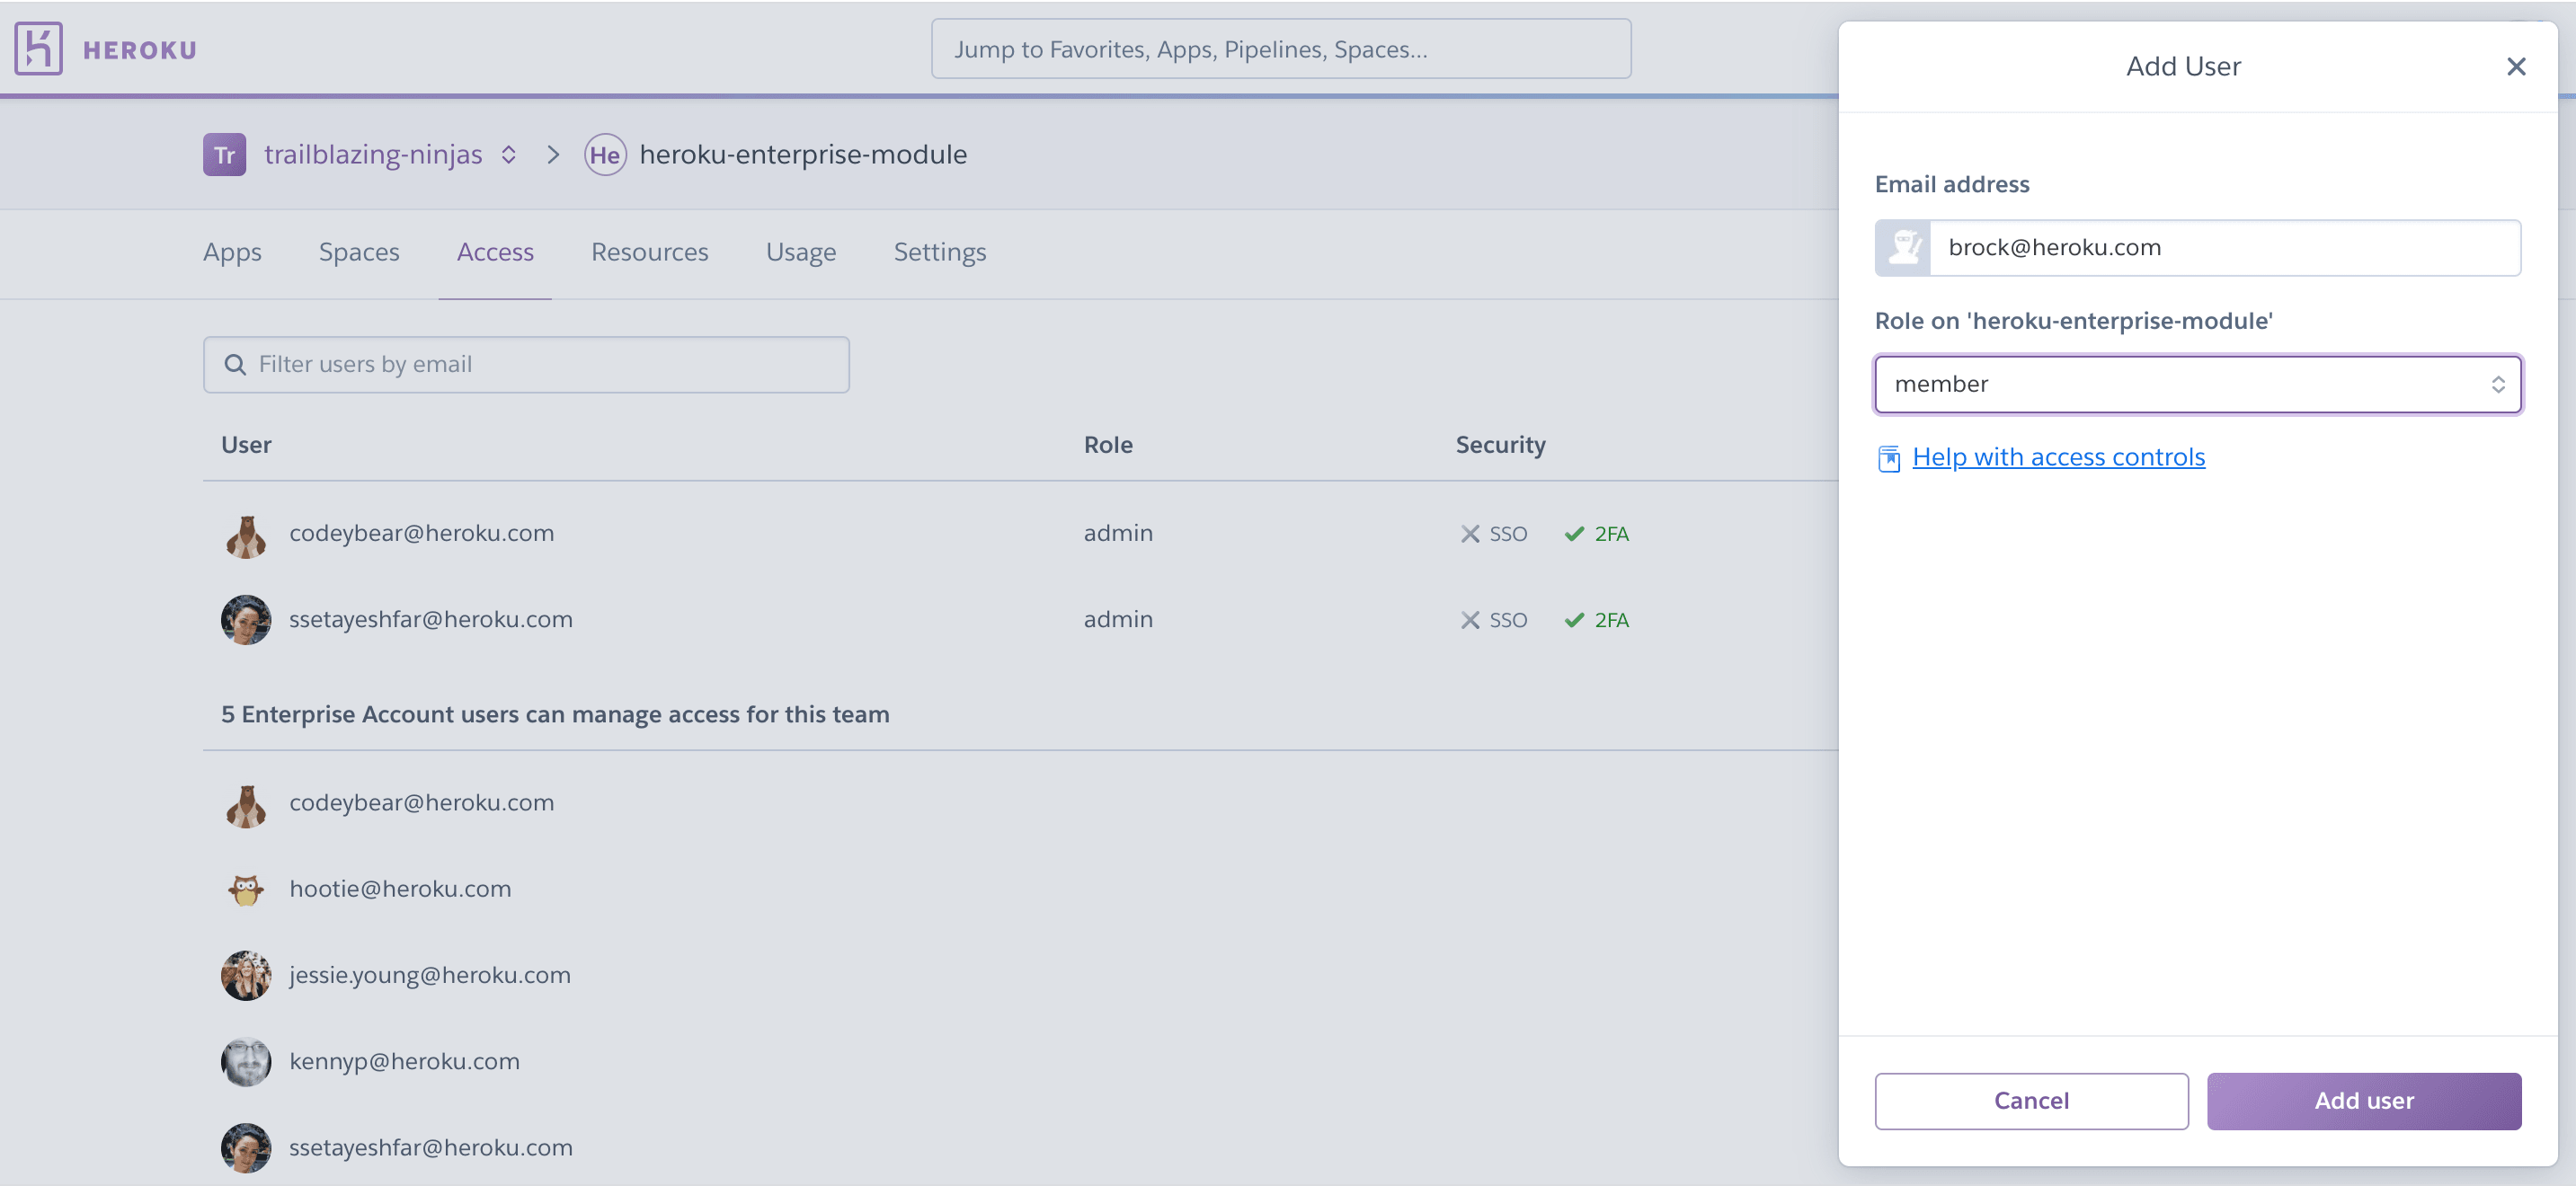
Enterprise Team users with the admin role can add, remove, and modify users from the team’s Access page in the Heroku Dashboard.
Adding Collaborators
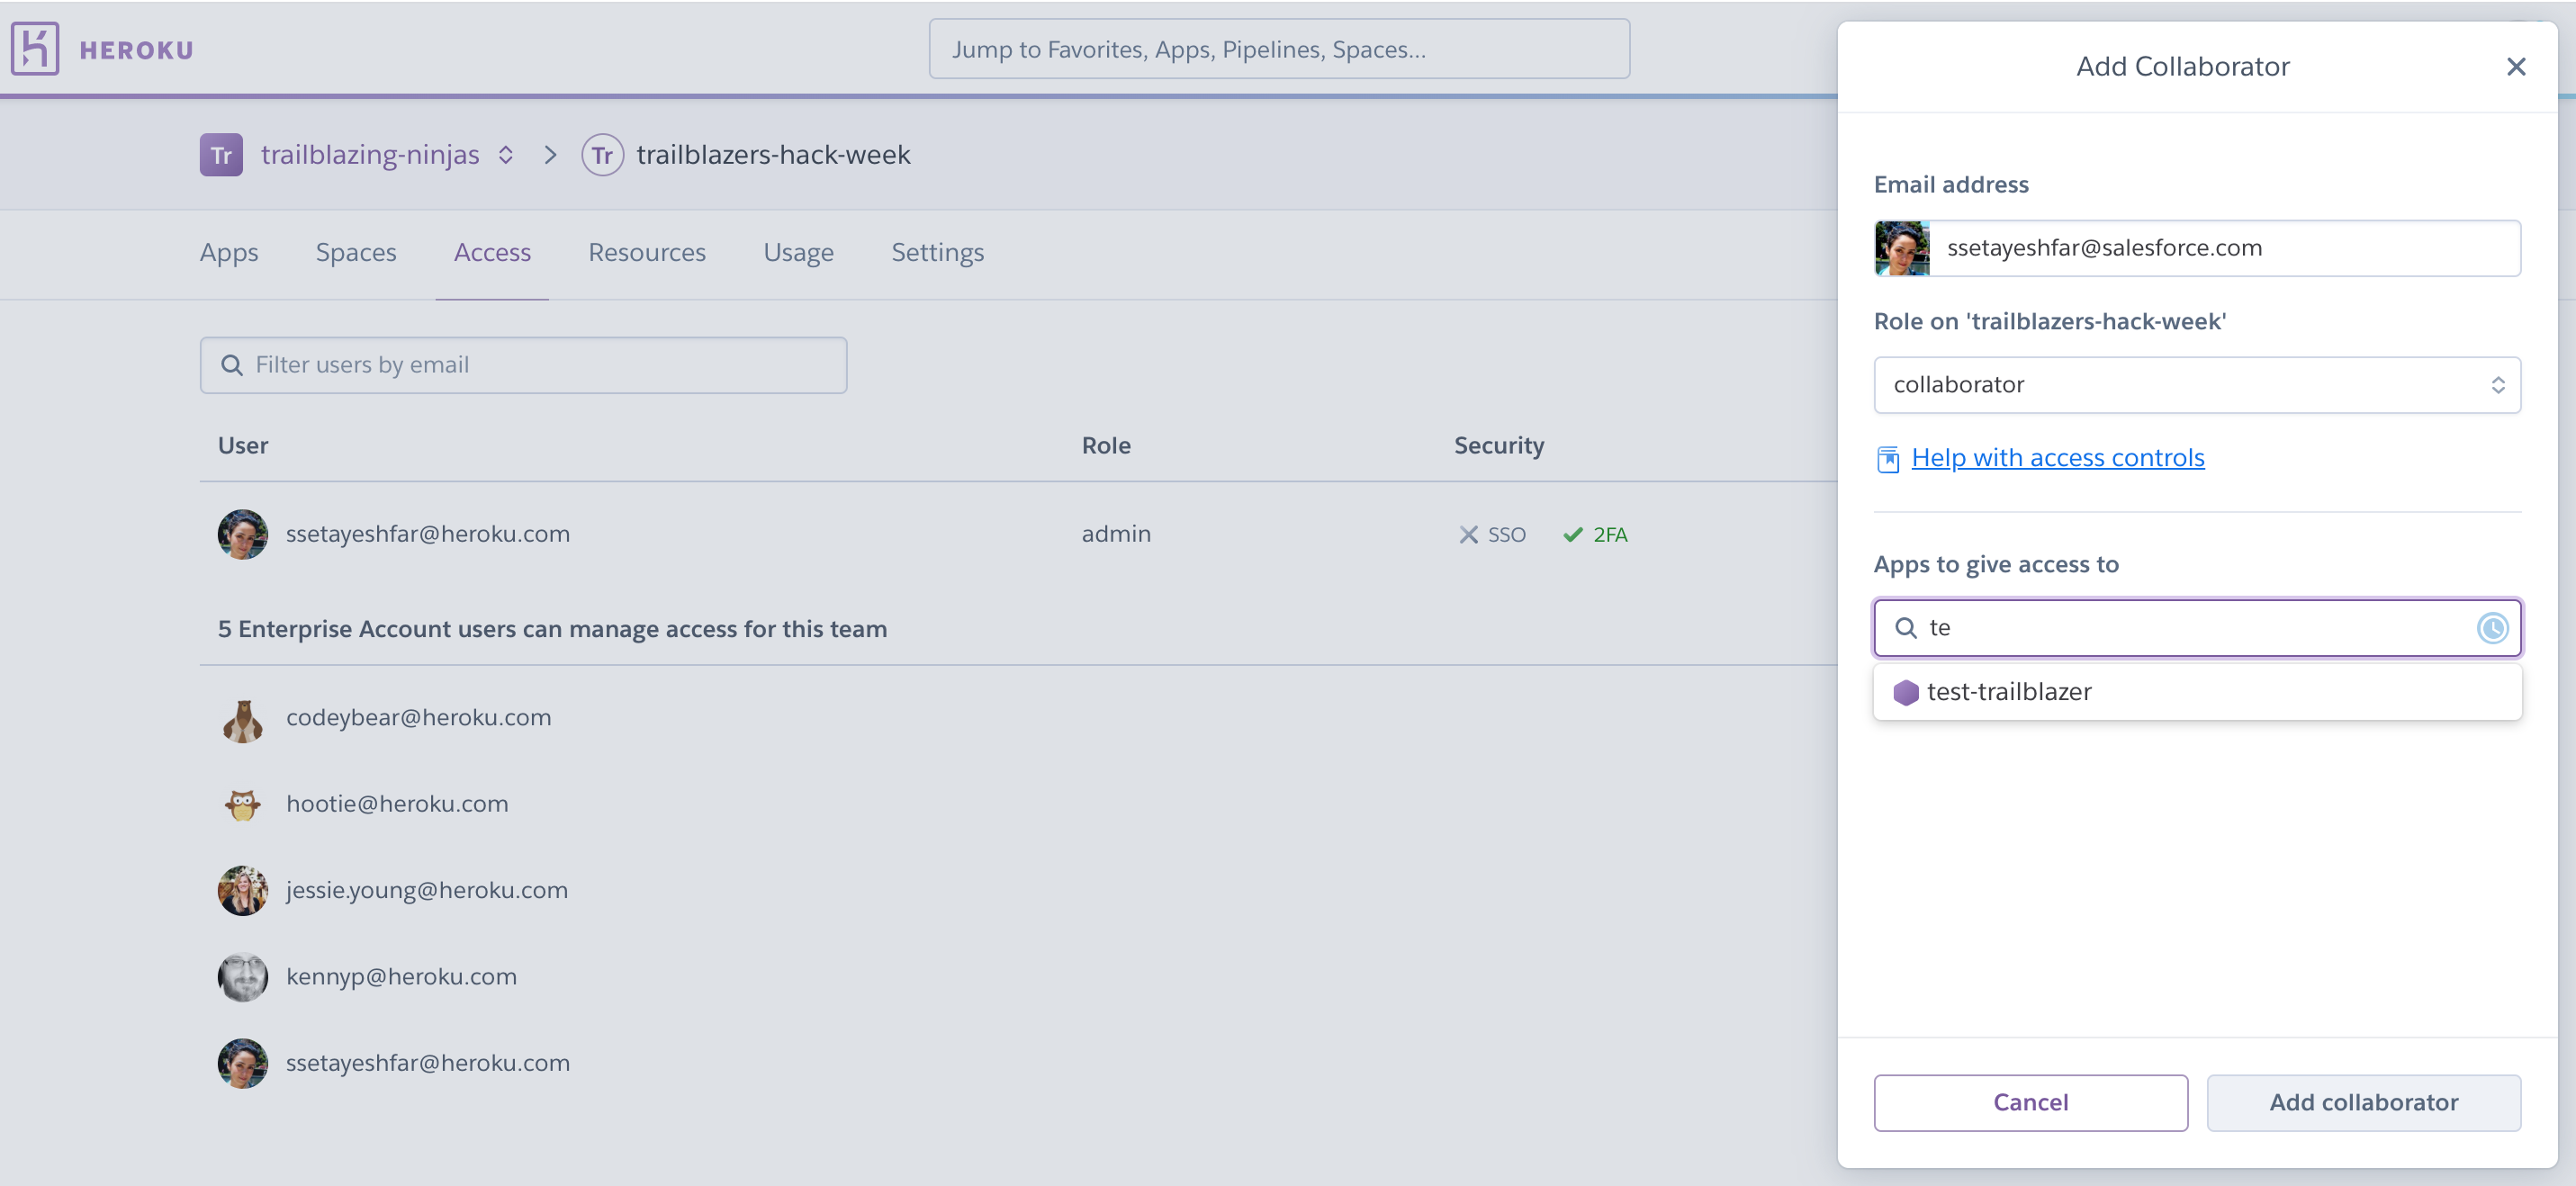
Enterprise Team users with the admin role can add or remove collaborators from the team’s Access page in the Heroku Dashboard.
When adding a user as a collaborator, you must select the app to collaborate on. Adding a collaborator user from the Enterprise Teams’s access tab only gives them the “View” app permission. You can change this permission via the Access tab of the application. Note that you can only enforce security features, such as SSO, on team members that are part of the Enterprise Account, they can’t be applied to collaborator logins.
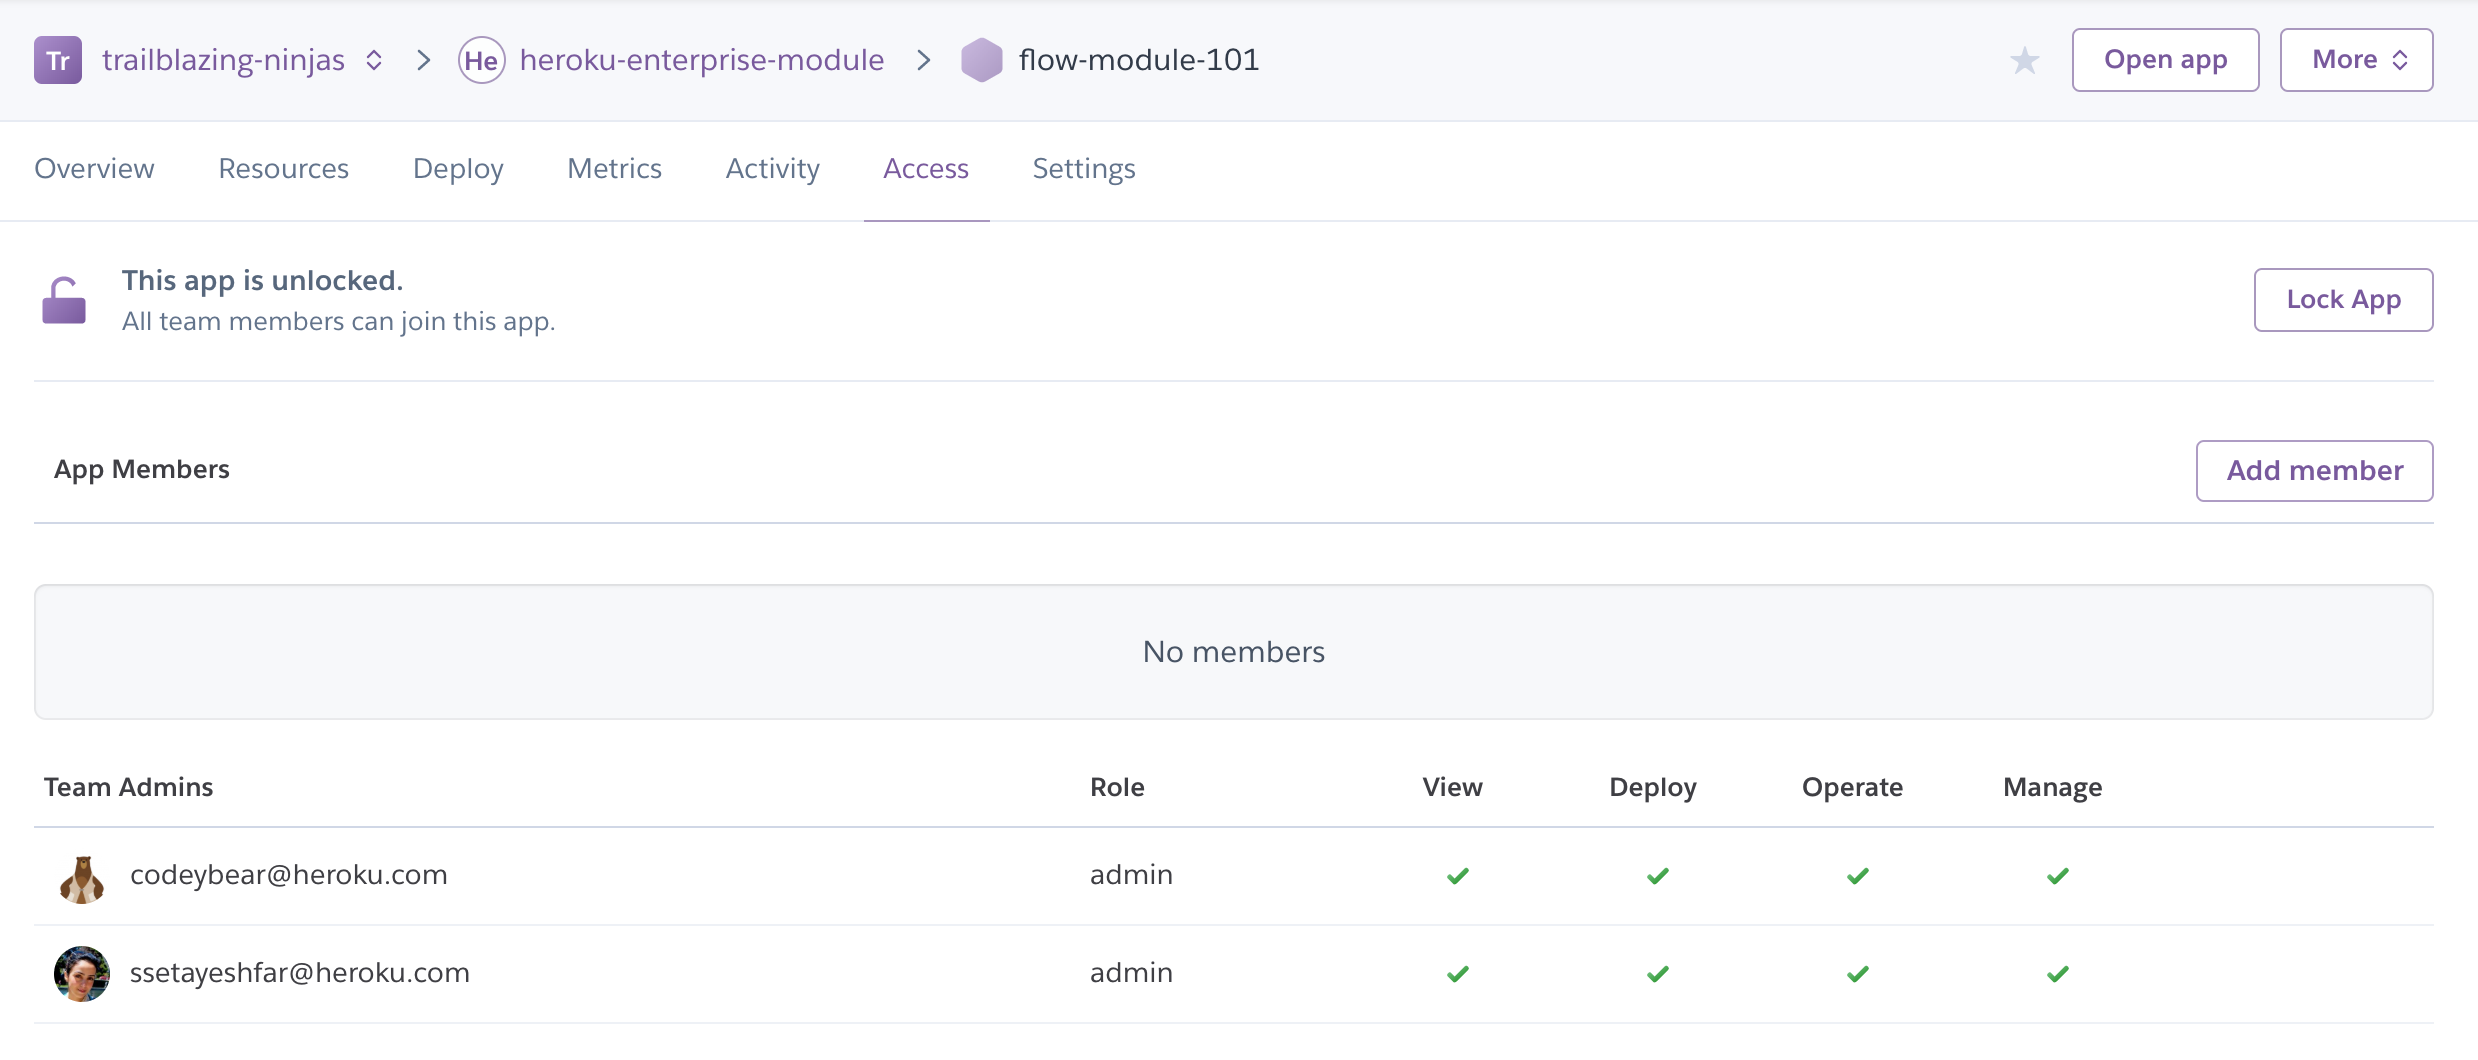
Users with manage permission on the app can also add collaborator users by selecting Add member from the Access tab of the application:
Add a User with the CLI
The following example shows how to add a team user and assign them a role:
$ heroku members:add joe@acme.com --team acme-widgets --role member
Adding joe@acme.com to acme-widgets as member... done
Change a User’s Role with the CLI
Change the role assigned to an existing team user with the members:set command:
$ heroku members:set joe@acme.com --team acme-widgets --role admin
Adding joe@acme.com to acme-widgets as admin... done
The members:set command can only be used to assign the admin and member roles. Non-team users who have app-specific permissions can’t be given another role until they are explicitly added to the team with members:add.
For more information on changing user permissions for specific apps, see Using App Permissions in Heroku Enterprise Teams.
Remove a Team User with the CLI
Removing a user from your Enterprise Team prevents them from accessing the team and its associated apps.
You can remove admin and member users with the members:remove command:
$ heroku members:remove joe@acme.com --team acme-widgets
Removing joe@acme.com from acme-widgets... done
If the user also has app-specific permissions, you can remove them from the app’s Access Page in the Heroku Dashboard.
Viewing Multi-Factor Authentication Status
Multi-factor authentication (MFA) is a mandatory Heroku platform security feature. A user must provide a verification code in addition to their username and password whenever they log in.
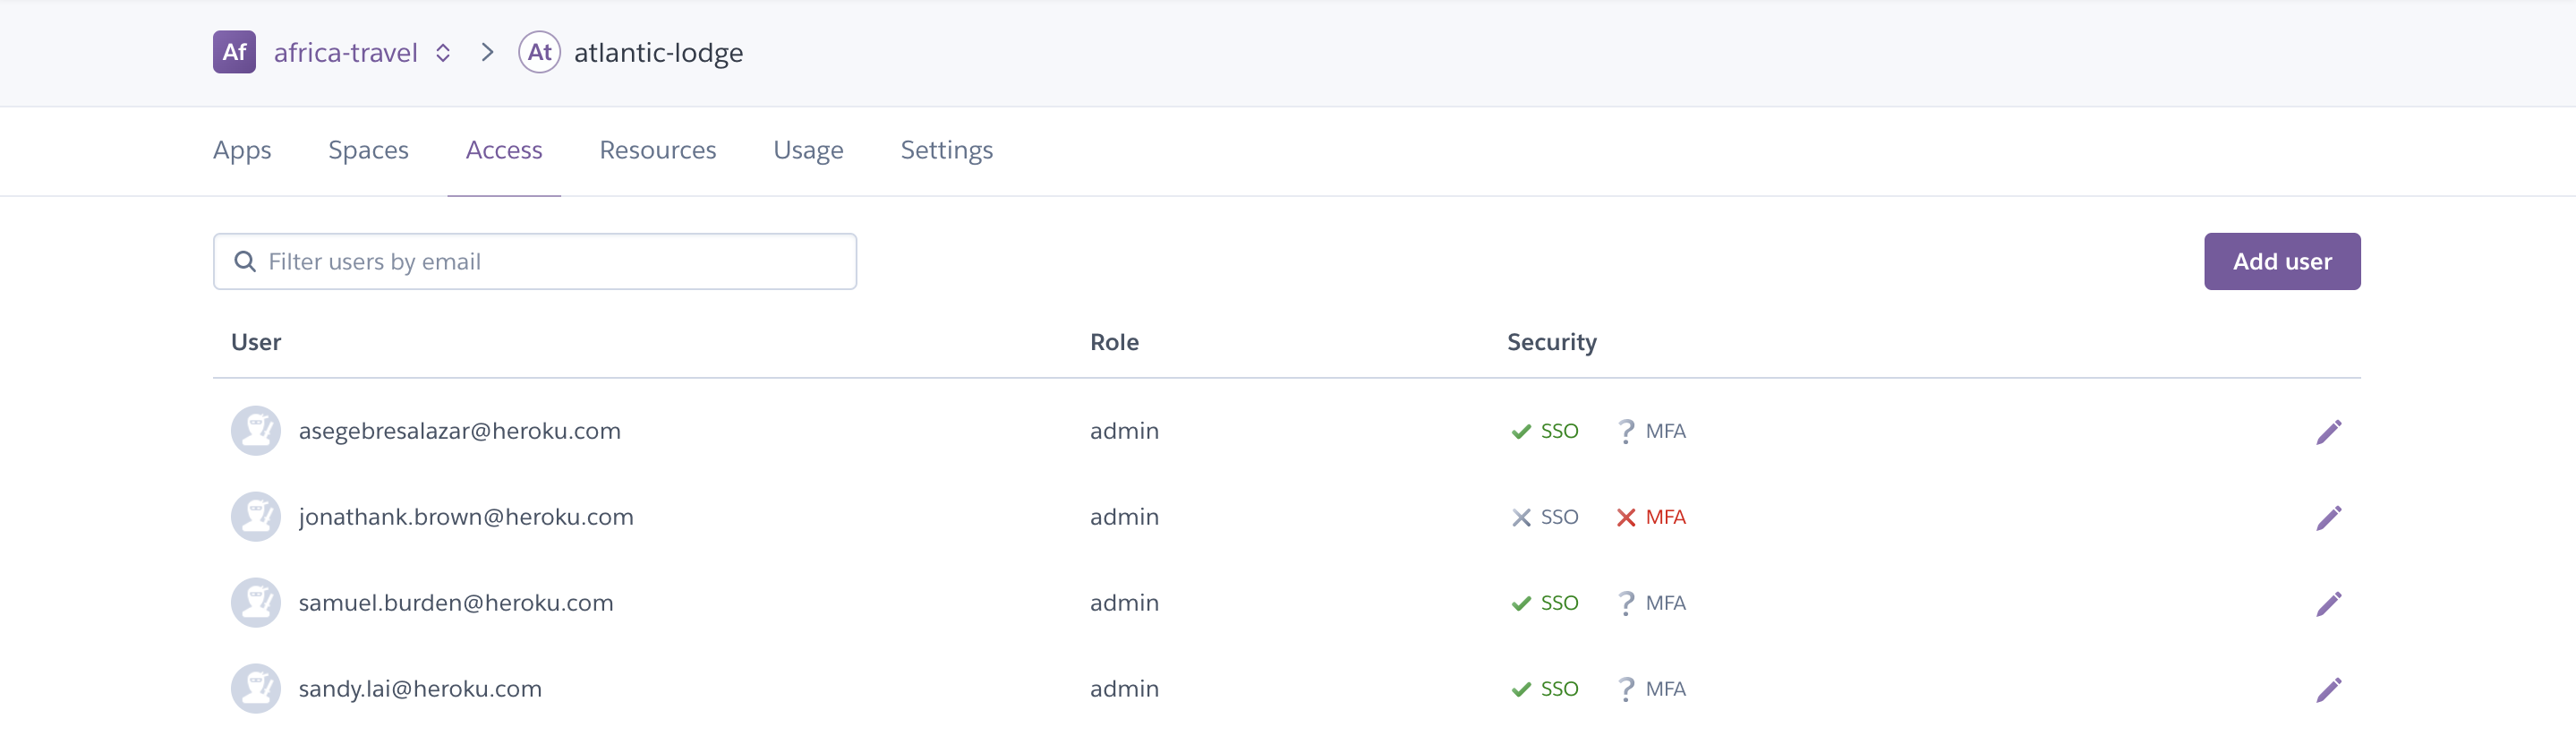
Users can manage MFA on their individual accounts. When these users are part of an Enterprise Team, admins and other members of the Enterprise Team need visibility into their MFA status. This visibility helps ensure continuous compliance with the company’s security and governance policies.
The Access page of an Enterprise Team indicates which users have MFA or SSO for their Heroku account. The status is updated as soon as it changes:
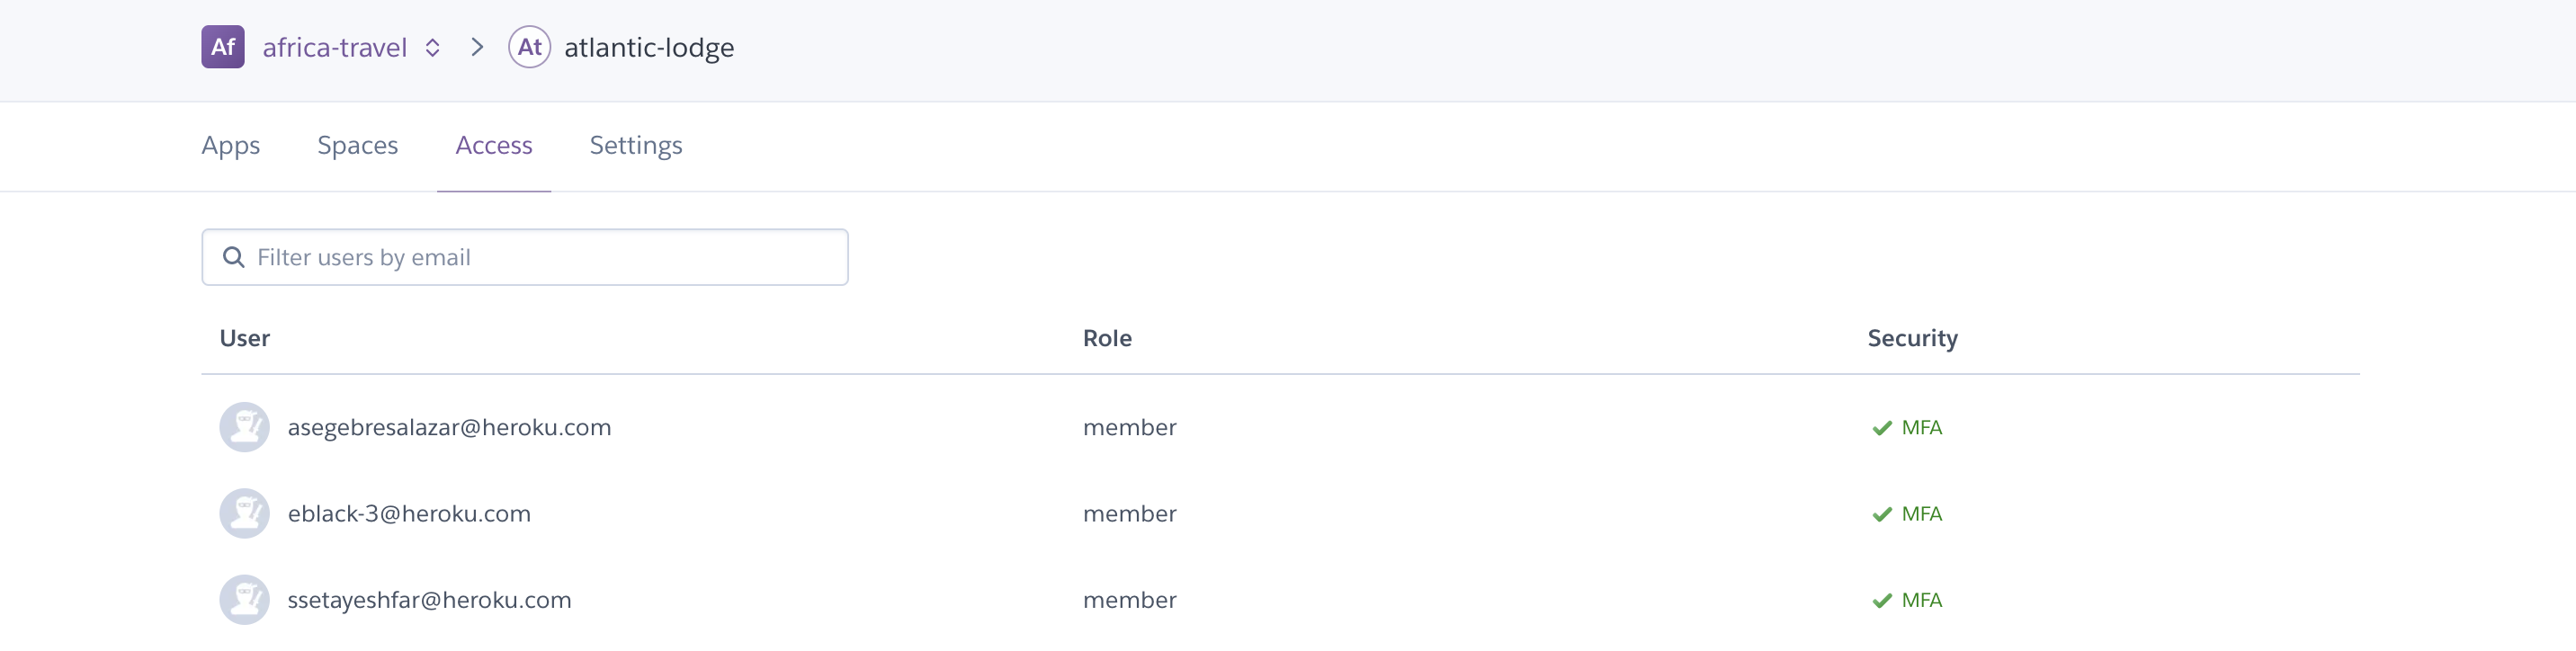
Heroku has limited visibility into MFA status when SSO is configured with a third-party IdP. Ensure MFA is enforced by the IdP.
Viewing Single Sign-On Status
Single sign-on (SSO) is a Heroku platform security feature for delegating authentication to the team’s centralized, company-controlled single sign-on. When an admin has enabled SSO for their team, users get redirected to their company’s IdP whenever they log in.
Users with SSO enabled must enforce MFA at the IdP-level. It’s the administrator’s responsibility to ensure that MFA is enabled at the IdP-level for their users to ensure logins via SSO are compliant per the MFA requirement.
The Access page of an Enterprise Team indicates which users have SSO enabled for their Heroku account and whether MFA is enabled at the IdP-level, where the status is limited by third-party providers:
Locking an App
Enterprise team admins and users with the manage permission on an app can “lock” an app to restrict unauthorized users from modifying an app and granting administrative access. The app itself remains running and fully operational. Locking an app only affects access for new team members.
This feature prevents newly added team members from making any changes to an app, such as creating new releases, updating or viewing config vars, scaling dynos, via the Heroku Dashboard or CLI. New team members must be explicitly added to the locked app and granted applicable deploy, operate, or manage permissions to be able to modify the app.
All team members still have view access by default to the app’s details and runtime status via the dashboard, CLI, and API.
Locking an app is useful when the app reaches a stable state, such as production, serving as a safeguard against unintentional or unauthorized changes during code-freeze periods, legal hold, or other relevant use cases.
From the Heroku CLI
To lock an app using the CLI, use the apps:lock command:
$ heroku apps:lock --app myapp
Locking myapp...  done
You can view the locked status of your apps with the list command:
$ heroku list --team acme
=== Apps in team acme
test
myapp (locked)
website-staging
website-prod (locked)
From the Heroku Dashboard
Visit your app’s Access page and click the Lock App button in the upper-right corner. Locked apps are displayed with a lock icon in your team’s apps list.
Granting Access to a Locked App
Team admins and users with the manage permission for a locked app can grant users app-specific permissions for that app.
Unlocking an App
Unlock a locked app with the apps:unlock command:
$ heroku apps:unlock --app myapp
Unlocking myapp...  done
You can also unlock the app from the app’s Access page in the Heroku Dashboard.