Table of Contents [expand]
Last updated November 14, 2024
This feature is available in Heroku Enterprise
Enterprise Teams were previously known as Heroku Orgs or Organizations. The name change doesn’t change existing features or settings. We’re updating all CLI commands to replace “Org”. That work is ongoing, so some Org commands remain.
Enterprise Teams helps you to manage access to a shared group of applications, check resources used by different apps within the Enterprise Team, and more. The development experience remains largely the same, but you now have granular access control and can more efficiently manage your development process.
When your Enterprise Team is provisioned, Heroku sends you an email with the enterprise team name, resource limits, and a link to your dashboard. This guide outlines how to complete the setup of your Enterprise Team.
Apps
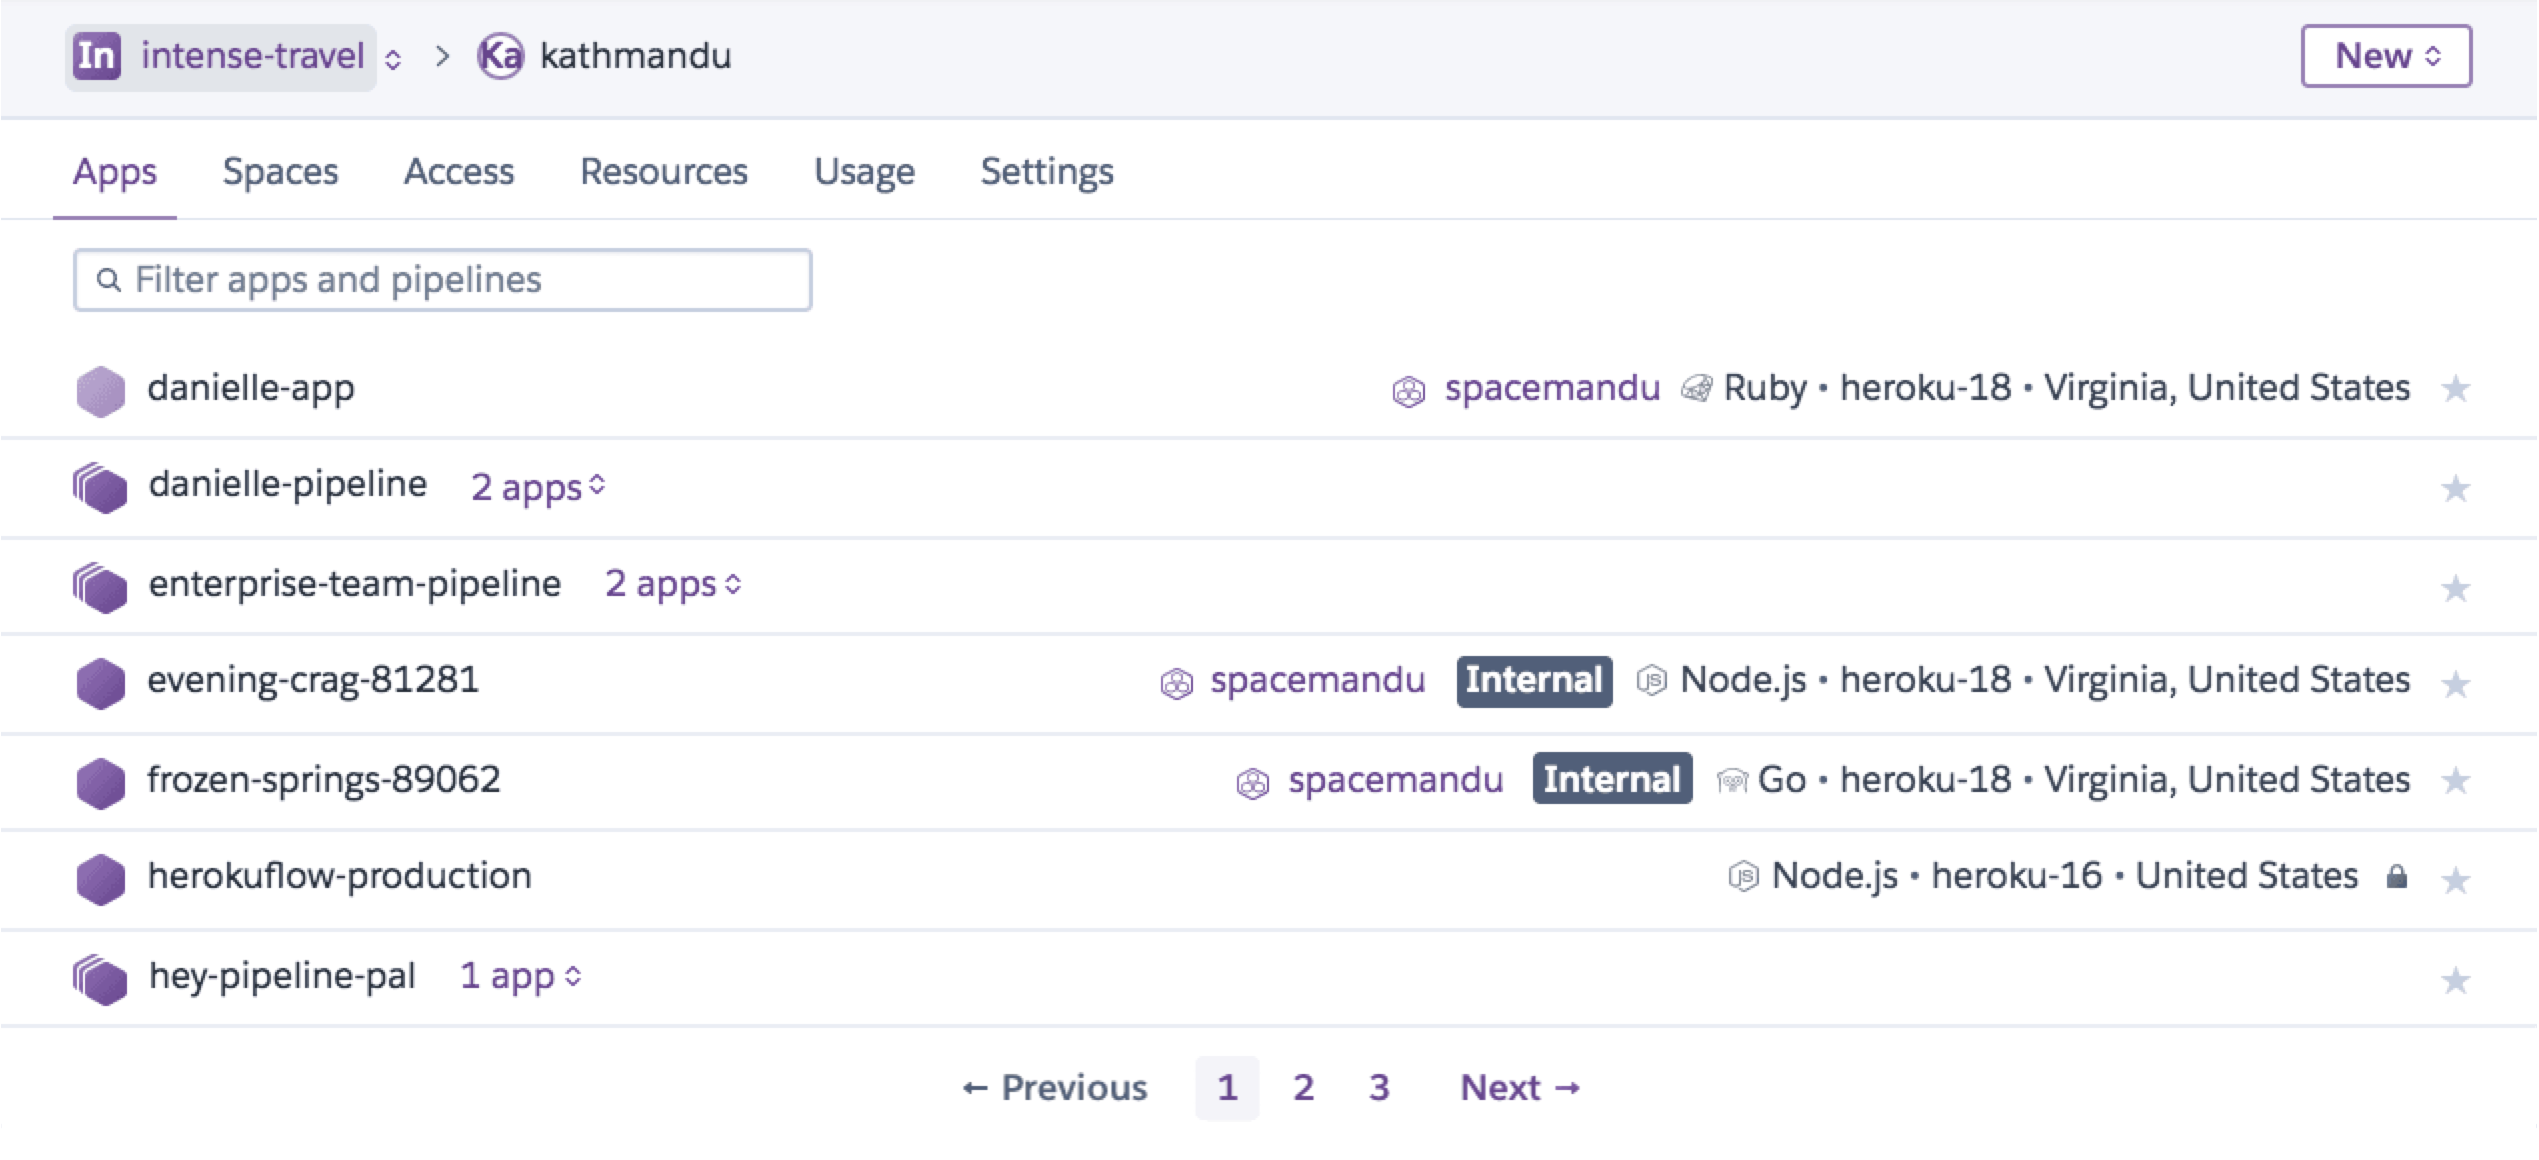
Enterprise Team apps are listed under the Apps tab. The right column links to their stack. Pipelines – marked by an icon of multiple apps – don’t have a stack displayed. Applications become part of an Enterprise Team when they’re transferred into the Enterprise Team or created as part of the Enterprise Team.
Use the filtering option to search for specific apps and pipelines.
You can find the same pagination and search features for the apps list in your Heroku Teams, and personal accounts as well.
For our Enterprise Accounts users, the pagination and filtering features are also available for Enterprise Teams and users management under the Teams and Access tabs of their Enterprise Account.
Creating Apps
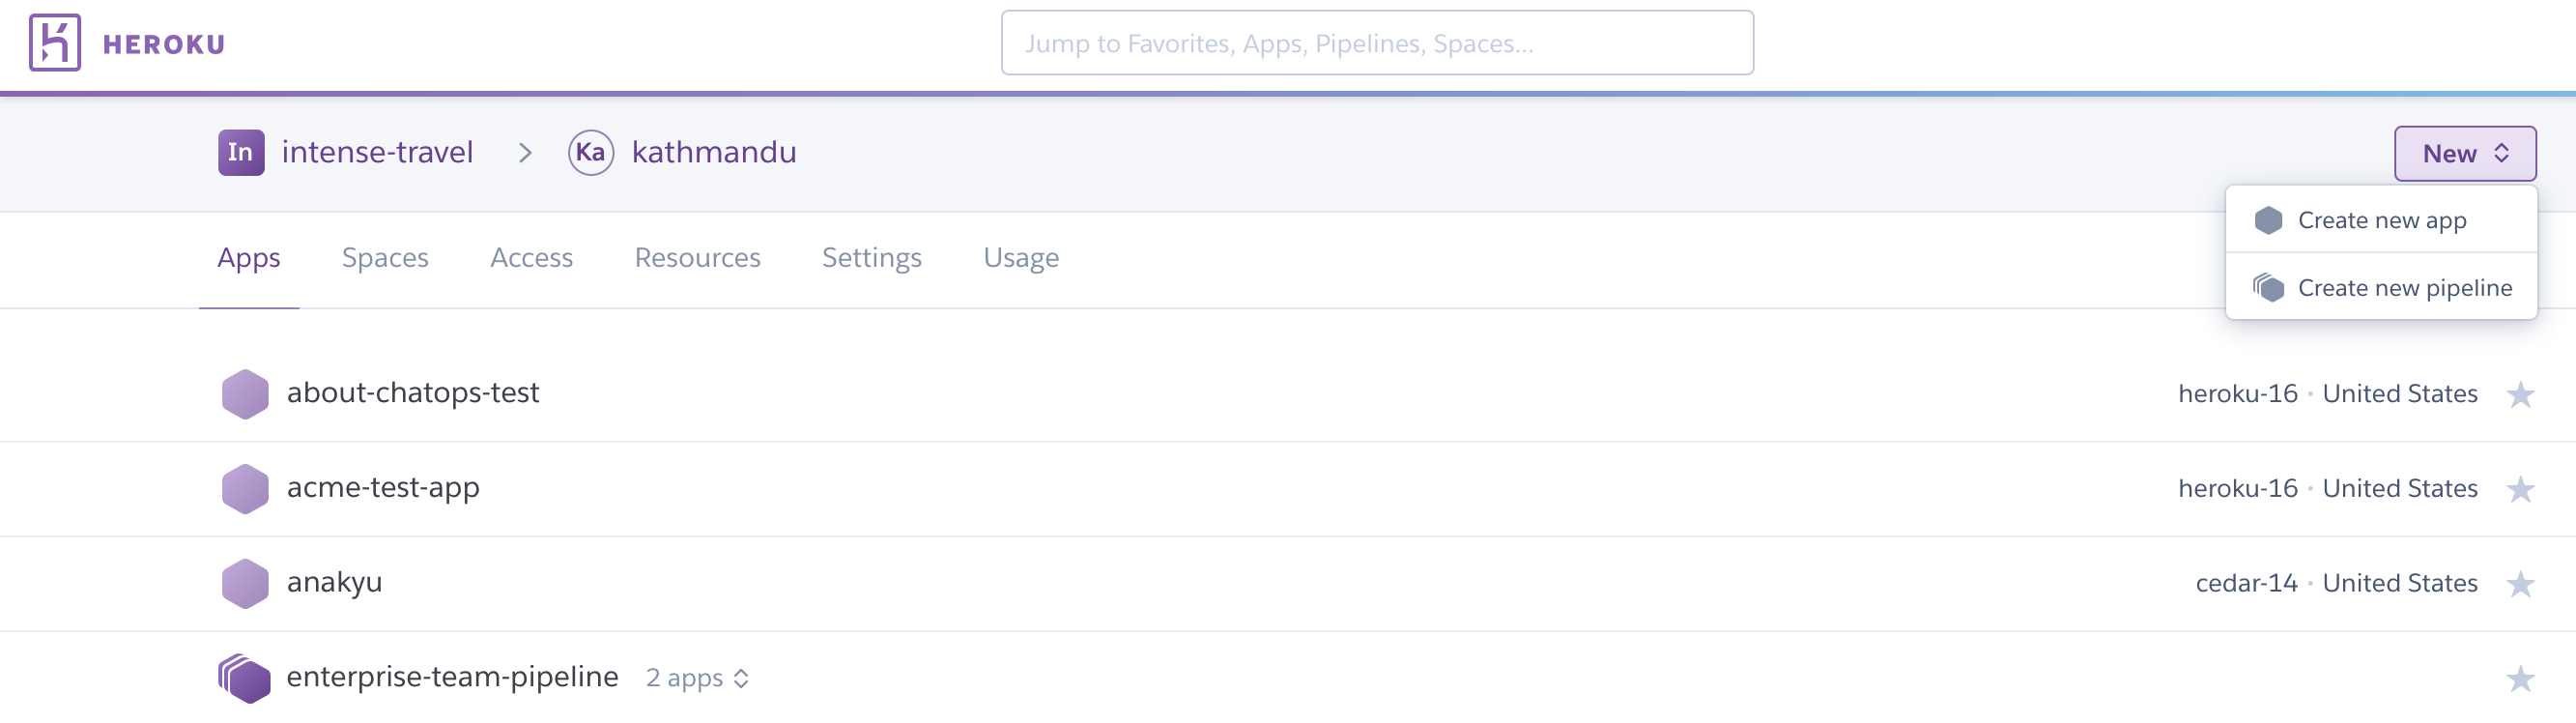
Enterprise Team users with “admin” and “member” permissions can create an app directly within the Enterprise Team. To create an app, select Enterprise Team from the main menu, and then select the new button.
To create an app from the CLI, specify the Enterprise Team name with the --team flag on the heroku create command. A random app name is generated if you don’t provide an app name. Heroku’s naming style is <adjective>-<noun>-<4 digit number>, with the adjectives and nouns drawn from a list of brand-friendly words. The following example creates a randomly named app in the organization acme-widgets.
$ heroku create --team acme-widgets
Creating gentle-garden-8862 in organization acme-widgets... done
https://gentle-garden-8862.herokuapp.com/ | https://git.heroku.com/gentle-garden-8862.git
To specify the app name run the following:
$ heroku create --team acme-widgets --app apple
Creating apple... done
https://apple.herokuapp.com/ | https://git.heroku.com/apple.git
Transferring Apps
Existing development teams often have several apps in development under a shared account or personal developer accounts. App owners must transfer their apps to the Enterprise Team before it can be managed as part of the Enterprise Team. Billing transfers with the app.
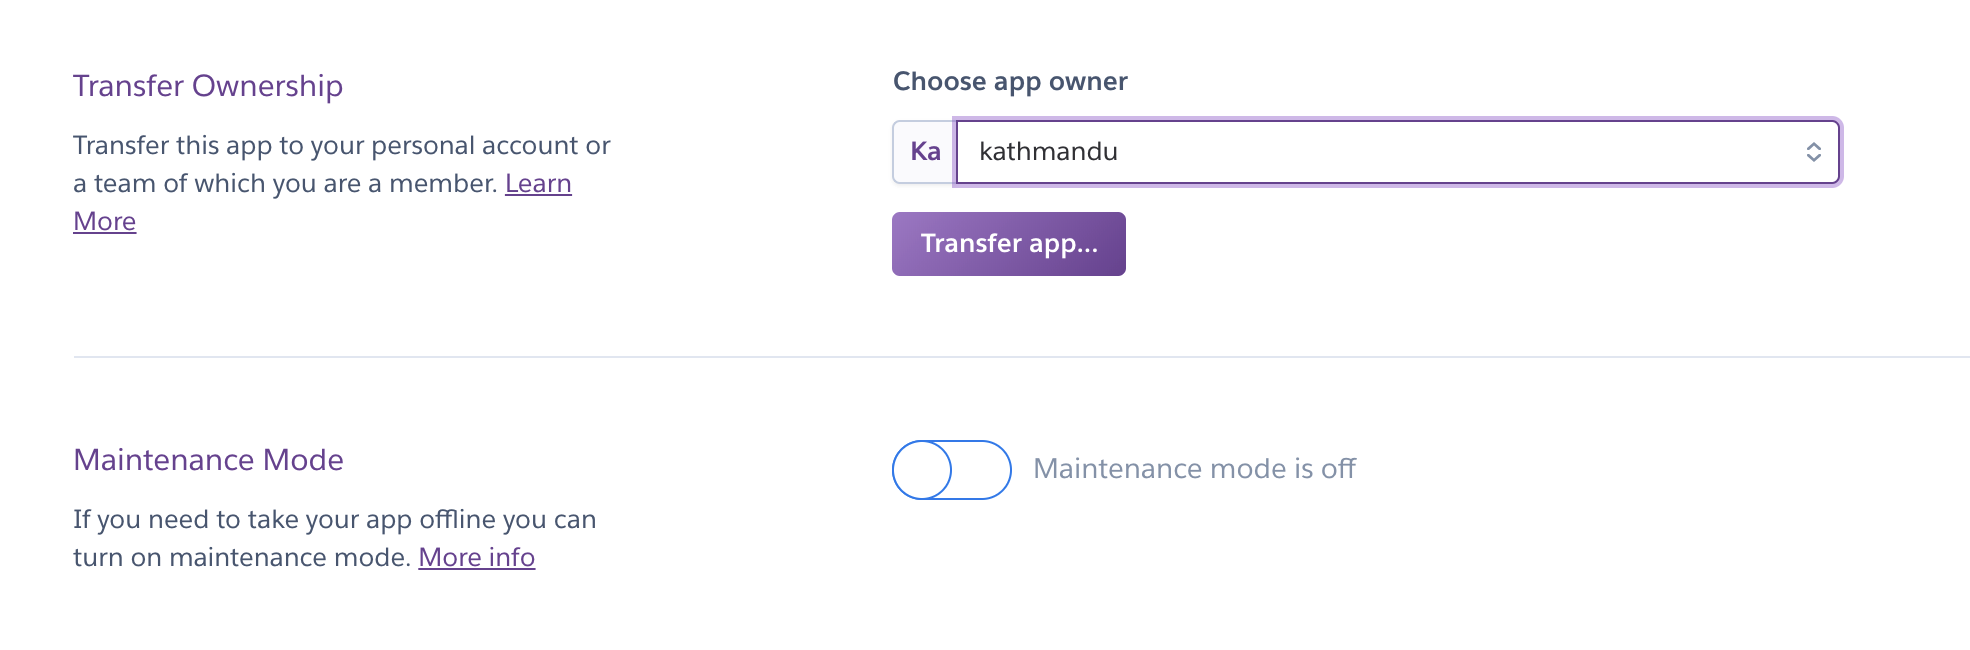
To transfer an application using the Dashboard, the current app owner must go to the Settings tab of the application, scroll down to the “Transfer Ownership” section, and then select the Enterprise Team.
You can also use the CLI to transfer apps into an Enterprise Team:
$ heroku apps:transfer acme-widgets -a deep-spring-4274
Transferring deep-spring-4274 to acme-widgets... done
Bulk Transfer Apps
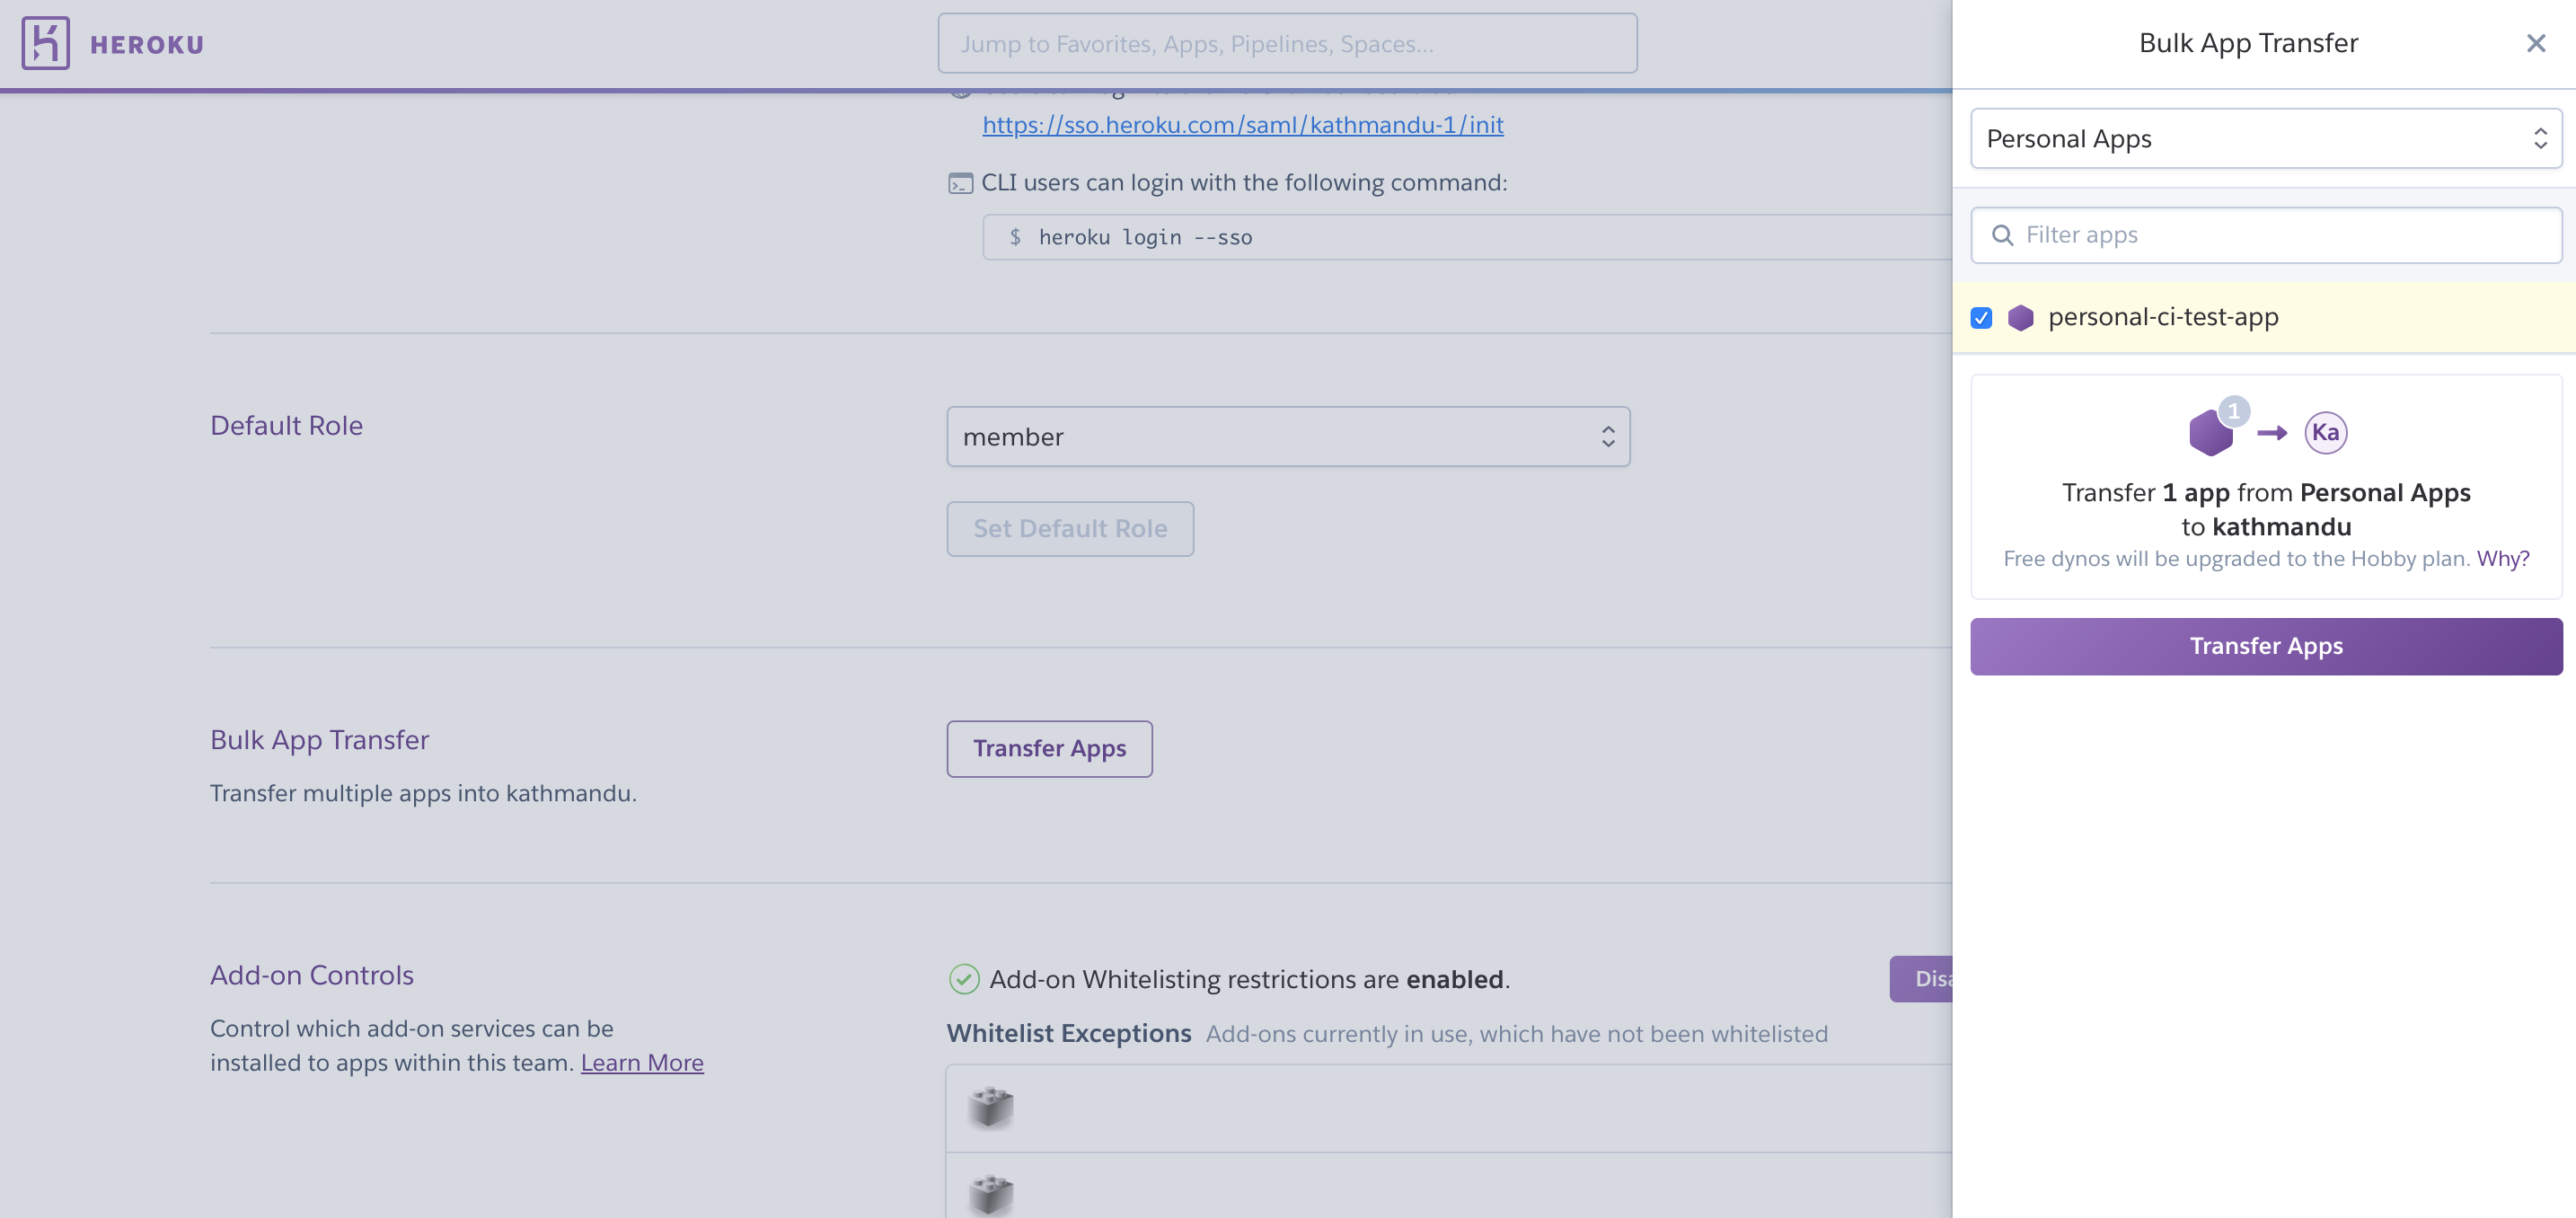
To transfer multiple apps to an Enterprise Team in the Dashboard:
- Select an Enterprise Team to receive the transferred apps.
- Select the
Settingstab. - Select the
Transfer Appsbutton in front ofBulk App Transfer. - Choose your apps, and then select Transfer to transfer them to the new Enterprise Team.
Remove Apps
Remove Enterprise Team apps by transferring them to a new owner or by deleting them. Admins can delete or transfer any app. Members must have the manage permission for an app to delete or transfer the app.
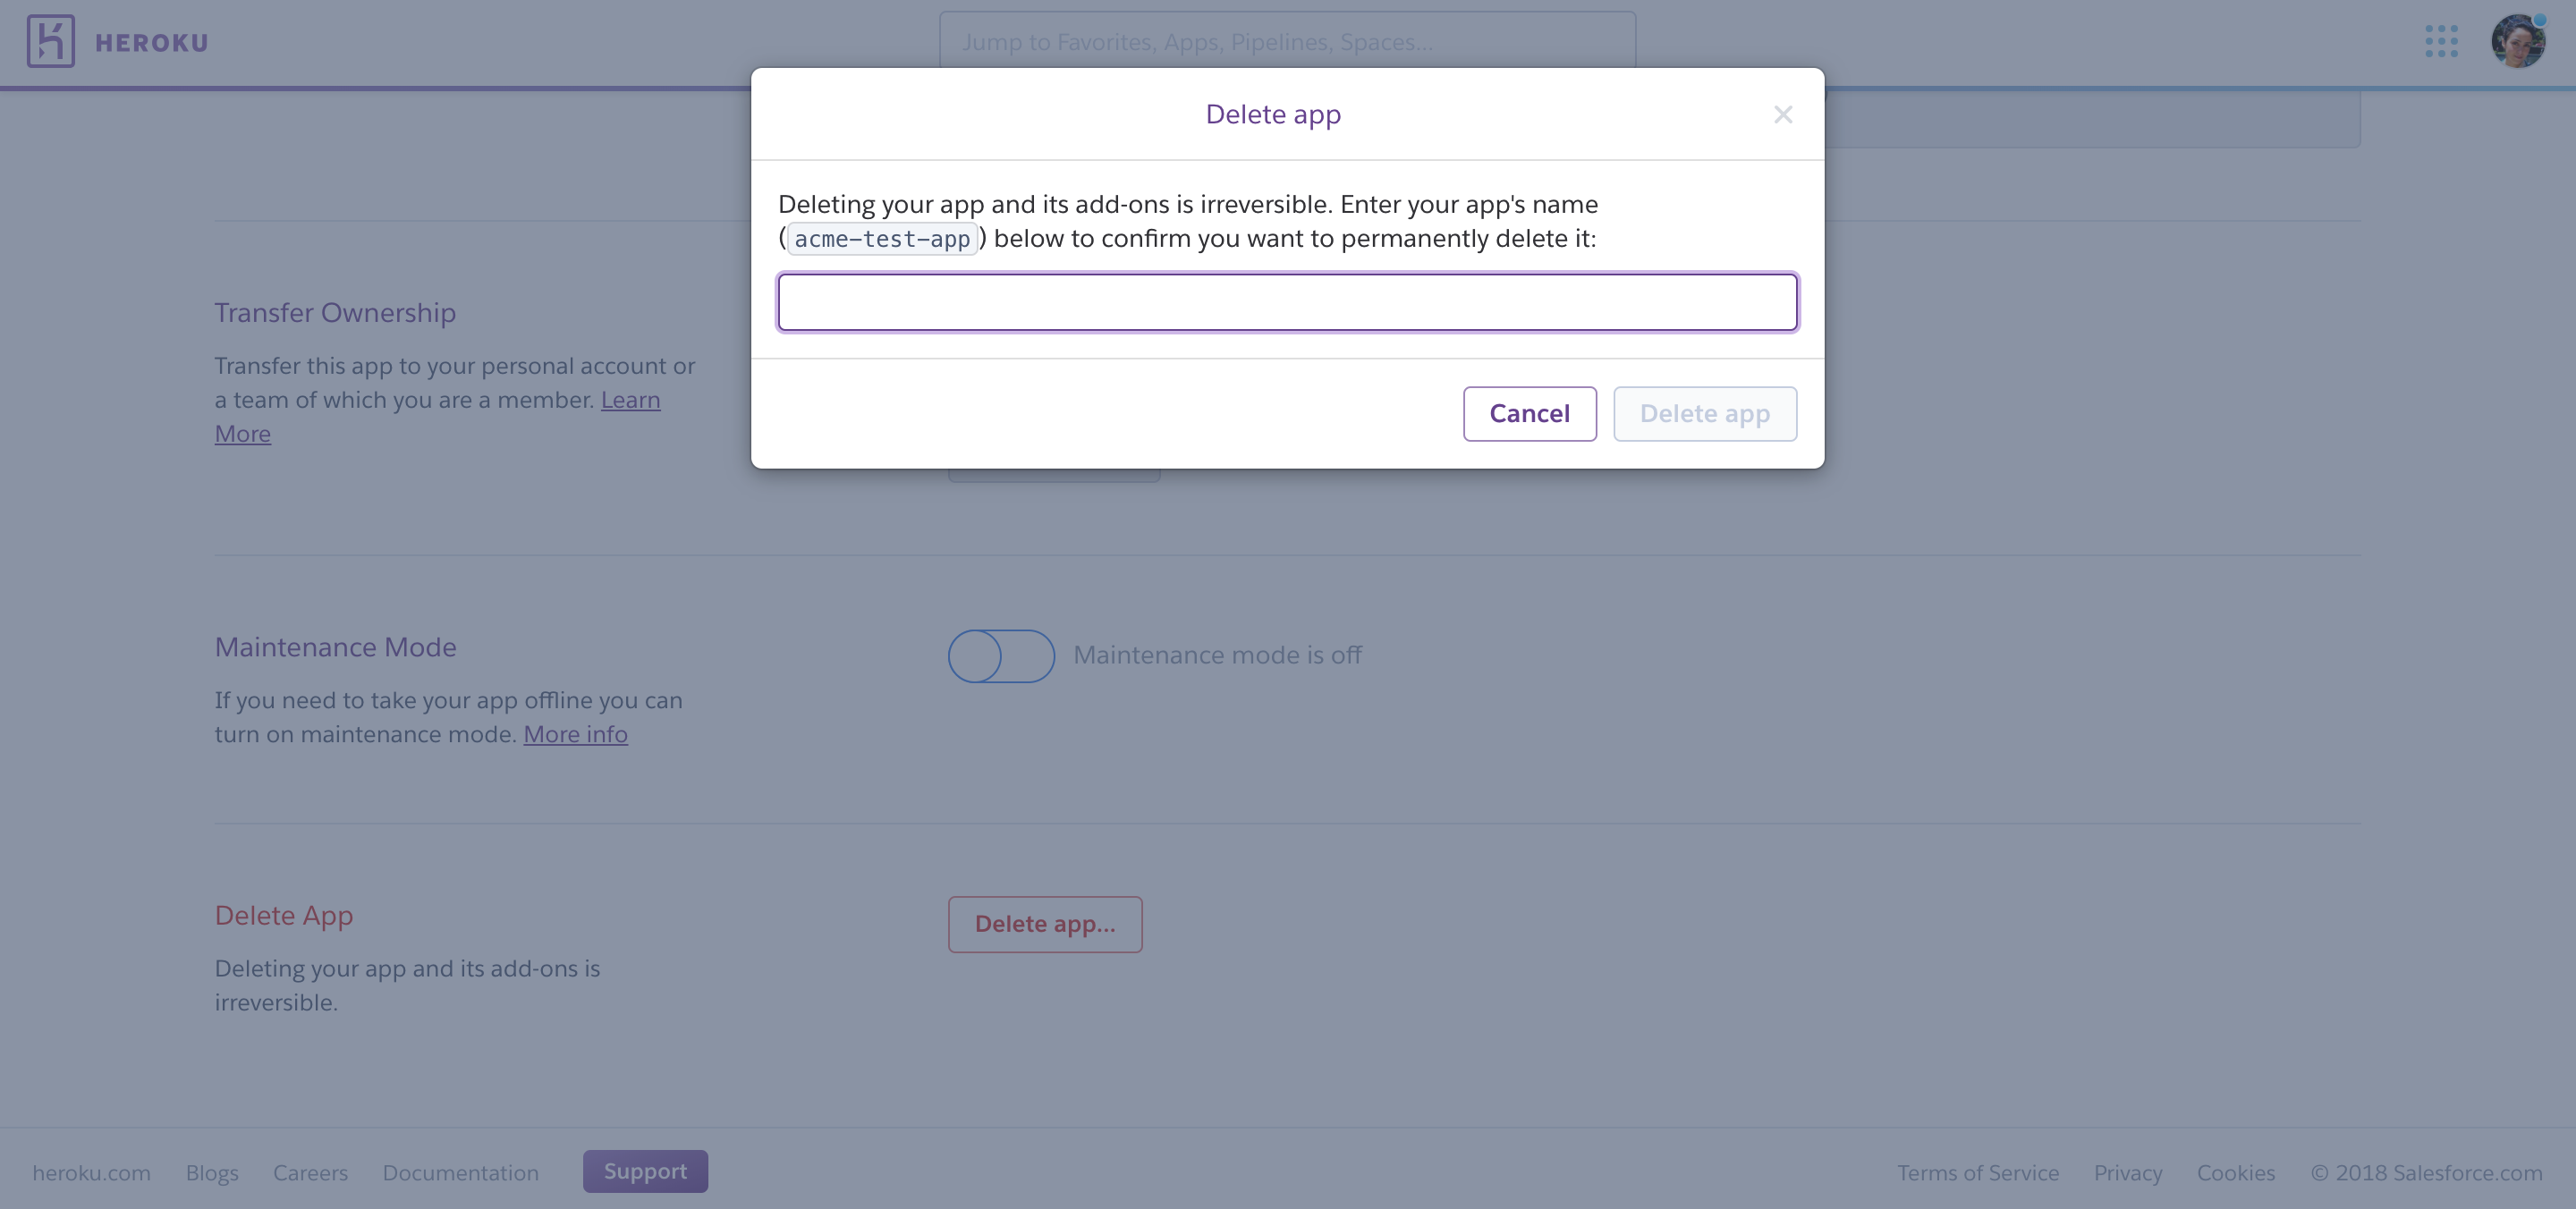
To delete an app:
1. Click on the app in the Heroku Dashboard.
2. Click Settings.
3. Click Delete app...
4. Type the name of the app and click Delete app to confirm.
Limit Access to Apps via OAuth
Heroku admins can deny OAuth access to team-owned resources from all non-Heroku products and services. Turn off third-party OAuth access to the Heroku Platform API in the team’s Settings tab.
Spaces
This tab lists your Heroku Private Spaces. You can create a space by selecting the Create a Space button.
Each Heroku Private Space costs $1000 in Add-on Credits/month (pro-rated to the second).
You can also transfer a space to another Enterprise Team within the same Enterprise Account. The user making the transfer must be an “admin” in both Enterprise Teams or have “Manage” permissions it the company’s Enterprise Account. To transfer a space, navigate to its Settings tab, then find the Enterprise Team you want to move it to in the Space Ownership section.
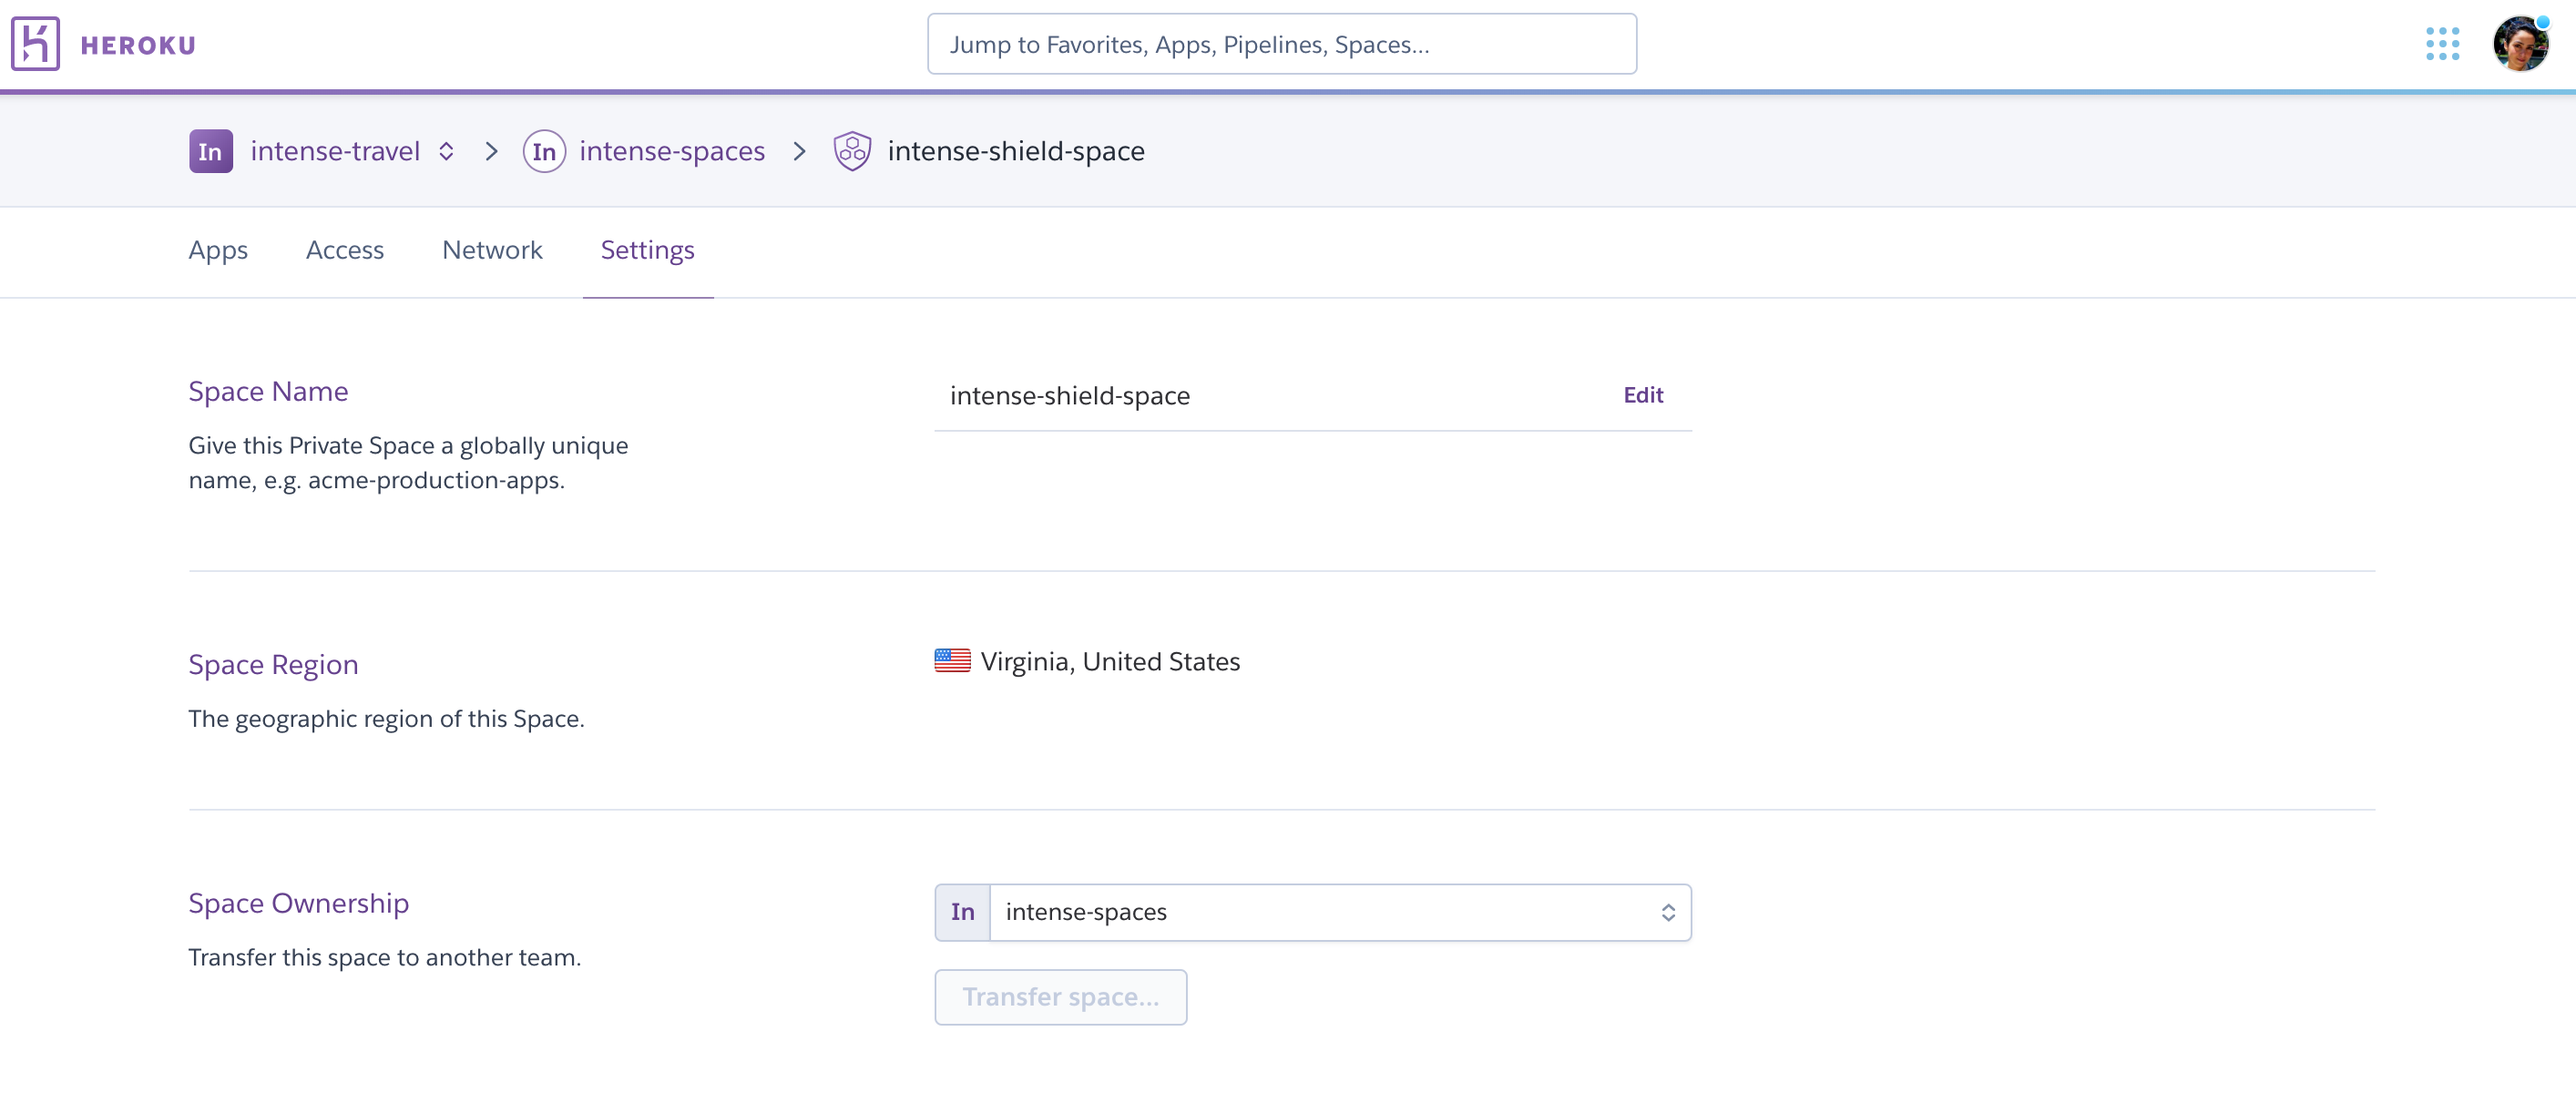
When transferring spaces, only apps that are inside the space move to the new Enterprise Team. If you have a pipeline that contains apps both inside the space and outside, only the apps inside the space move to the new Enterprise Team. The pipeline stays in the old Enterprise Team with the apps that aren’t inside that space.
Access
All users in an Enterprise Team are listed under the Access tab.
When an Enterprise Team is provisioned it only has one user - the admin user that requested the team. This initial admin can add other users to the team and give them the appropriate access. Each Enterprise Team can have up to 500 members.
Admin, Member, Viewer, and Collaborator Roles
Users in an Enterprise Team can be admins, members, viewers, or collaborators.
An admin user controls membership to the Enterprise Team, can view billing information, and can perform any action on any app owned by the team. Admin users can:
- Access all apps in the Enterprise Team
- Add, remove, and modify users in the Enterprise Team
- View resource usage across the Enterprise Team
- Manage invoices and billing for the Enterprise Team
- Rename the Enterprise Team
- Transfer, create, and delete apps in the Enterprise Team
Users accountable for spend, development processes, and security posture are typically assigned the admin role. Admin users can only be added by existing admins. An Enterprise Team must have at least one admin user. The last administrator in an Enterprise Team can’t be removed to enforce this rule.
Member users can only be added by Enterprise Team admins. Assigning a user the member role gives them read-only access to all apps within the Enterprise Team. They can be granted additional access on a per-app basis. Members can:
- List all apps in the Enterprise Team
- View admins & members in the Enterprise Team
- View resources for the Enterprise Team
- Transfer personal apps into the Enterprise Team
- Create apps in the Enterprise Team
Users in the member role can view all apps and see basic details about each app. By default, they can’t perform any other operations on the app. You must grant users in the member role additional permissions on a per-app basis before they can perform development and operational tasks on specific apps. Members who have the manage permission on an app (including admins) can grant other members additional permissions.
Users in the member role can create apps within, and transfer apps to, an Enterprise Team. Members automatically get all permissions on the apps they create and can grant other members specific permissions on their apps. The member role is commonly assigned to the in-house developers working on your applications.
Viewer is a limited role that enables users to view apps and pipelines, spaces, users (Access tab), and resources.
Collaborator users don’t belong to your Enterprise Team but are granted app-specific permissions. Collaborator users can’t:
- List or access other apps that belong to the Enterprise Team
- View the list of Enterprise Team users
- Create or transfer apps to the Enterprise Team
Third-party collaborators not trusted to view all apps in the Enterprise Team can be granted permissions on specific apps. You do not have to add them to an Enterprise Team or assign them a role in an Enterprise Team. For example, contractor developers assigned to a specific project can be granted access to only the apps that are part of that project.
For more information about how members and non-team members can be granted permissions on specific apps, see Using App Permissions in Enterprise Teams. For more information about the capabilities granted per role, see Enterprise Teams Permissions & Allowed Actions.
Adding or Deleting Users or Editing Permissions
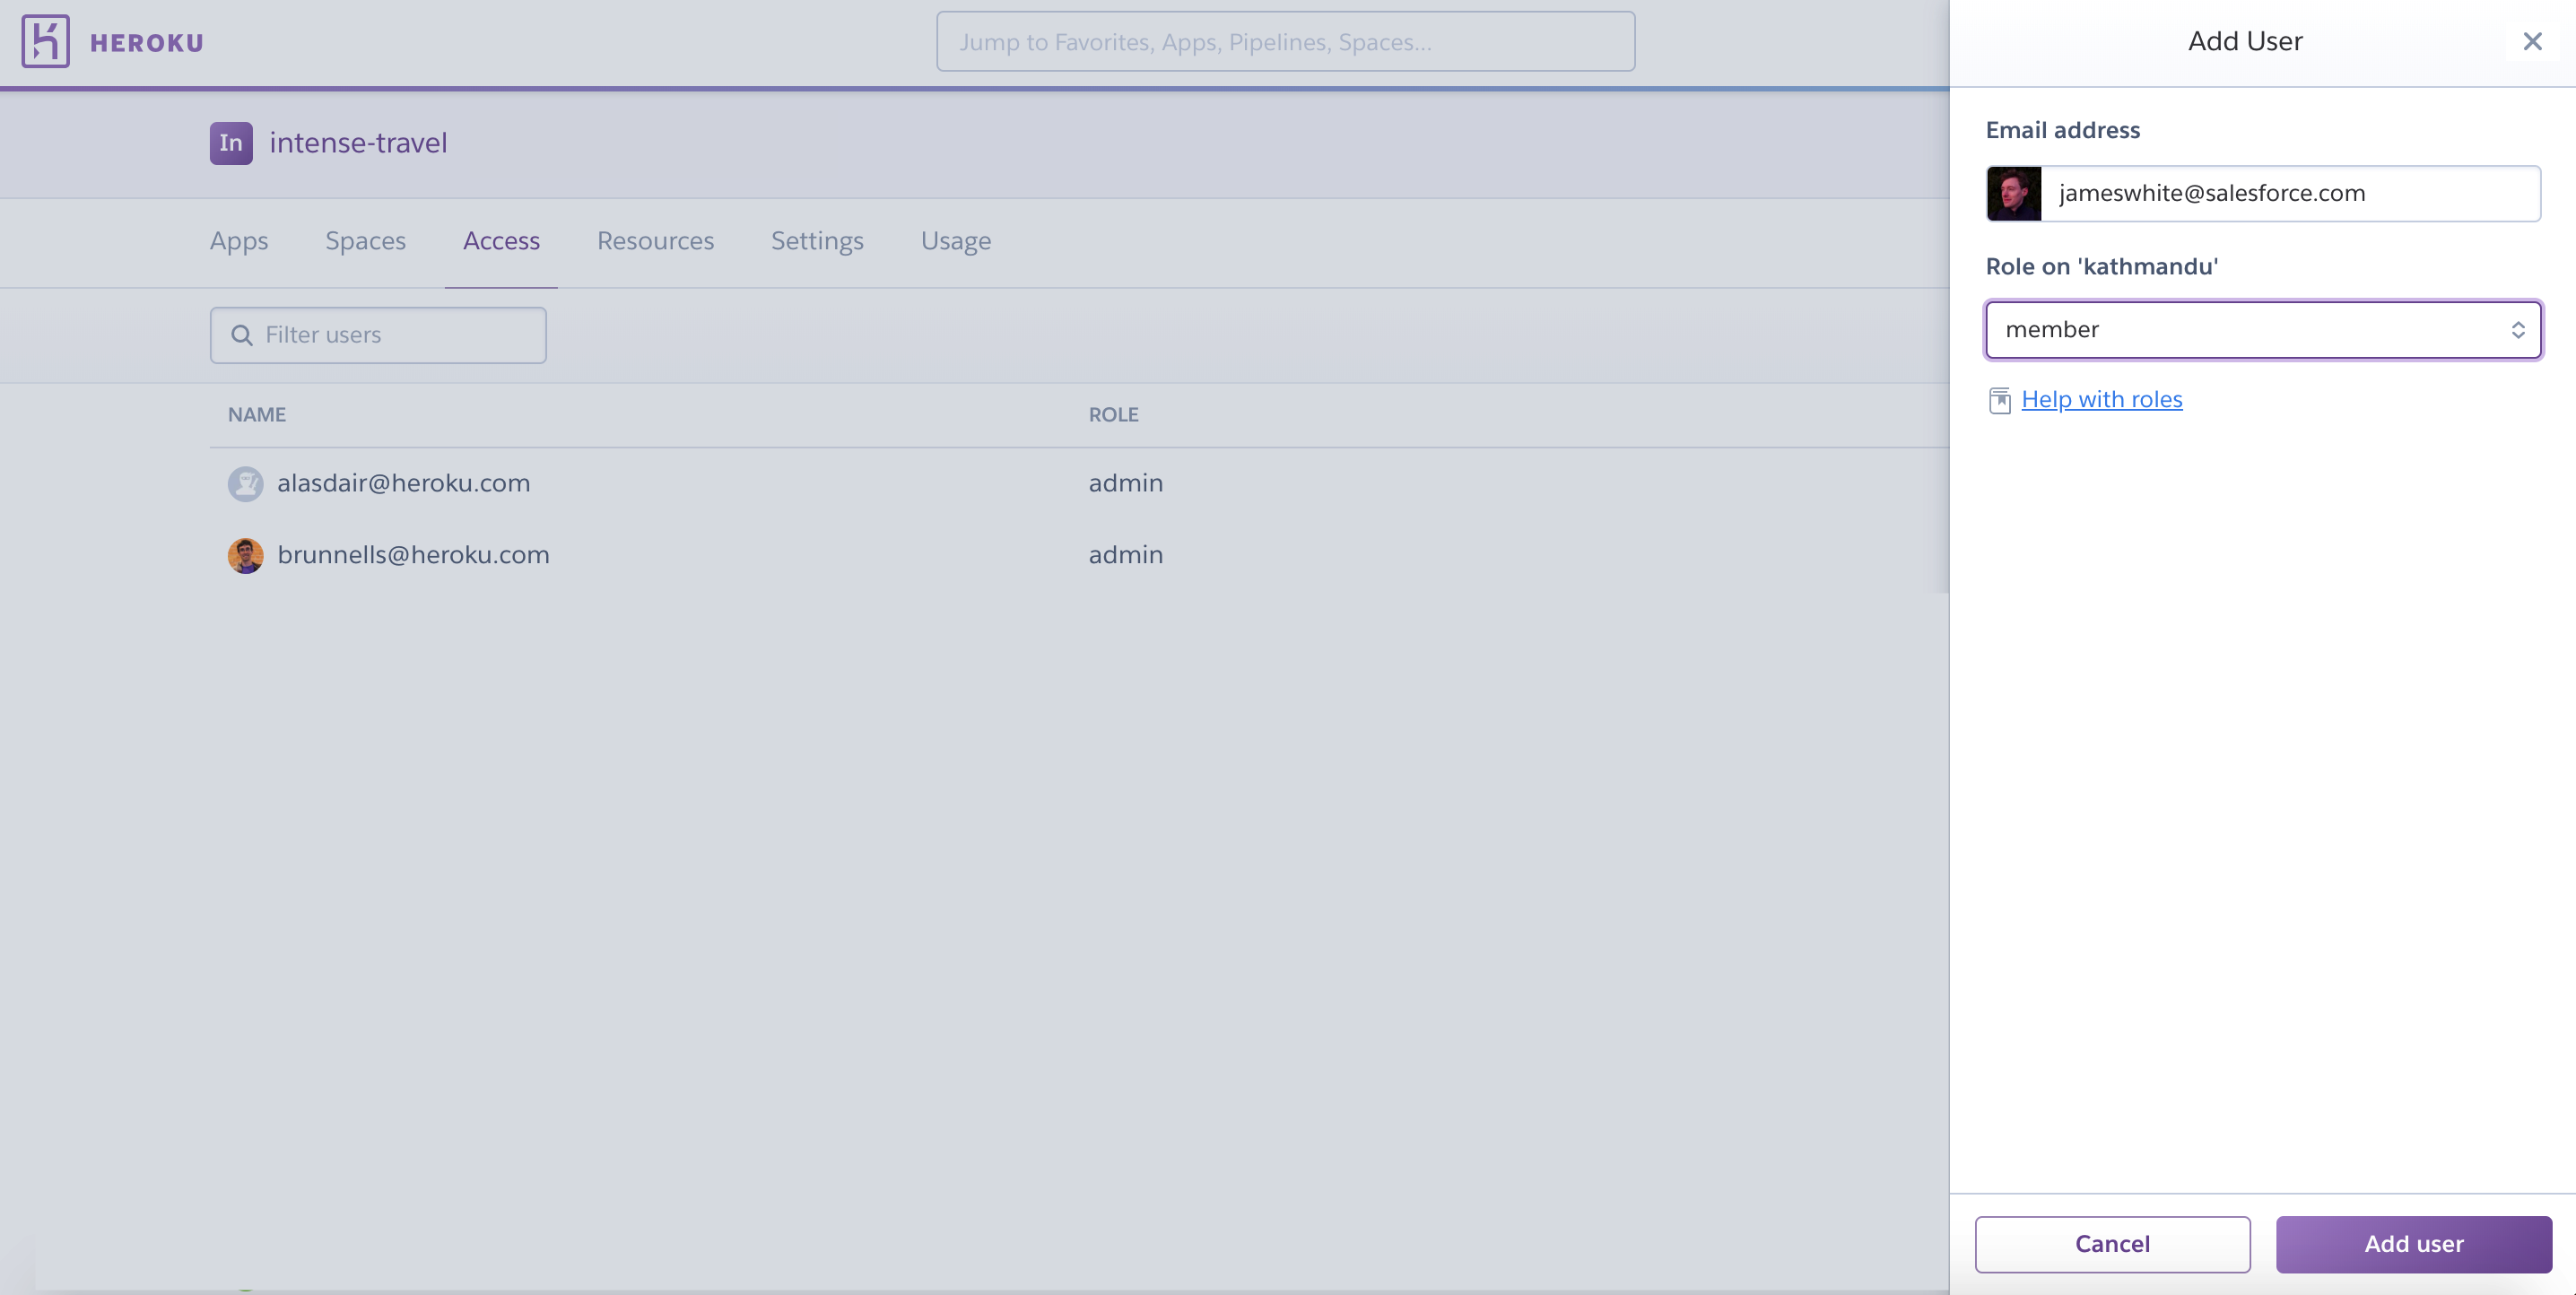
Users can be added and managed from the Access tab in your Enterprise Team Dashboard. To edit permissions or remove a user, select the small pen in the far right column. Select the Add User button to add a new user.
You can also manage users using the Heroku CLI. For example, to add a new Enterprise Team member:
$ heroku members:add joe@acme.com --team acme-widgets
Adding joe@acme.com as member to organization acme-widgets... done
Add additional admin users using the same command with the --role flag:
$ heroku members:add joe@acme.com --team acme-widgets --role admin
Adding joe@acme.com as admin to organization acme-widgets... done
Because of their app-level access, non-enterprise-team users (collaborators) require a different command. In this example, we’re adding “jill@creativeinc.com” as a collaborator to the “acme-website” app with only “view” permission. For more information about app privileges in Heroku organizations, see App Privileges in Heroku Organizations.
$ heroku access:add jill@creativeinc.com --app acme-website --permissions view
Adding jill@creativeinc.com to acme-website as collaborator... done
Removing Yourself from an Enterprise Team
An Enterprise Team user or collaborator can remove themselves from the Enterprise Team. The method of removal depends on the role. If you’re an “admin”, “member” or “viewer” you can remove yourself via the Access tab of the Enterprise Team or from the CLI.
$ heroku members:remove --team example-team email@example.com
You can’t leave an Enterprise Team if you’re the last remaining admin. Another user must be assigned the “admin” role before you can remove yourself.
If you’re a collaborator on any apps owned by a team, you must remove yourself from each app to be disassociated from the team. Since collaborators aren’t technically a member of the Enterprise Team, they can’t remove themselves via the Access tab.
The following example assumes that you’re a collaborator on two apps, each named my-app-1 and my-app-2.
$ heroku access:remove -a my-app-1 email@example.com
$ heroku access:remove -a my-app-2 email@example.com
MFA and SSO Status
Multi-factor authentication is a mandatory Heroku platform security feature. Users are prompted to set up MFA on their account and are required to log on with two or more verification factors, including their username and password.
Users can manage MFA on their individual accounts. When users are part of an Enterprise Team, admins and other members can monitor MFA status and ensure compliance with security and governance policies.
Admins can enable single sign-on (SSO) for users after configuring Heroku with their identity provider (IdP) of choice and can view SSO status in the Settings tab of the Enterprise Team. With SSO enabled, admins can enforce MFA with the configured IdP.
The Access tab of an Enterprise Team highlights users who use MFA or SSO for their Heroku accounts. The status is updated as soon as it changes. Scroll over the status displayed for each user to learn more.
Admins of the Enterprise Team can ensure compliance and maintain their security composure by:
- Removing users from the team
- Changing user roles
- Restricting users to less-sensitive apps
Heroku has limited visibility into MFA status when SSO is configured with a third-party IdP. Ensure MFA is enforced by the IdP.
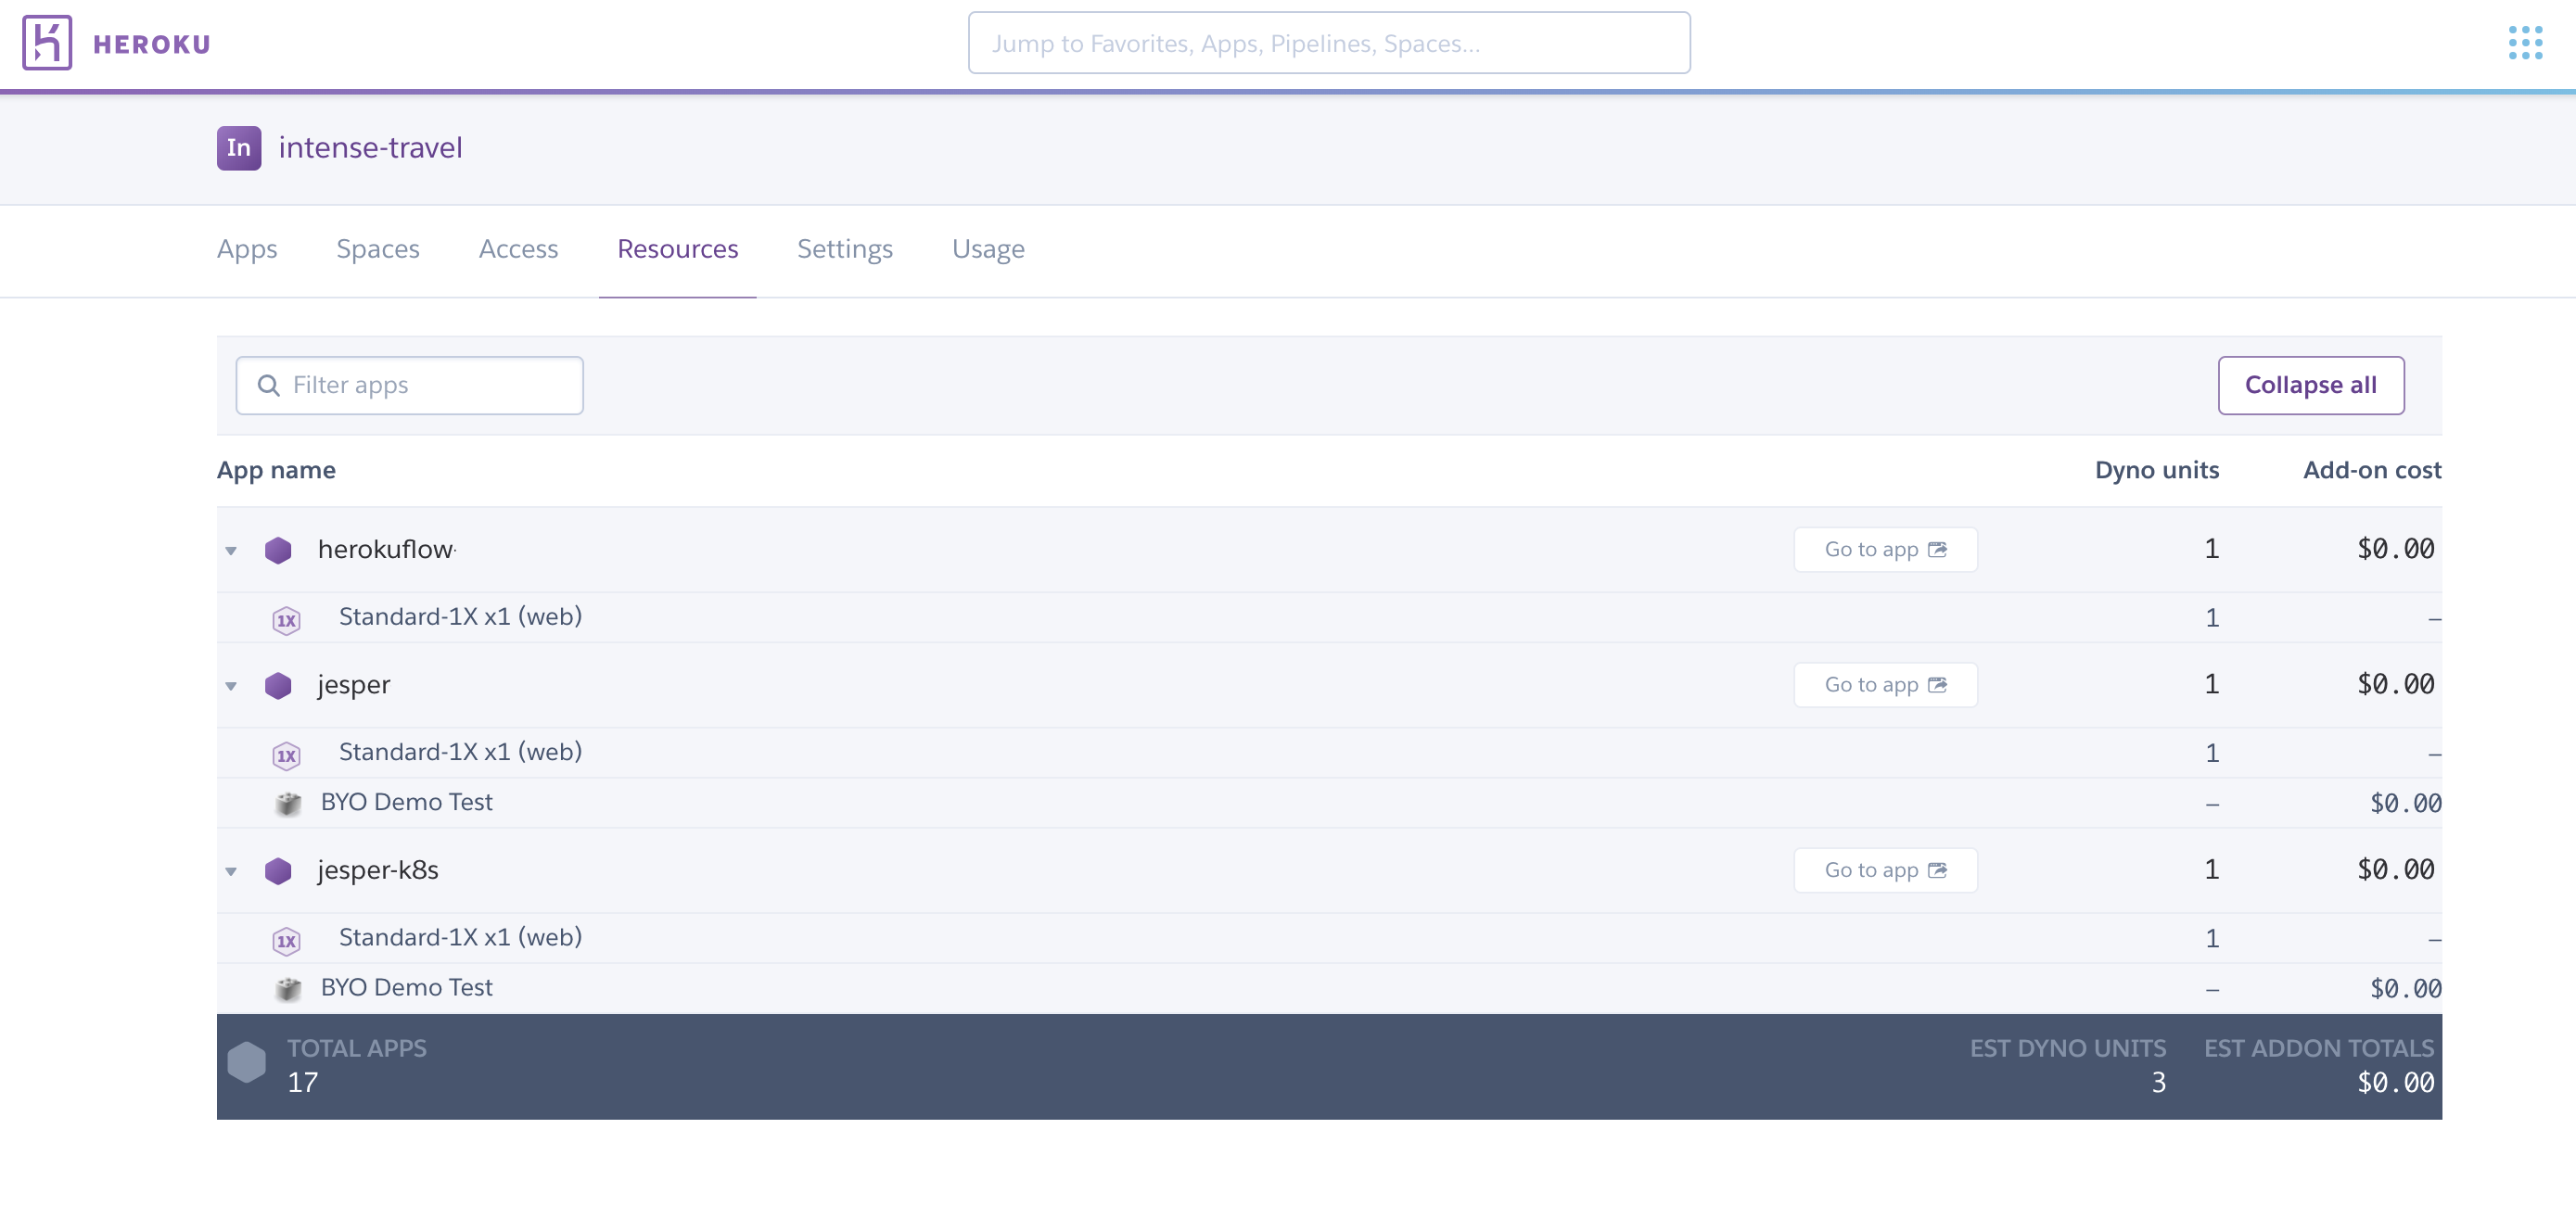
Resources
Lists all resources used by all applications within the Enterprise Team.
Settings
Use the Settings tab to:
- Rename your Enterprise Team
- Set up SSO
- Change the default from “member”. New users are assigned the new default permissions.
- Control which add-ons can be used with apps in the Enterprise Team
- Move multiple apps into your Enterprise Team using Bulk app transfer. Eco dynos migrated from a Personal to an Enterprise Team account are automatically upgraded to Standard-1X.
- Limit access to apps via OAuth
- Create a support ticket to have your Enterprise Team deleted
Transfer a Team To or From an Enterprise Account
If you have an existing Heroku Team that incurs charges to a payment card, you can transfer the team to your Enterprise account to consolidate billing. You can also request to migrate an Enterprise Team out of your Enterprise account. See Transfer Heroku Teams To and From Enterprise Accounts for more info.
Next Steps
Learn more about developing and managing Enterprise Teams: