Table of Contents [expand]
- Before Getting Started
- Supported Data Services
- Provisioning the Data Cloud & Marketing Connector Add-on
- Advanced Provisioning Options
- Navigating the Add-on Dashboard
- Configuring the Add-on
- Configuring the Add-on for Postgres
- Configure the Add-on for Marketing Cloud
- Configure the Add-on for Data Cloud
- Configure the Add-on for Redshift
- Configuring the Add-on for Kafka
- Configuring the Add-on for Alert Notification
- Create a Data Cloud to Postgres Sync Connector
- Create a Marketing Cloud to Heroku Postgres Sync Connector
- Create a Heroku Postgres to Marketing Cloud Sync Connector
- Create a Marketing Cloud to Apache Kafka on Heroku Sync Connector
- Sync Configuration Details
- Truncate and Sync
- Support
Last updated March 27, 2024
This add-on is operated by Softtrends LLC
Sync Data Cloud & Marketing Cloud with Postgres, Redshift, BigQuery, Kafka etc.
Softtrends Data Cloud & Marketing Connector is an add-on that synchronizes data between your Salesforce Data Cloud, Marketing Cloud and data stores like Heroku Postgres, AWS Redshift, Google BigQuery, Kafka etc.
Use Data Cloud & Marketing Connector to:
- Sync Data Cloud Unified Profiles into Postgres to leverage the 360° view of your consumers
- Sync Data Cloud Segments into Postgres to act on the underlying raw data in a variety of ways
- Sync Postgres data into Data Cloud Data Streams/DLOs
- Sync Data Cloud data into Postgres for reporting & AI/ML services
- Stream Marketing data to Kafka to perform predictive & real-time analytics
- Sync data into Marketing Cloud for marketing campaigns
- Create consumer services and marketing or data-driven applications
- Sync data into an AWS Redshift data warehouse, Google BigQuery engine and others
The Data Cloud & Marketing Connector supports all the languages and frameworks supported by Heroku.
If you’re just getting started with Heroku or Heroku add-ons, see the Heroku Getting Started Guides or the add-ons overview.
Before Getting Started
Ensure the following setup tasks are complete before:
The marketing environment’s configuration allows API access from external applications. For Salesforce Marketing Cloud, reference this article for guidance on proper configuration.
Data Cloud & Marketing Connector only supports Salesforce Data Cloud & Marketing Cloud instances that have API access enabled. Some plan types, including trial versions, don’t have API access by default and can’t be used with the Data Cloud & Marketing Connector.
A provisioned Postgres or Kafka instance and its configuration details. Data Cloud & Marketing Connector requires an app to have a Postgres database for Data or Marketing Cloud connectors, or in the case of Marketing Cloud streaming, a Kafka topic available to sync or publish data.
Open Data Cloud & Marketing Connector and complete its configuration. Access Data Cloud & Marketing Connector from the app’s Resources tab on the Heroku Dashboard, or via the CLI:
$ heroku addons: open mcconnect
Full instructions for configuring Data Cloud & Marketing Connector are described in Navigating the Add-on Dashboard.
Data Cloud & Marketing Connector uses Extended Oauth tokens given to you by the Heroku Platform to allow access to resources in your Heroku account, such as the Postgres Database URL which is required to run your instance of the Addon. By using Data Cloud & Marketing Connector, you are granting the Addon permission to use this Extended Oauth token.
Supported Data Services
Heroku Postgres
Data Cloud & Marketing Connector supports all standard, premium, and Private/Shield Heroku Postgres plan types. Data Cloud & Marketing Connector syncs data between a Salesforce Marketing Cloud instance and a Heroku Postgres database in or out of a Heroku Private/Shield Space as well as syncs data between a Salesforce Data Cloud instance and a Heroku Postgres database, in or out of a Heroku Private/Shield Space as well.
Essential-tier Postgres database Heroku Postgres plans are usable with Data Cloud & Marketing Connector, but not recommended. Essential-tier databases have limited row and connection allowances that Data Cloud & Marketing Connector consumes too quickly if it’s configured with multiple data connectors.
Apache Kafka on Heroku
Data Cloud & Marketing Connector supports all Standard, Private, and Extended Apache Kafka on Heroku plan types. Data Cloud & Marketing Connector can sync Data Extensions between a Salesforce Marketing Cloud instance and a Kafka on Heroku Topic in or out of a Heroku Private Space.
AWS Redshift
Data Cloud & Marketing Connector supports AWS Redshift. Data Cloud & Marketing Connector can be used to sync data between a Salesforce Marketing Cloud instance and an AWS Redshift database.
Network latency can become a factor of service performance. Consider the overall architecture of any solution that employs a Data Cloud & Marketing Connector, Heroku Postgres/Kafka, and Salesforce Marketing Cloud instance distributed across divergent geographic locations.
Provisioning the Data Cloud & Marketing Connector Add-on
The available plans for the Data Cloud & Marketing Connector add-on are listed here.
To add Data Cloud & Marketing Connector to a new or an existing app, provision it from the app’s Resources tab in the Heroku Dashboard or via the CLI:
$ heroku addons:create mcconnect
Creating mcconnect on sharp-mountain-4005... free
Created mcconnect-infinite-31247
Steps for creating the app manually are described in the next section.
Manual Provisioning
If an app needs provisioning for use with Data Cloud & Marketing Connector, create a Heroku app and add the Data Cloud & Marketing Connector add-on via the Heroku CLI or Dashboard.
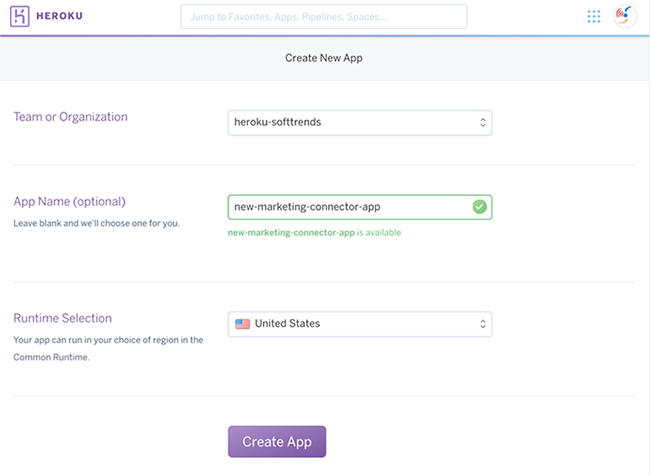
Step 1
Create a Heroku app from the Heroku Dashboard.
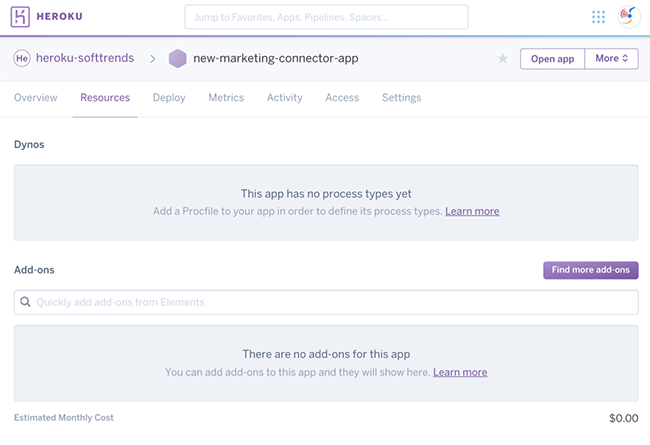
Step 2
After the app is created, select the Resources tab from the Heroku App Dashboard.
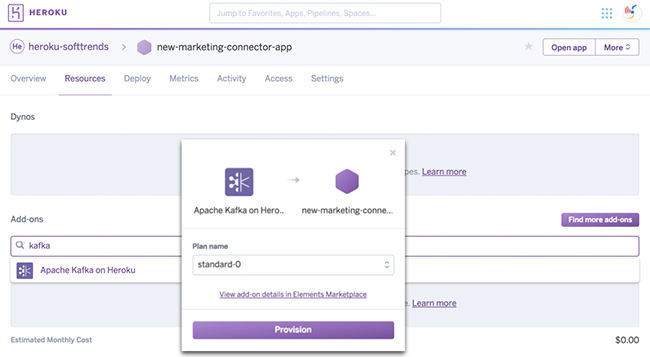
Step 3a (Kafka)
If pairing Data Cloud & Marketing Connector with Apache Kafka on Heroku, provision the Apache Kafka on Heroku addon, too, via the dashboard or share an existing Apache Kafka on Heroku add-on with the new Heroku app.
$ heroku addons:attach my-existing-kafka-appname::KAFKA -a app-name
Attaching kafka-cubed-12345 to ⬢ app-name... done
Setting KAFKA config vars and restarting ⬢ app-name... done, v3
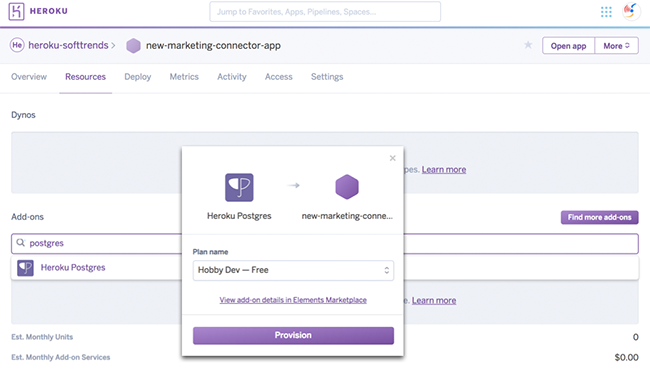
Step 3b (Postgres)
If pairing Data Cloud & Marketing Connector with Heroku Postgres, provision the Heroku Postgres add-on, too, via the dashboard or share an existing Heroku Postgres add-on with the new Heroku app.
$ heroku addons:attach my-existing-postgres-appname::DATABASE --app app-name
Attaching postgresql-metric-12345 to ⬢ app-name... done
Setting DATABASE config vars and restarting ⬢ app-name... done, v5
Step 4
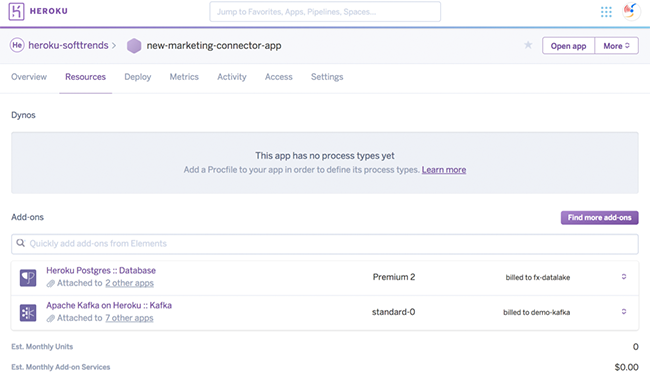
A new Heroku app with Apache Kafka on Heroku or Heroku Postgres newly provisioned or shared is available on the Dashboard:
Advanced Provisioning Options
Provisioning Multiple Add-ons Per App
Data Cloud & Marketing Connector only supports provisioning a single instance of itself on a single app. However, to synchronize data from multiple Salesforce Data Cloud or Marketing Cloud instances, each instance of the Data Cloud & Marketing Connector add-on can authorize and connect to independent Data Cloud or Marketing Cloud instances or Data Extensions, Unified Profiles & Segments. As such, one provisioned instance of the add-on can support multiple Data Cloud and/or multiple Marketing Cloud instances in that single Heroku application.
Additionally, you may use a single Heroku Postgres instance to support multiple Heroku applications, each with an instance of the Data Cloud & Marketing add-on installed. A best practice for this is to leverage a separate schema for each instance of the add-on.
Use a different Postgres database schema name or Kafka topic name for each Marketing or Data Cloud Connector instance to allow Data Cloud & Marketing Connector to use a single Heroku Postgres database.
Provisioning a Private or Shield Space plan
Heroku at present does not support the ability for a third party add-on provider to register itself as “Installable in Space,” only as “Available in Space.” Despite this lack of support, the Data Cloud & Marketing Connector add-on does offer support to install it within your Private or Shield space. When selecting this plan, we provision the add-on itself, as a standalone Heroku application, running inside of your Private or Shield Space. Naturally, this will consume Heroku Dyno compute usage and as such you will incur the cost of that add-on application’s Dyno configuration. If you have any questions on how to track and manage this add-on Installed in Space, reach out to support@softtrends.com or engage us via our add-on’s Live Chat icon.
When using multiple Data Cloud & Marketing Connector add-ons, use a distinct integration user per add-on. Each Data Cloud & Marketing Connector add-on uses a different access token for Salesforce Data Cloud & Marketing Cloud API calls. Using the same integration user for multiple add-ons can exceed the limit permitted by Salesforce Data Cloud or Marketing Cloud, potentially leading to connectors failing or requiring reauthorization. Both scenarios lead to failure of data synchronizations.
Upgrading the Add-on Plan
Select the Edit plan option for the Data Cloud & Marketing Connector add-on on the Heroku Dashboard or using the Heroku CLI to upgrade a Data Cloud & Marketing Connector plan.
$ heroku addons:upgrade mcconnect:ent-edition -a app-name
Changing mcconnect-cavernous-77445 on app-name from mcconnect:test to mcconnect:ent-edition... done, $3500/month
For enterprise users, the upgrade options assume your organization has a paid add-on plan entitlement already in place.
Using the Heroku CLI, upgrading one of multiple instances of Data Cloud & Marketing Connector attached to a single app requires defining the globally unique identifier, too:
$ heroku addons:upgrade mcconnect-cavernous-77445 mcconnect:ent-edition
Changing mcconnect-cavernous-77445 on app-name from mcconnect:test to mcconnect:ent-edition... done, $3500/month
Removing the Add-on
Remove the Data Cloud & Marketing Connector add-on using the Heroku Dashboard or the Heroku CLI.
Detaching Data Cloud & Marketing Connector from an app drops any related tables from the associated Heroku Postgres database. Ensure necessary database backups exist before proceeding.
$ heroku addons:destroy mcconnect -a app-name
▸    WARNING: Destructive Action
▸    This command will affect the app app-name
▸    To proceed, type app-name or rerun this command with --confirm app-name
$heroku addons:destroy mcconnect -a app-name --confirm app-name
Destroying mcconnect-cavernous-77445 on ⬢ app-name... done
If the app has multiple Data Cloud & Marketing Connector add-ons attached, specify the globally unique identified assigned to the add-on being removed using the Heroku CLI.
Navigating the Add-on Dashboard
Configure, monitor, and troubleshoot data mappings using the Data Cloud & Marketing Connector dashboard. Users with add-on access on an app have access to the Data Cloud & Marketing Connector dashboard. Refer to Collaborating with Other Developers on Your App for managing users’ access to an application.
Administration
The Administration menu allows users to:
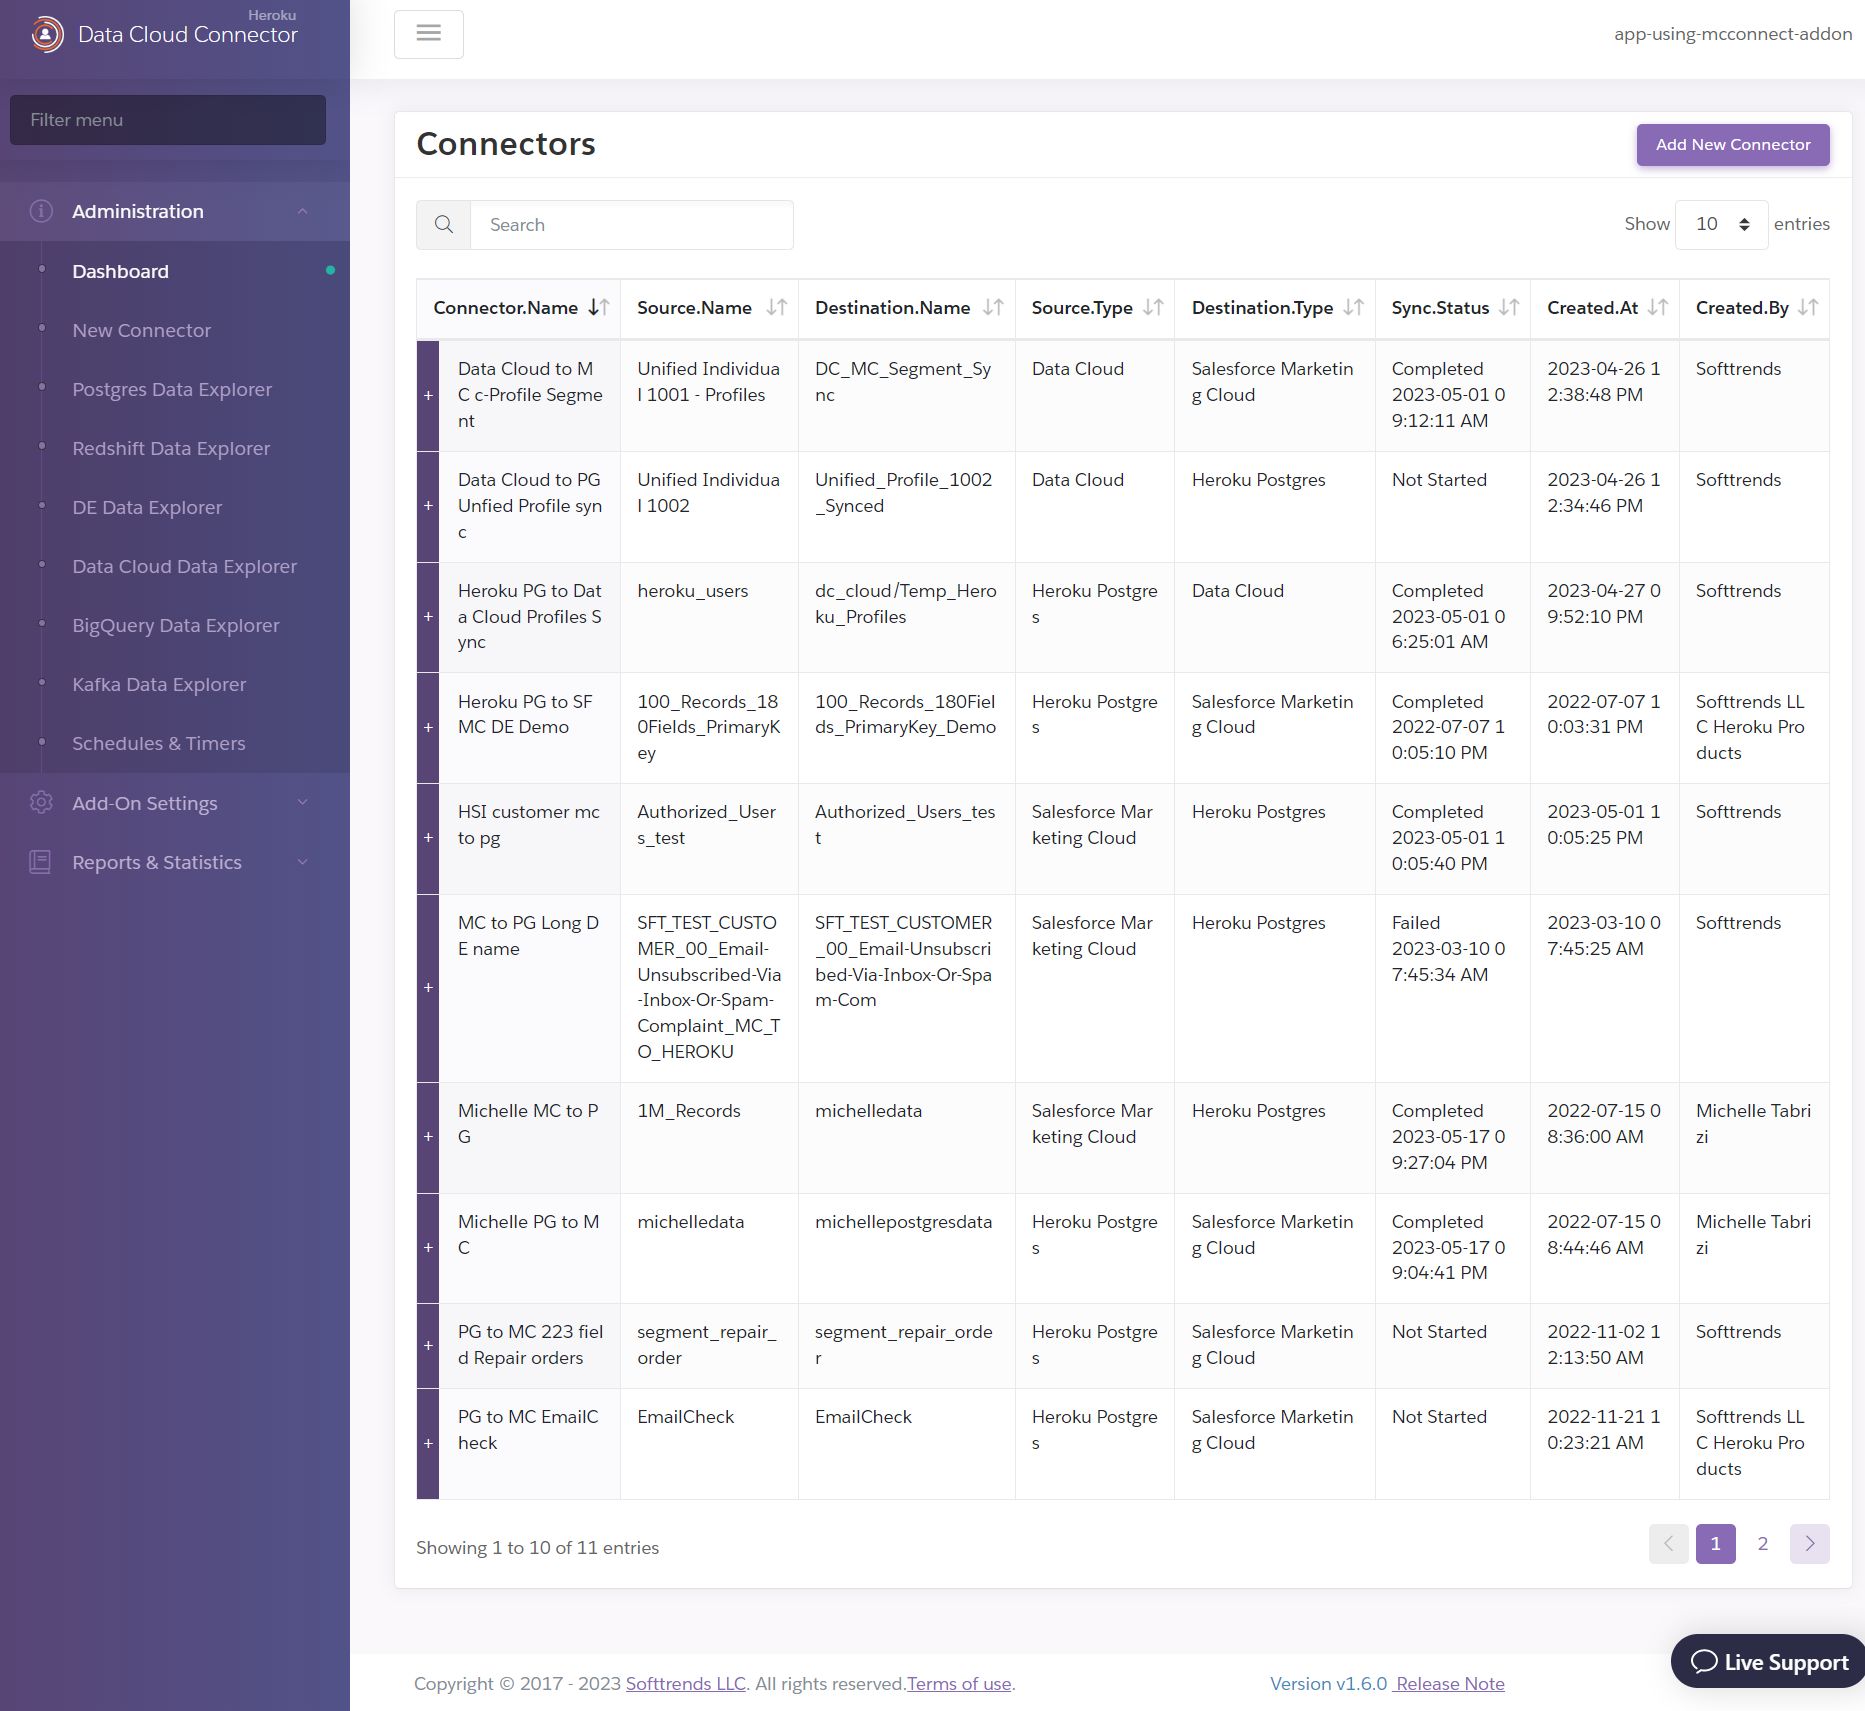
- Access a summary view of all existing data connectors
- Create a data connector
- Access the Data Cloud Explorer
- Access the Postgres Data Explorer
- Access the Kafka Data Explorer
- View Marketing Data Extension data
- View Data Cloud Data Stream data
- View exposed external objects in Postgres
- View and set your schedules and timers
Create a Connector.
View the current sync status of a Connector.

View synced data after a successful Heroku Postgres synchronization.
View data synchronized to the Data Extension or Data Lake Object.

Review and set data synchronization schedules and timers.

Add-on Settings
The Add-on Settings menu allows users to:
- View and set Heroku Postgres, Apache Kafka on Heroku, AWS Redshift, Salesforce Data Cloud and Marketing Cloud instance configurations
- View the Heroku host application’s settings
- View and edit email IDs to receive alert notifications, and retrieve an API key for the Marketing Connector API
View and set Heroku Postgres connection configuration.
View and set Marketing Cloud connection configuration.

View and set Data Cloud connection configuration.
View and set AWS Redshift connection configuration.
View and set Apache Kafka on Heroku connection configuration.

View the current Heroku app configuration values including the app name, app ID, and attached add-ons.

Configure the email address for alerts and retrieve the API Key for the Marketing Connector API.
Reports & Statistics
The Reports & Statistics Menu allows users to:
- View summary information about configured Data Cloud & Marketing Connectors
- View events and trends occurring within marketing data
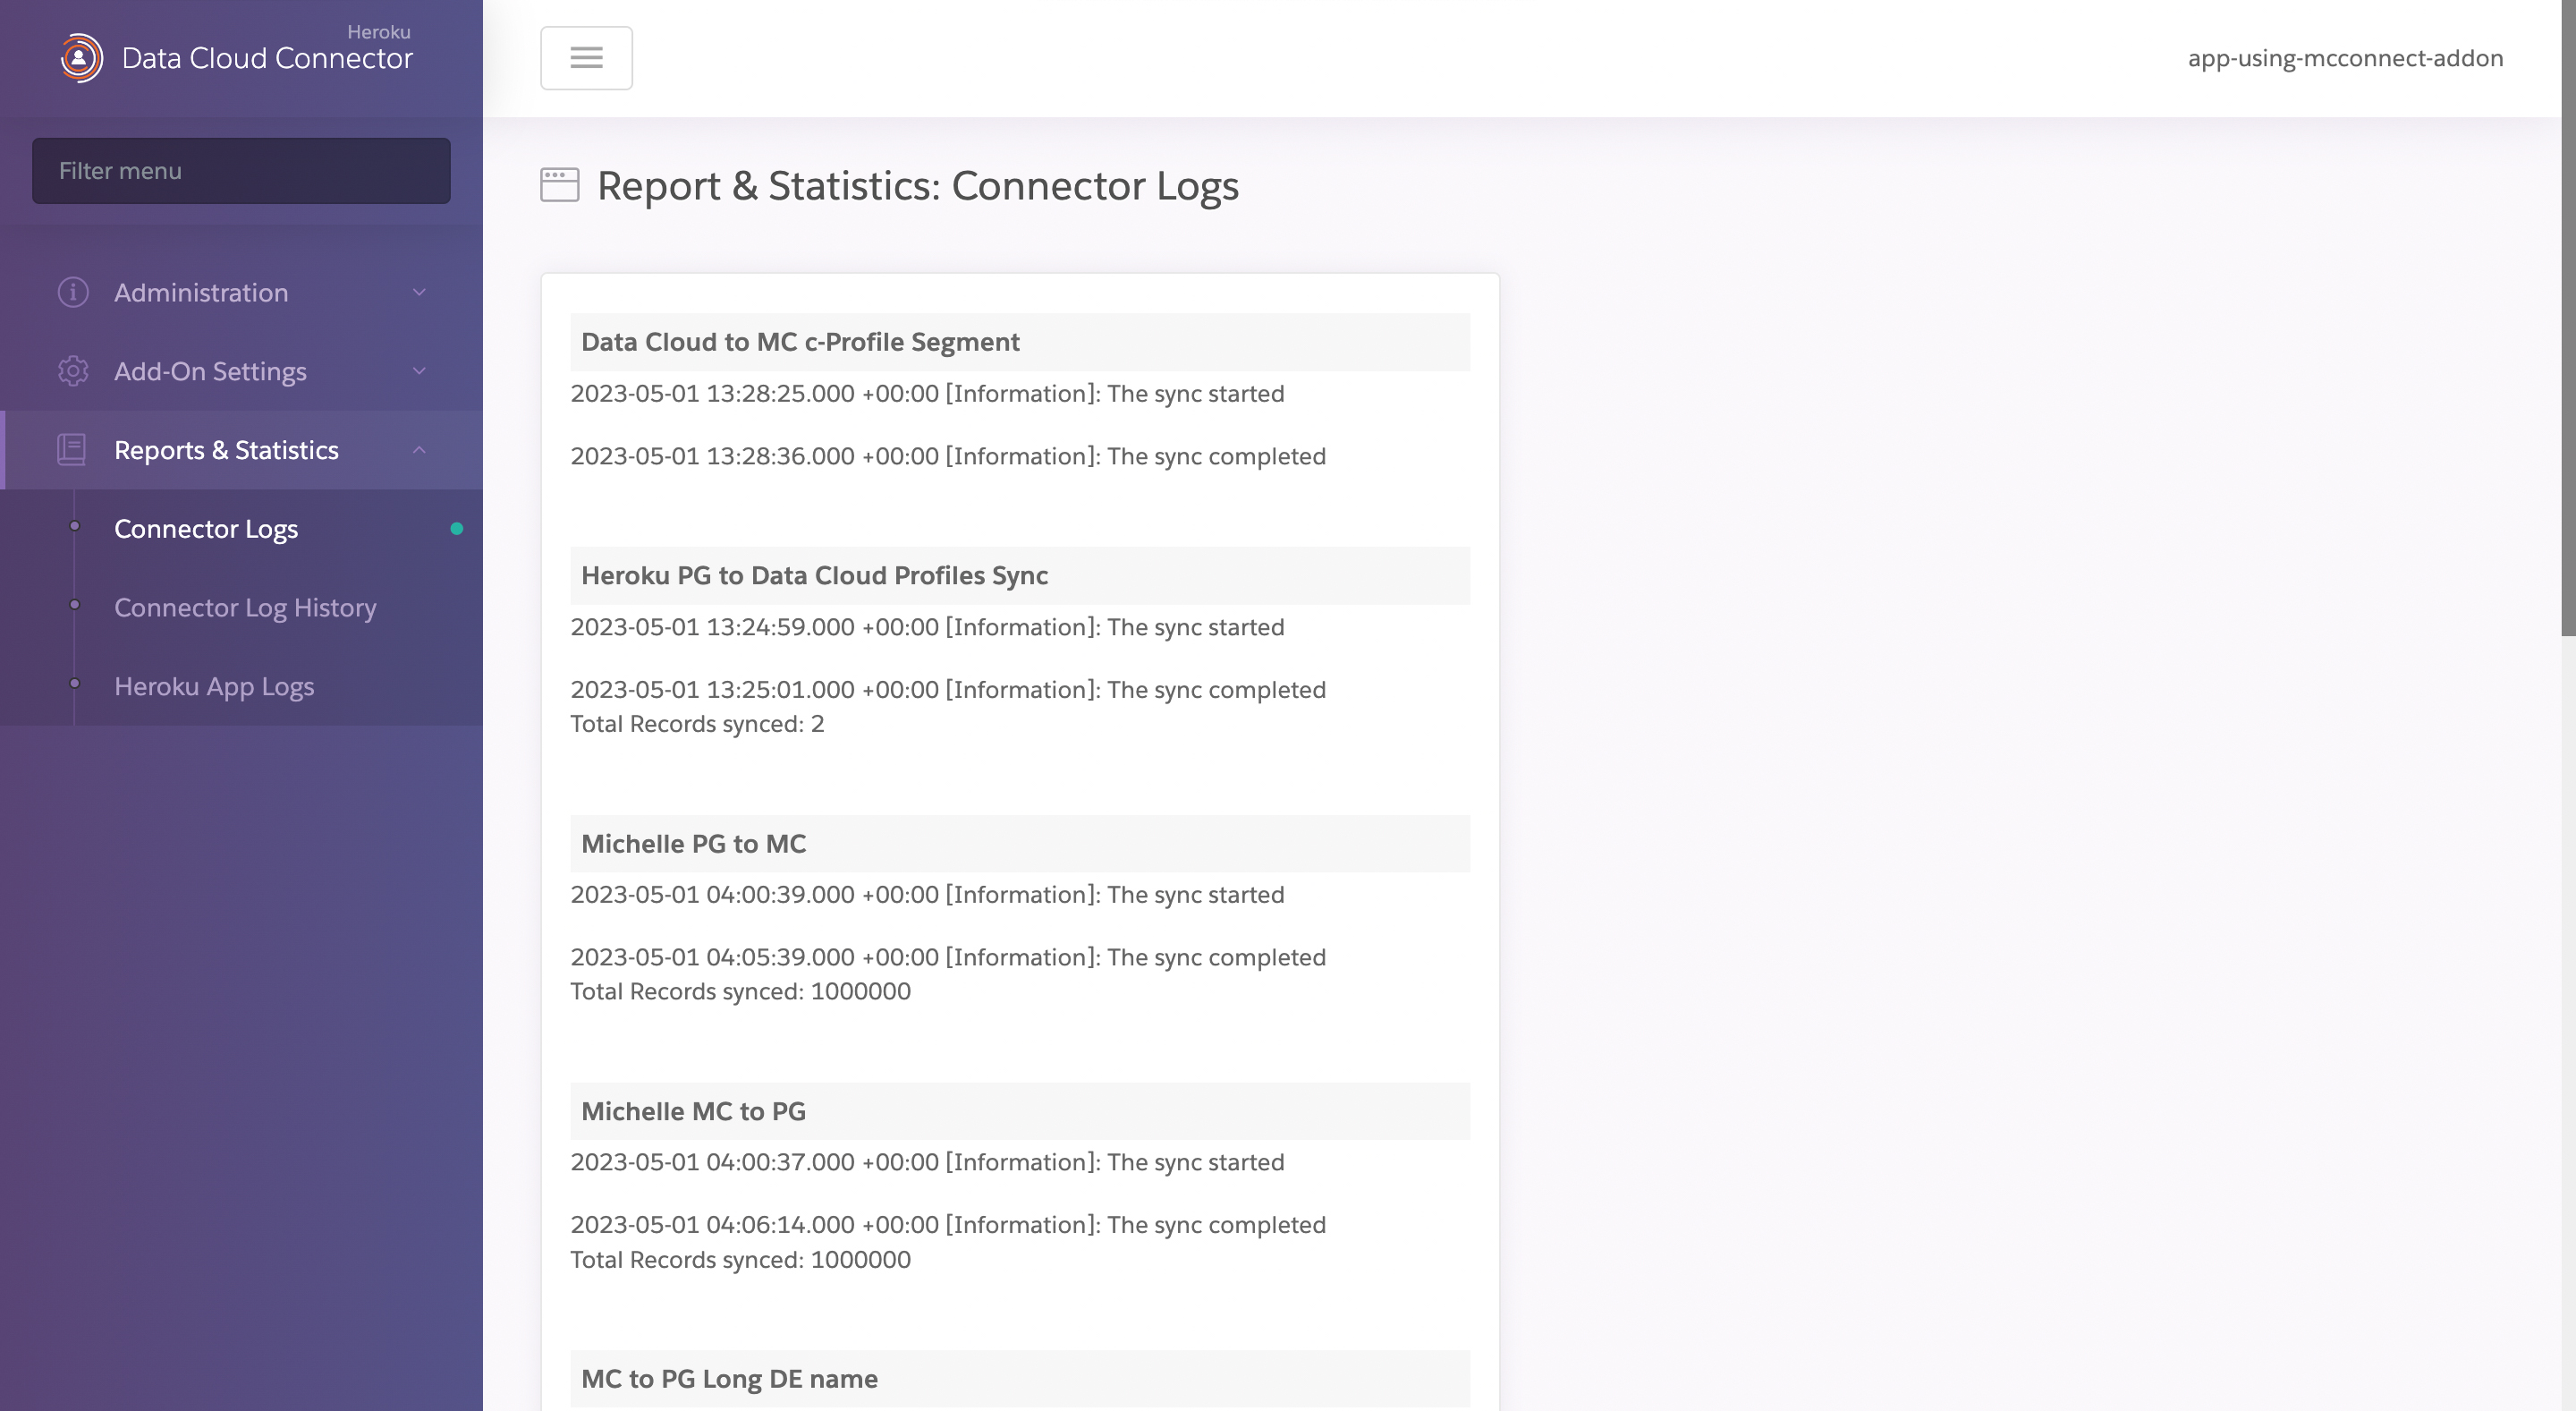
- View Data Cloud & Marketing Connector logs
- View the logs for the Heroku app Data Cloud & Marketing Connector is attached to
View logs for the configured Data Cloud or Marketing Cloud connectors.
View the logs for the Heroku app Data Cloud & Marketing Connector is attached to.

Configuring the Add-on
When setting up a new data connector in the add-on, Data Cloud & Marketing Connector can sync Salesforce Data Cloud & Marketing Cloud data from a Data Lake Object, Data Extension, DMO Unified Profile set or Segment to Heroku Postgres, AWS Postgres, Azure Postgres, AWS Redshift, or Apache Kafka on Heroku. Data Cloud & Marketing Connector can sync data from any Postgres or AWS Redshift instance to Salesforce Data Cloud or Marketing Cloud. The next sections cover configuring the add-on to select them as a source or destination when creating a Connector.
From the Resources tab of your Heroku application, click the Data Cloud & Marketing Connector add-on to open its administrative dashboard. Select Add-on Settings in the left-hand menu to expose the related Add-on setting options.
Configuring the Add-on for Postgres
Select Add-On Settings tab, then Database Config to begin configuring the add-on for your Postgres instances. Enter an instance a name and settings for them. The name entered when creating a connector appears in a dropdown menu and are an option when selecting any of the Postgres instances as a source or destination.
No Existing Postgres Database Settings
When configuring a Postgres database for the first time, the Default Postgres Database URL field will be empty:
Next to the Default Postgres Database URL field, “Get DB URL from App” appears if a Heroku Postgres database and Data Cloud & Marketing Connector are attached to the same app. Click this link and Data Cloud & Marketing Connector auto-detects the Heroku Postgres instance and fill in the Default Postgres Database URL field for confirmation.
Enter the connection string manually for Heroku Postgres databases attached to another app or AWS or Azure Postgres databases. Use the following format:
postgres://username:password@hostname:5432/databasename
The option to have more than one Postgres configuration is only available in all Enterprise Edition plans
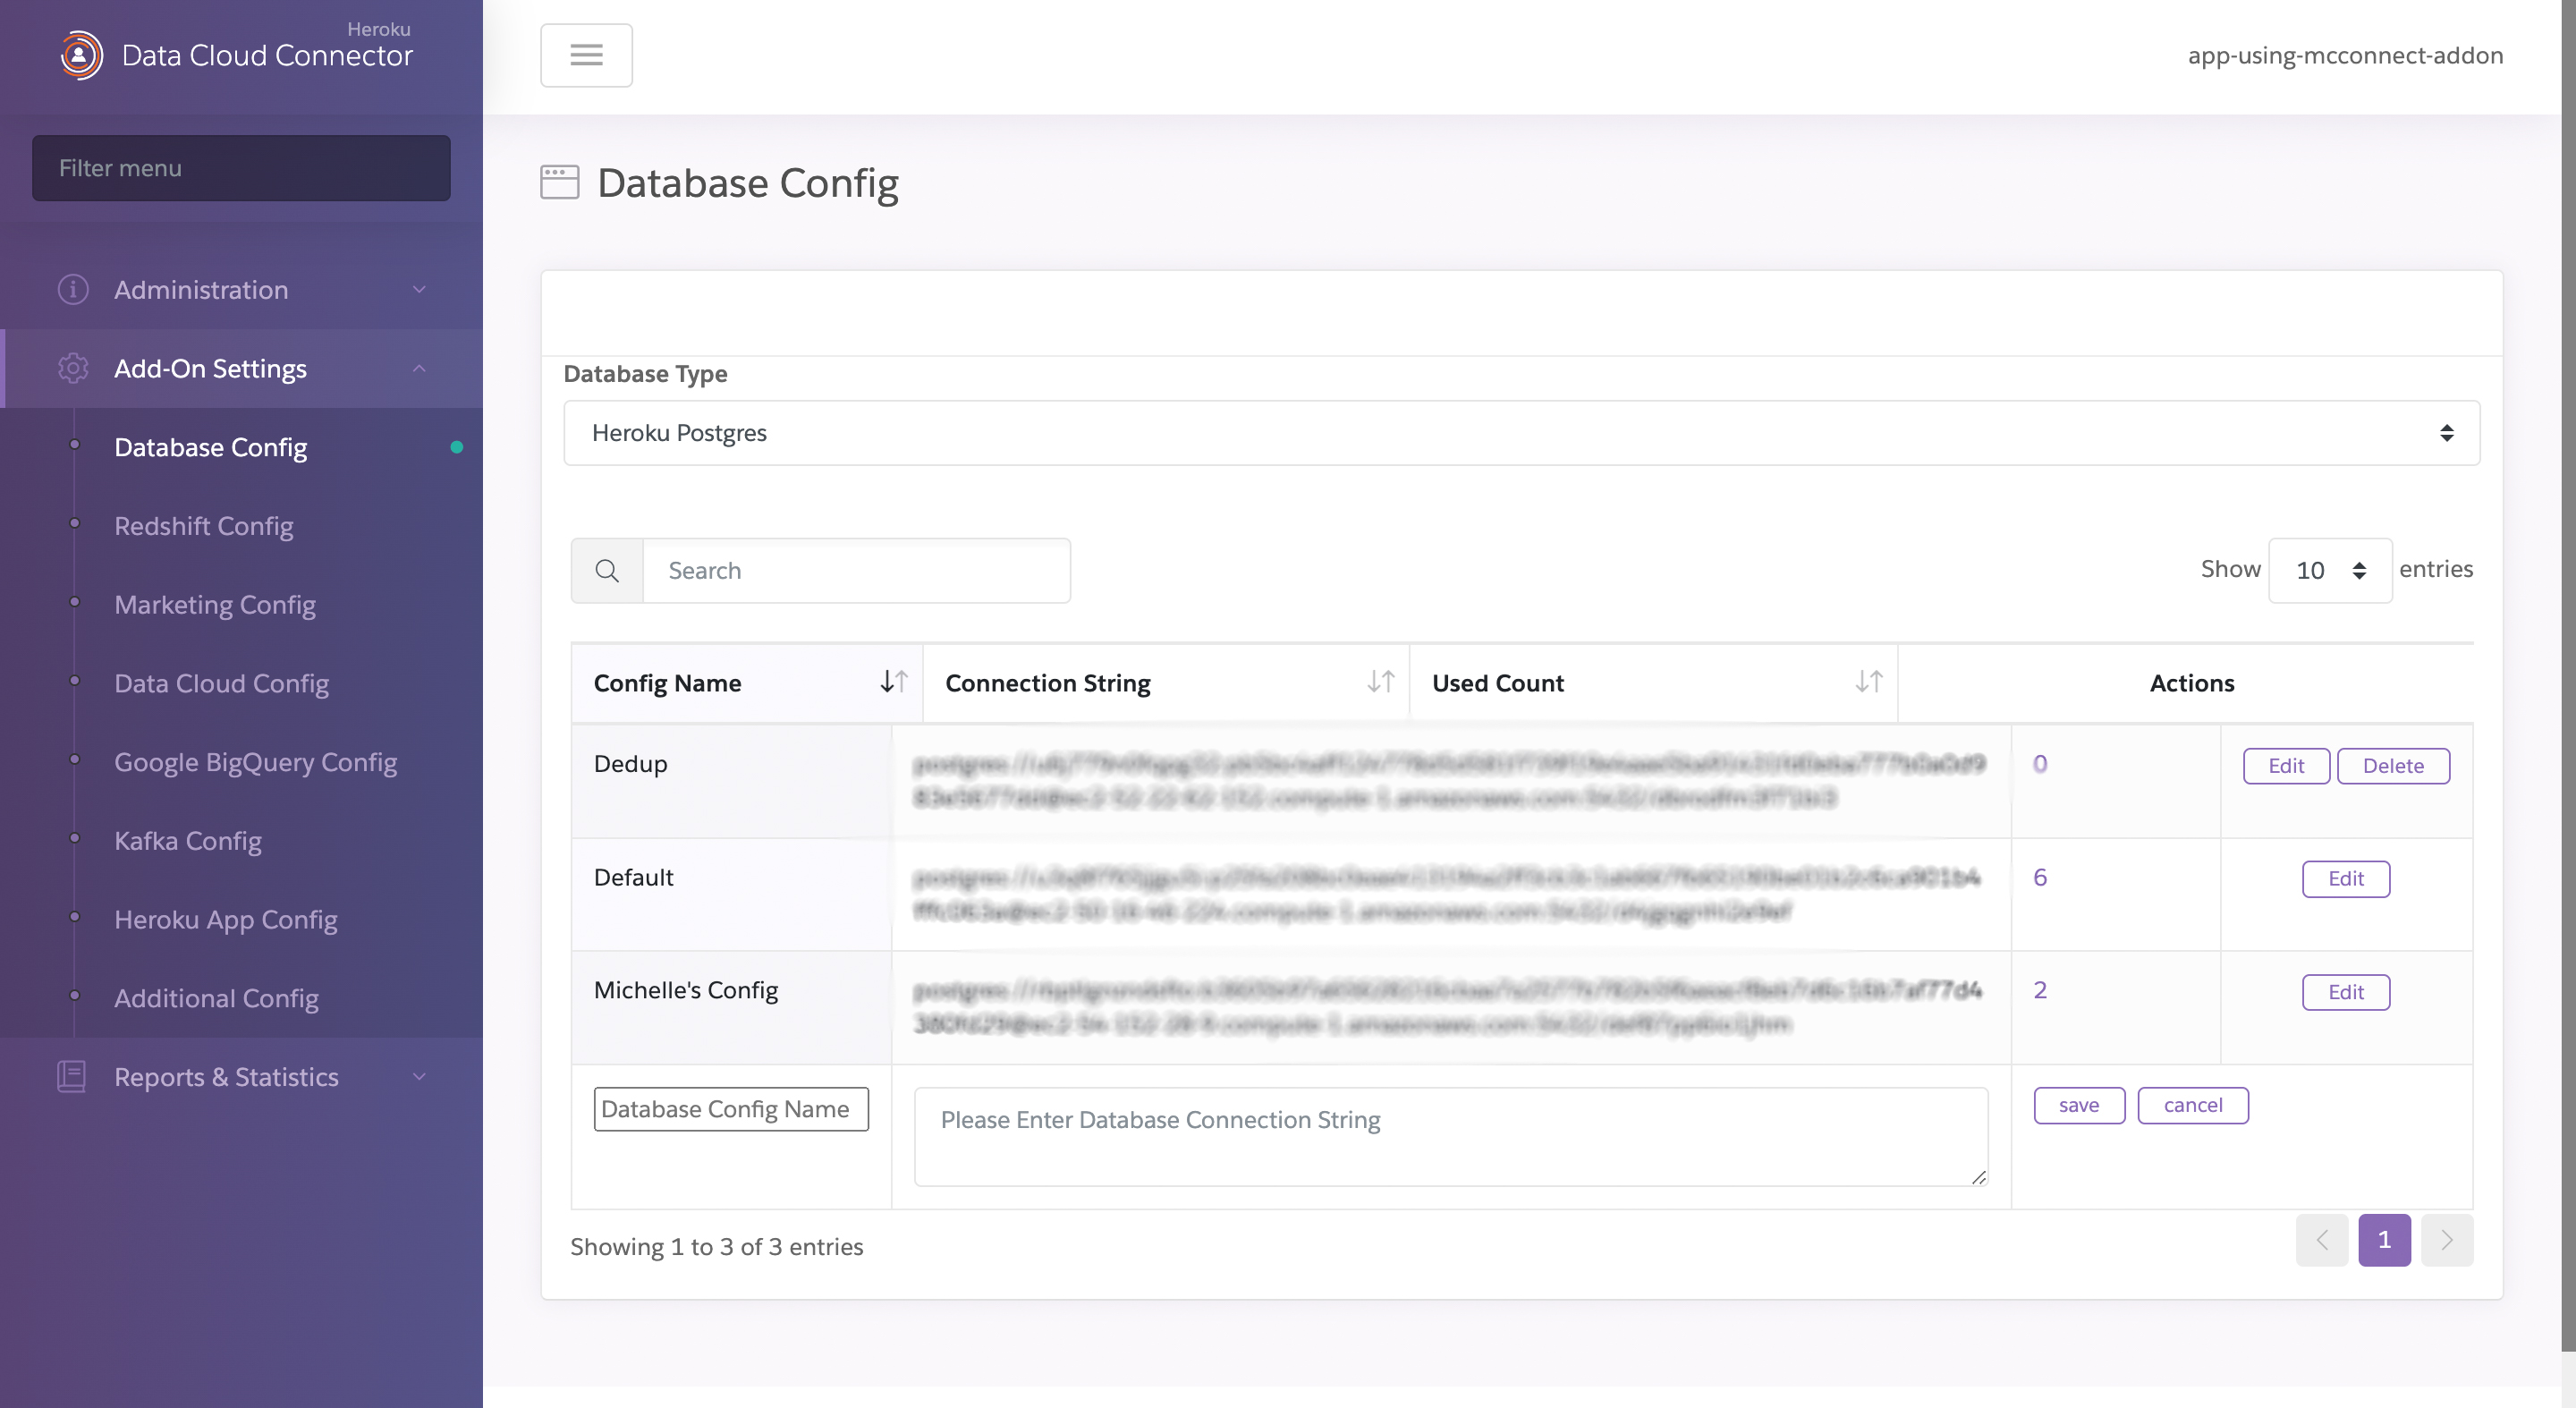
Existing Postgres Database Settings
The Postgres Configuration page displays the named Postgres configurations already created. The Used Count shows how many connectors are using the configuration and hovering over that will show which connectors are using it. If you Edit a URL, all connectors using the URL will start using the modified URL.
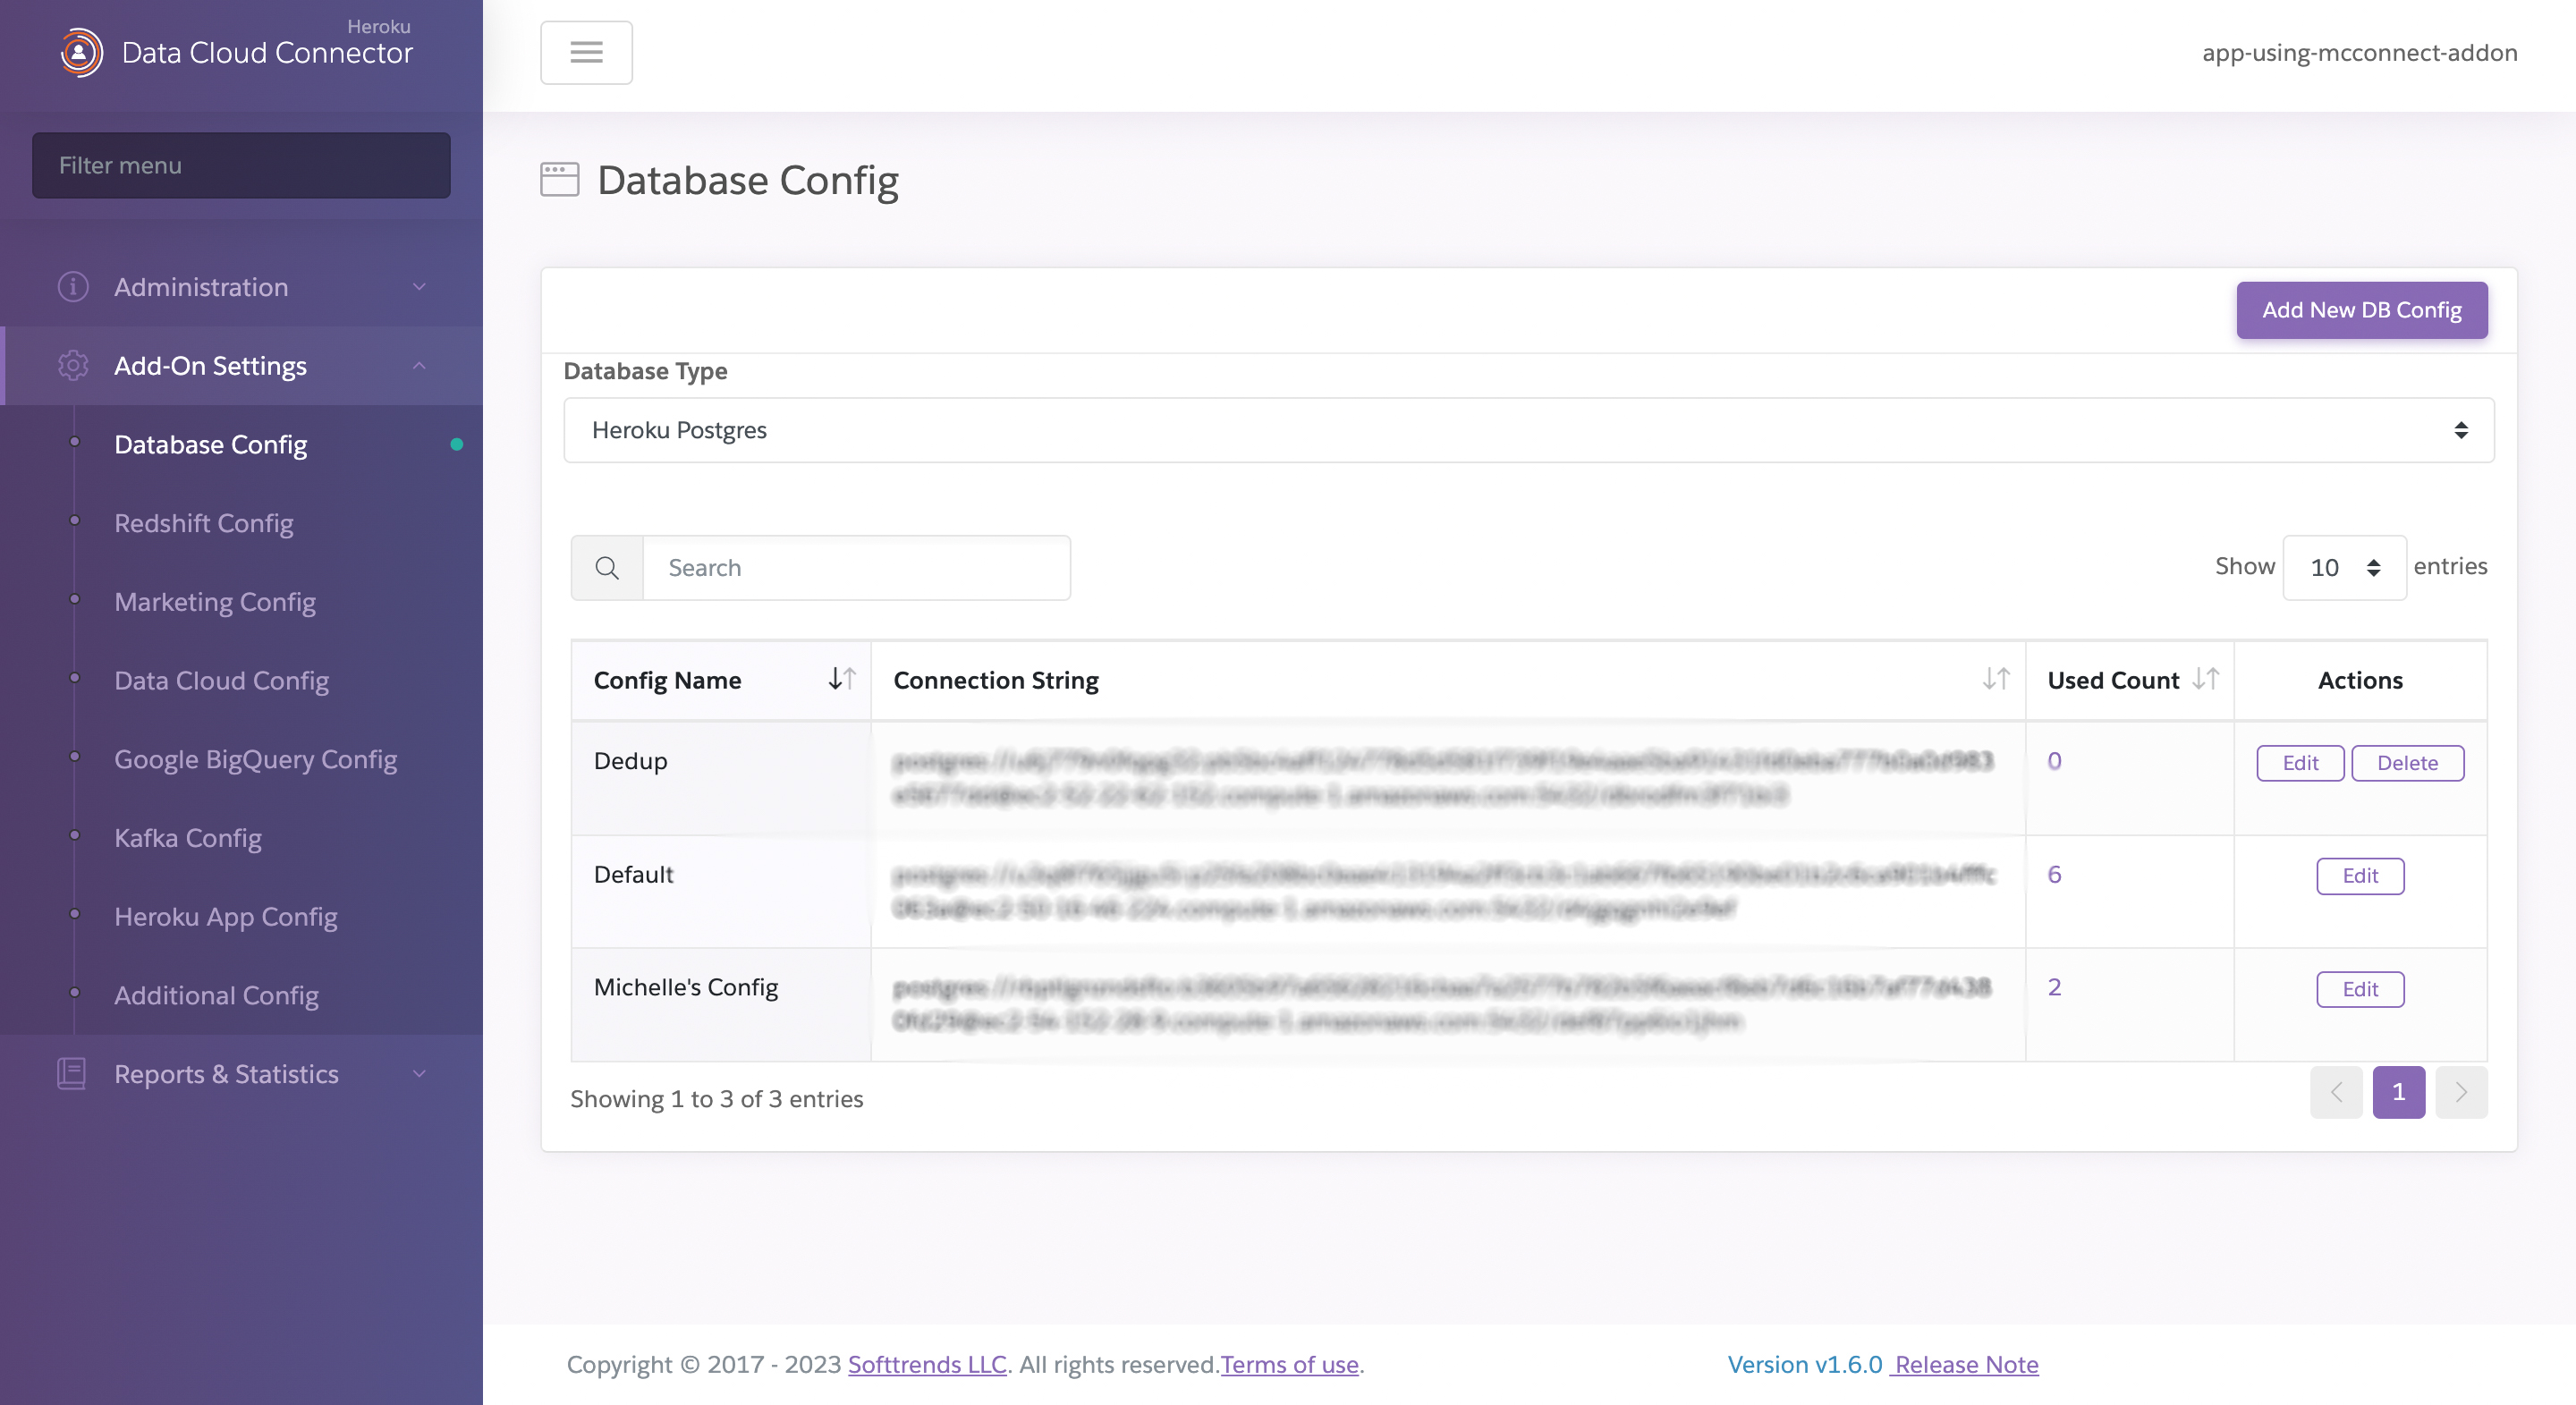
Click Add new URL button at the bottom of the page to enter additional named configurations.

Configure the Add-on for Marketing Cloud
All Enterprise Edition Data Cloud & Marketing Connector plans support syncing data to and from multiple Data Cloud & Marketing Cloud instances.
Click the Add-On Settings menu, then Marketing Config to provide Salesforce Marketing Cloud settings. The available Marketing Cloud settings vary depending on the current Marketing Connector plan.
Configuration when accessing Add-on Settings for the First time
Click on Add New Marketing Config button and create the Configuration.
Add-on Plan Allows Multiple Configurations
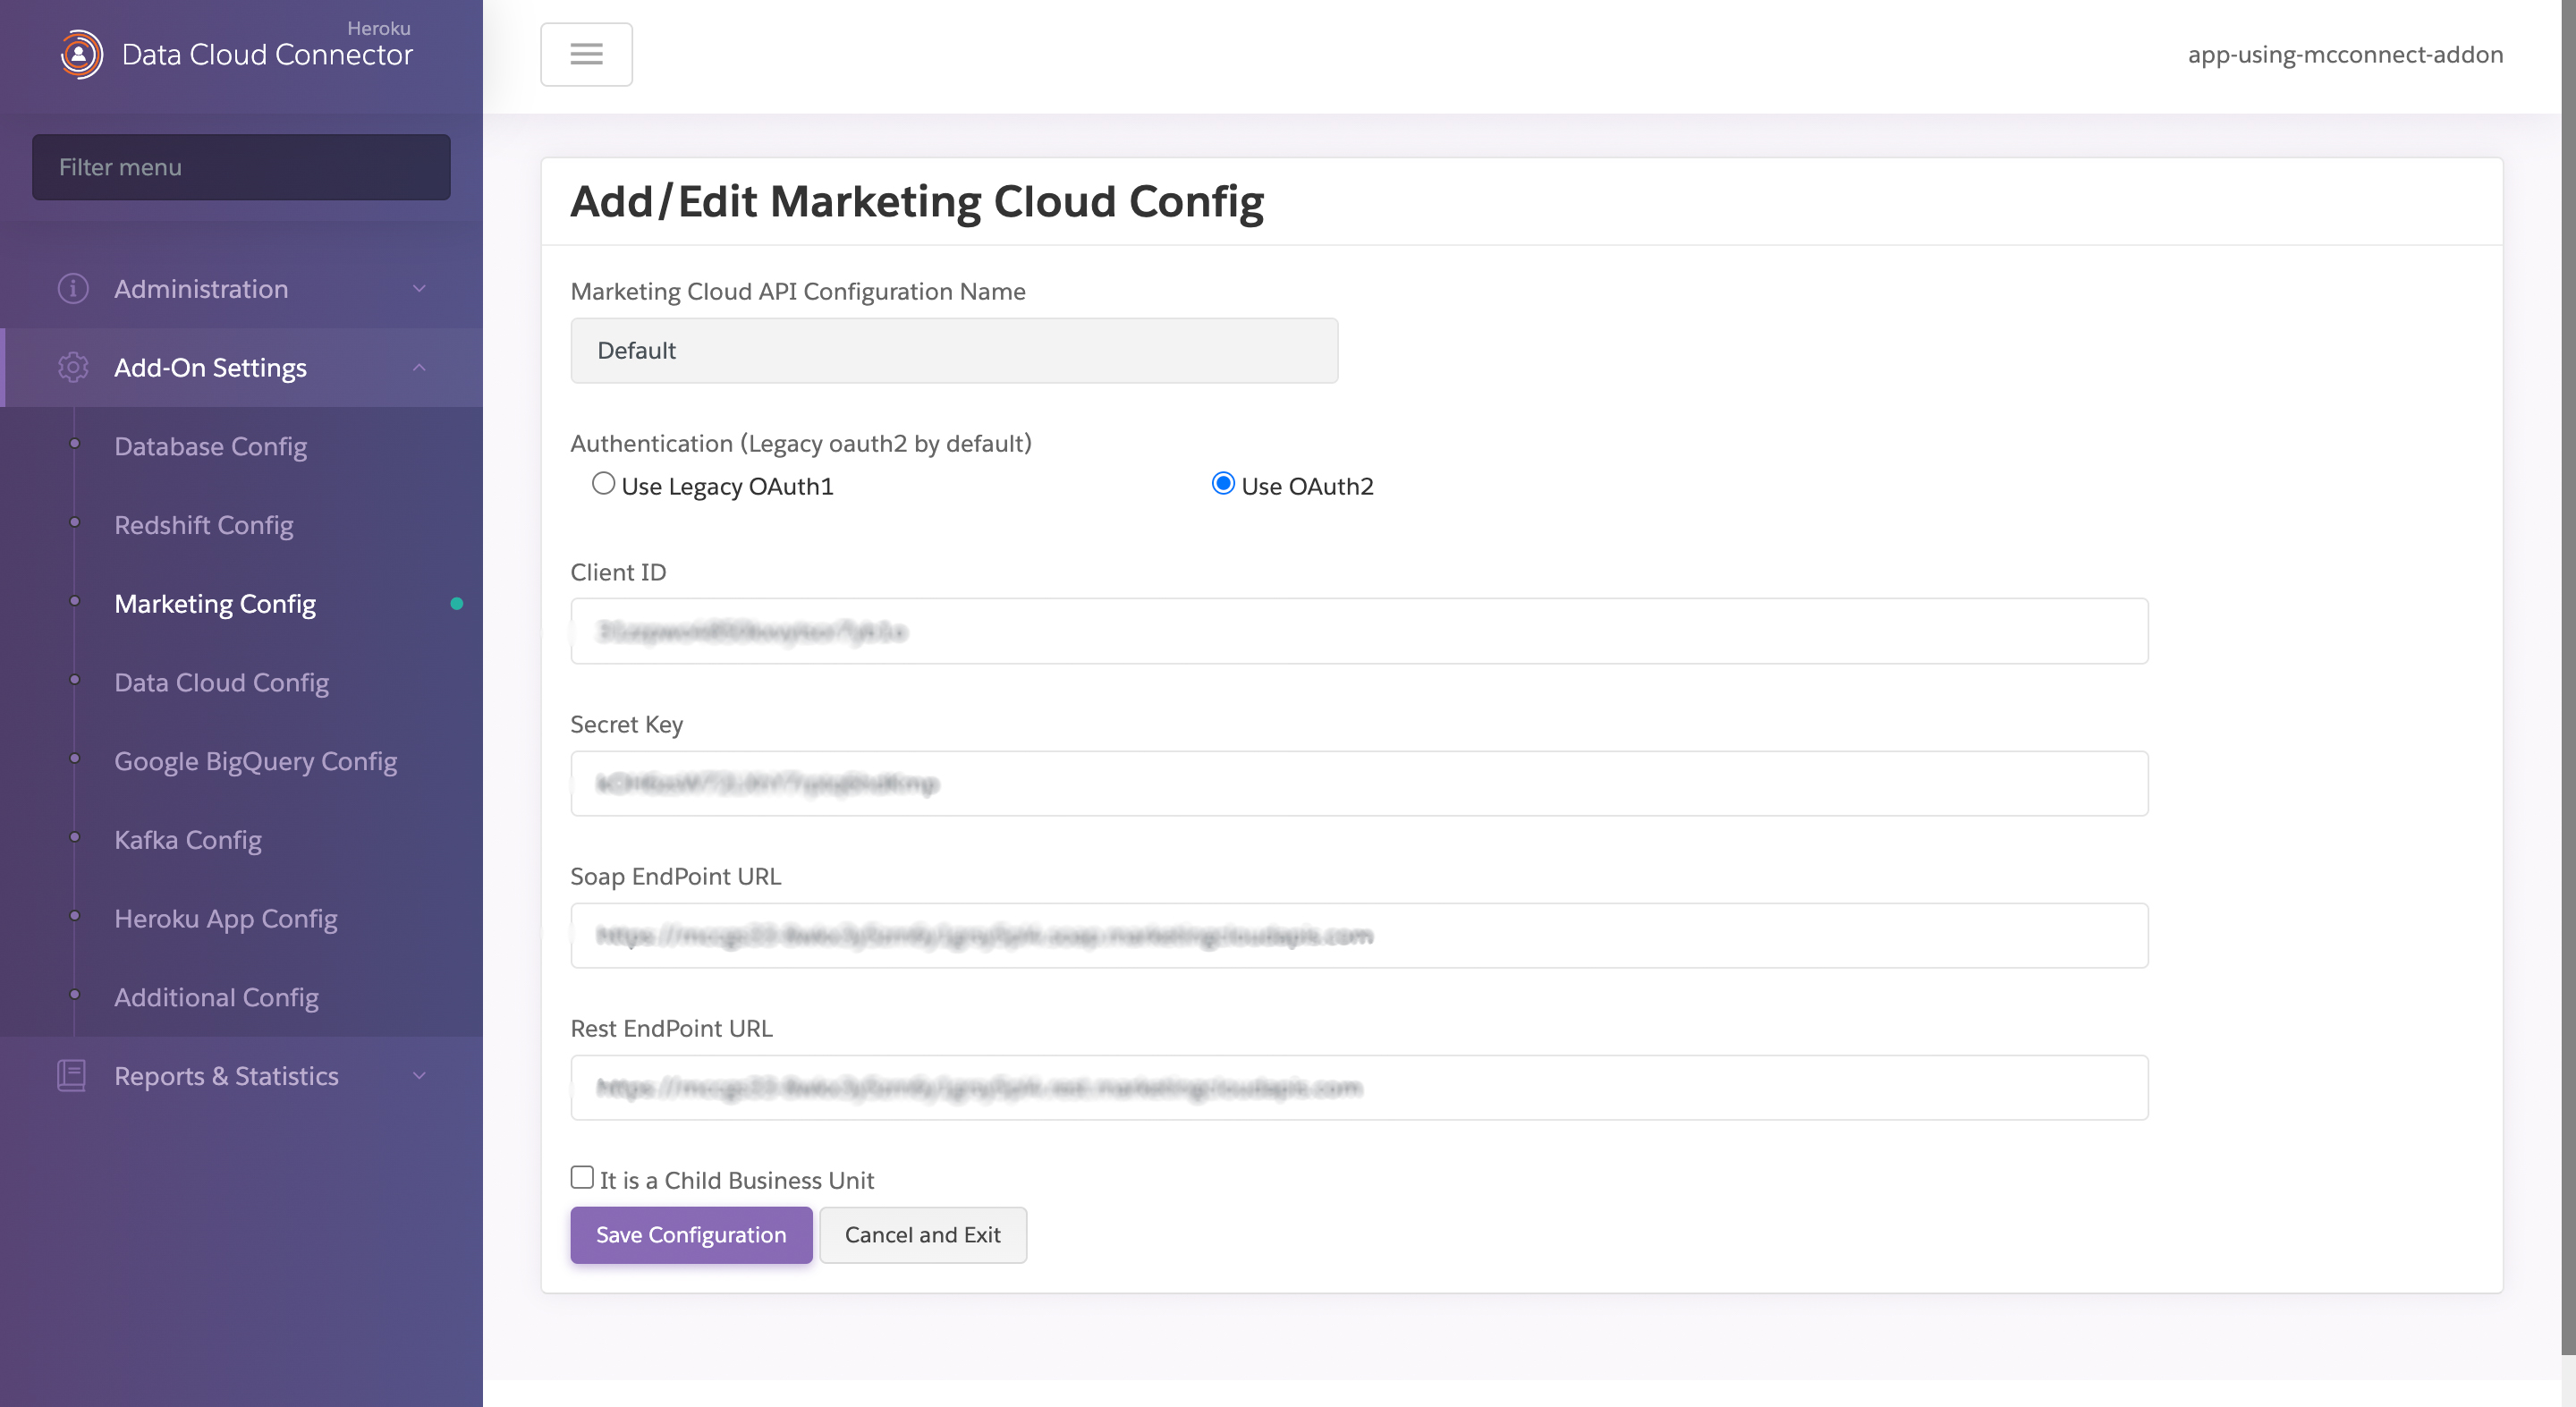
Configuration page shows a list UI of the configurations you have added, and the option to add new marketing configurations.
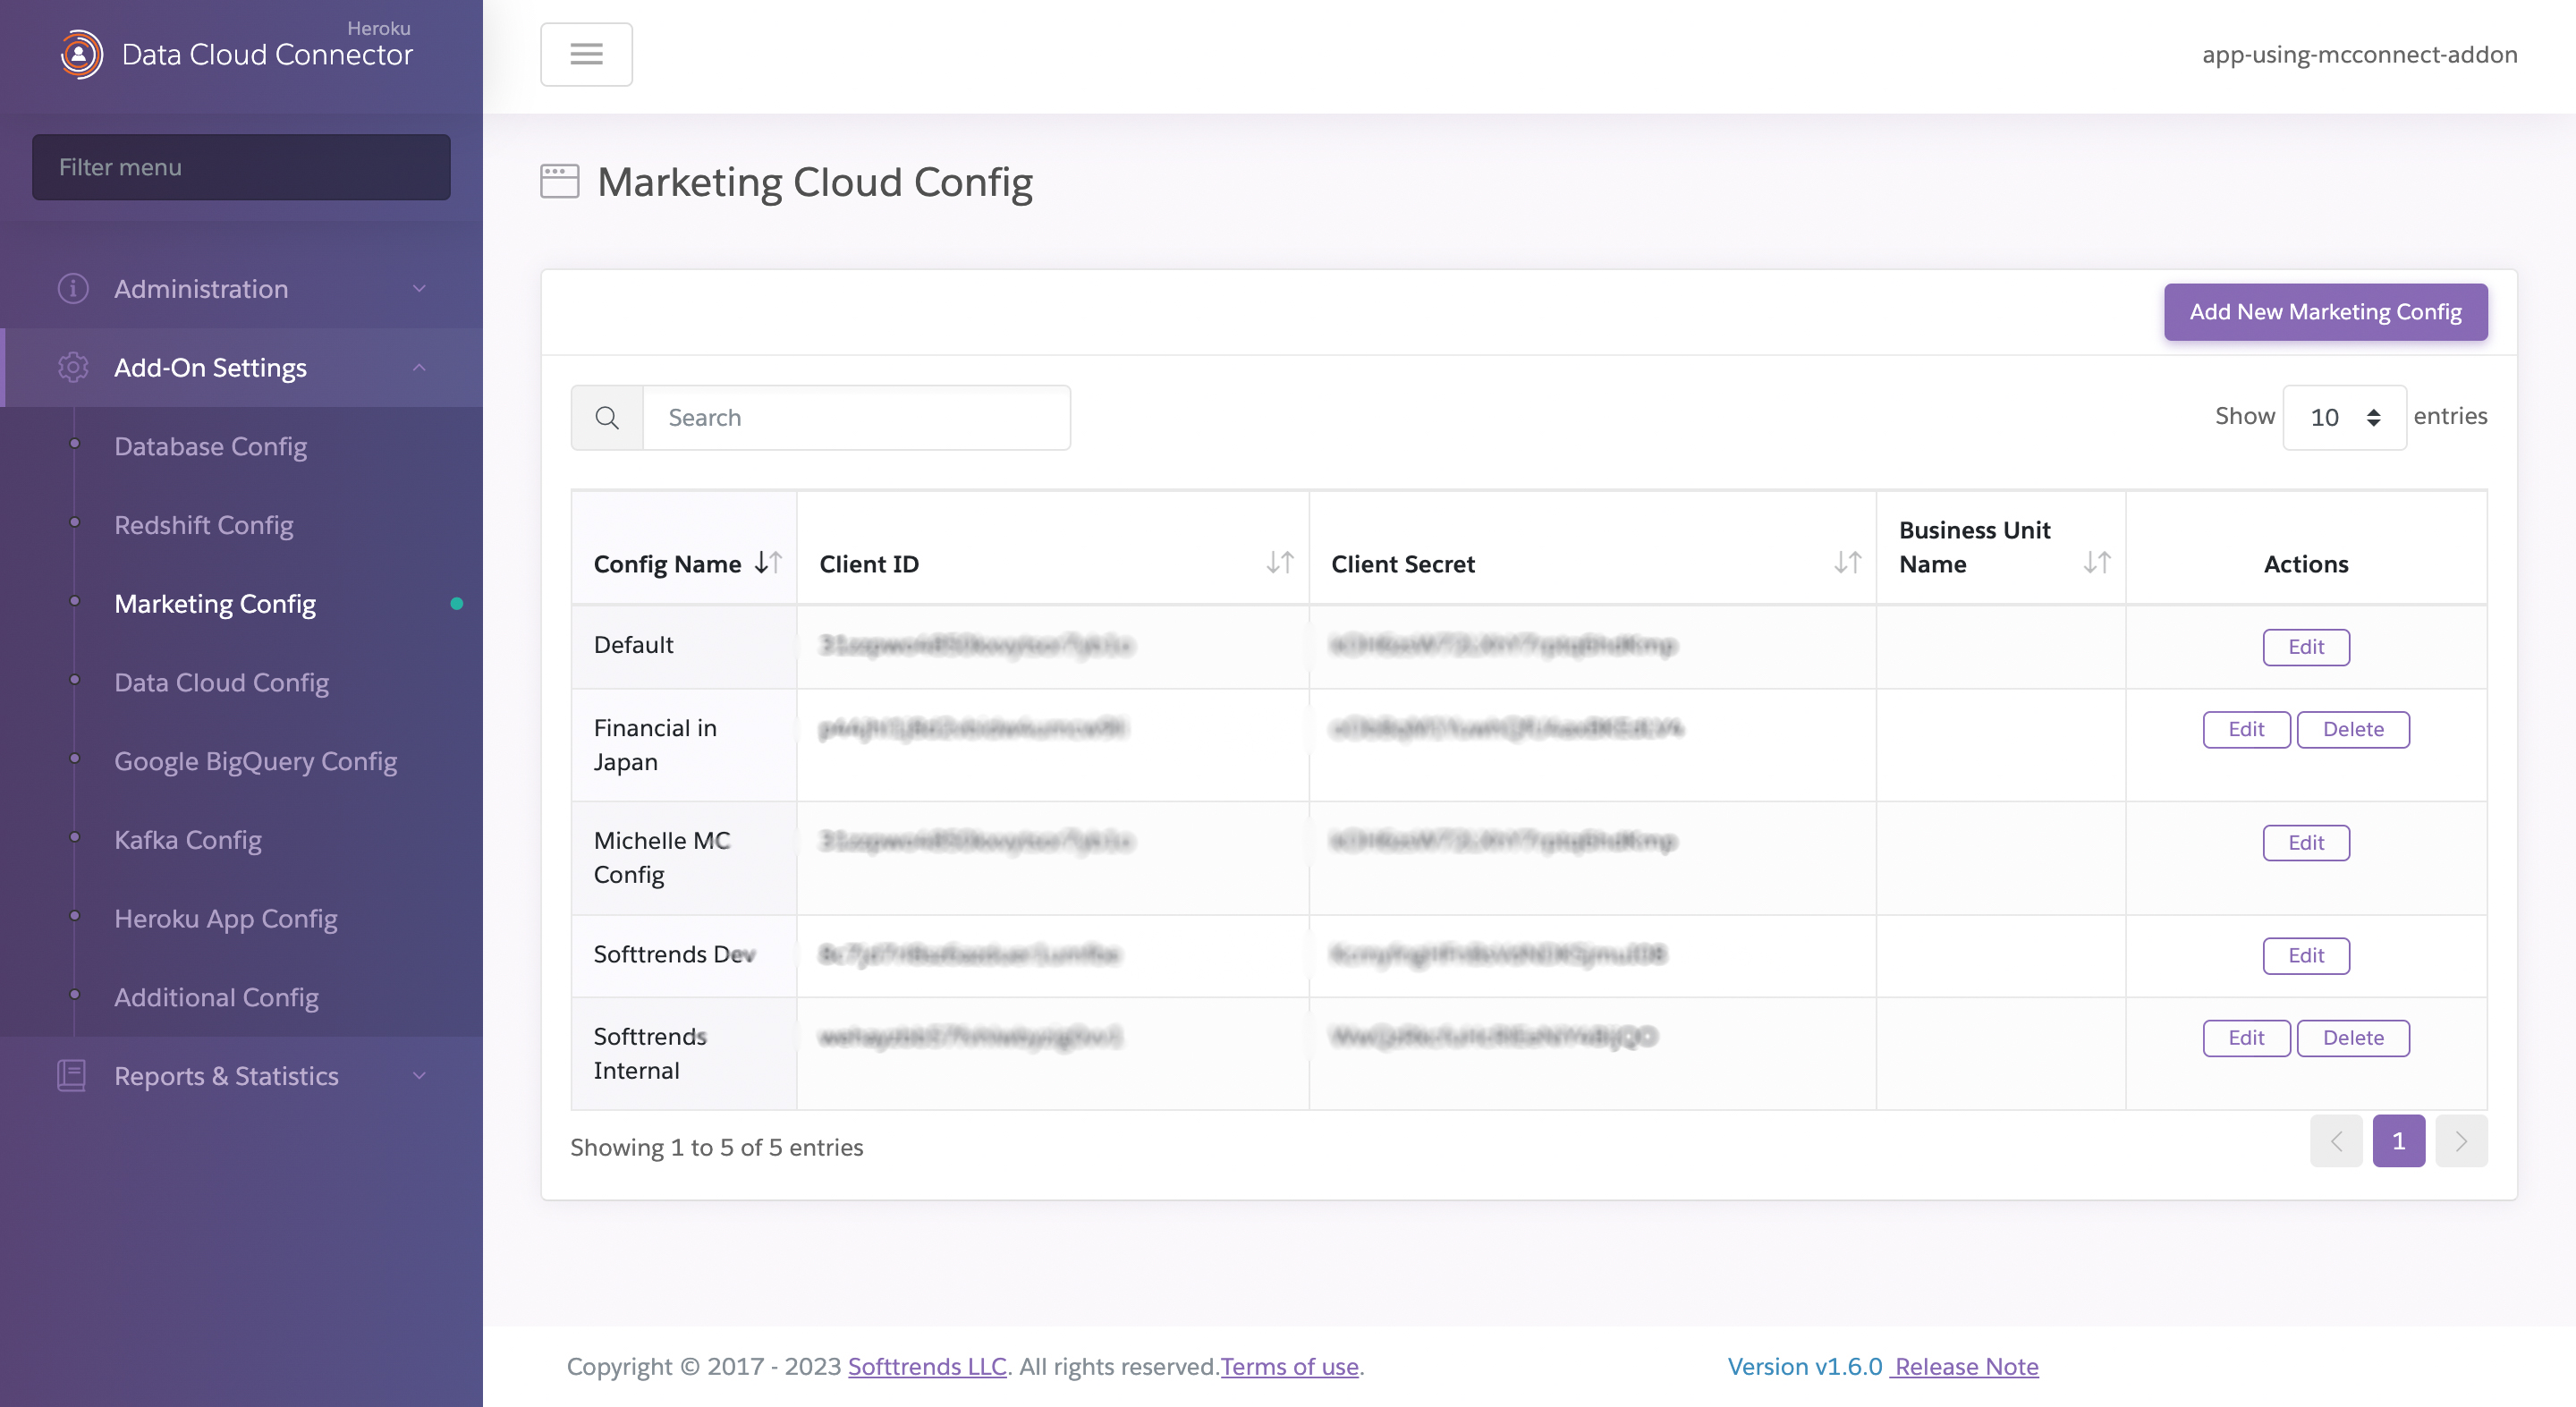
Clicking Edit on any of the listed configurations will let you edit the configuration or clicking Add New Marketing Config will allow you to create a new configuration.
Data Cloud & Marketing Connector can be used to sync data to/from Org’s root folder or any business unit. These are adjustable in Config settings
Configure the Add-on for Data Cloud
All Enterprise Edition Data Cloud & Marketing Connector plans support syncing data to and from multiple Data Cloud & Marketing Cloud instances.
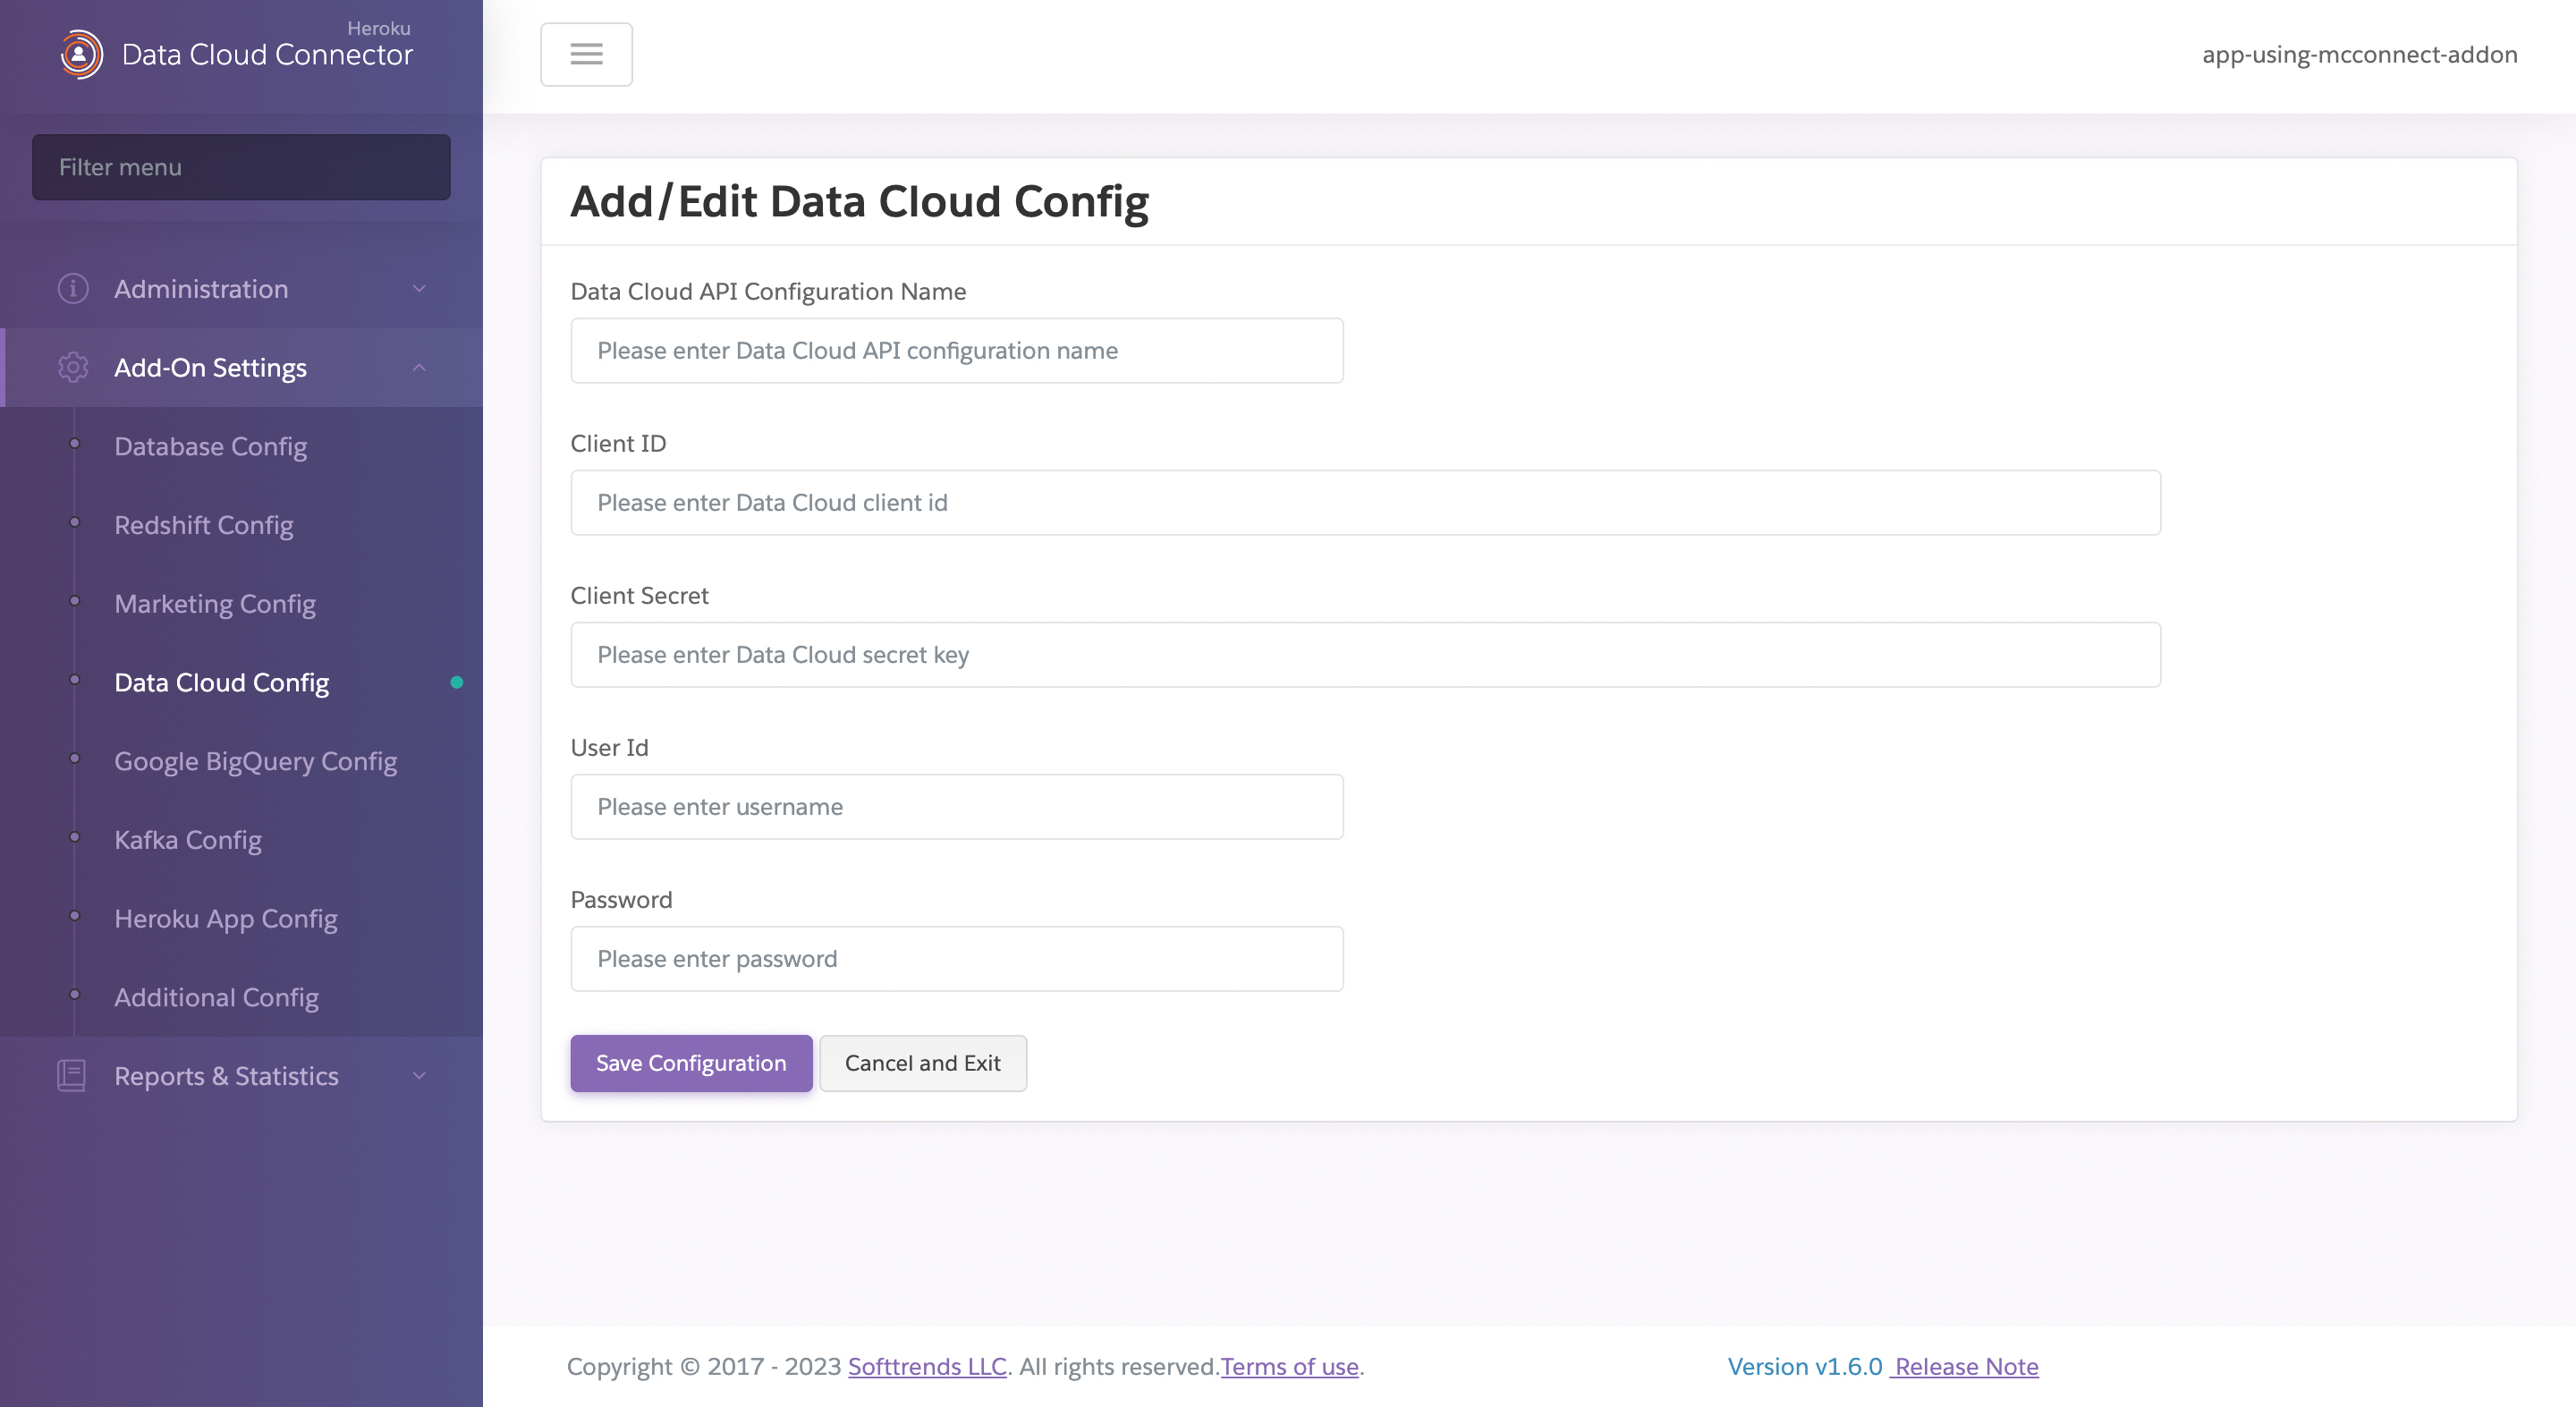
Click the Add-On Settings menu, then Data Cloud Config to provide Salesforce Data Cloud settings. The available number of Data Cloud settings vary depending on the current Data Cloud & Marketing Connector plan.
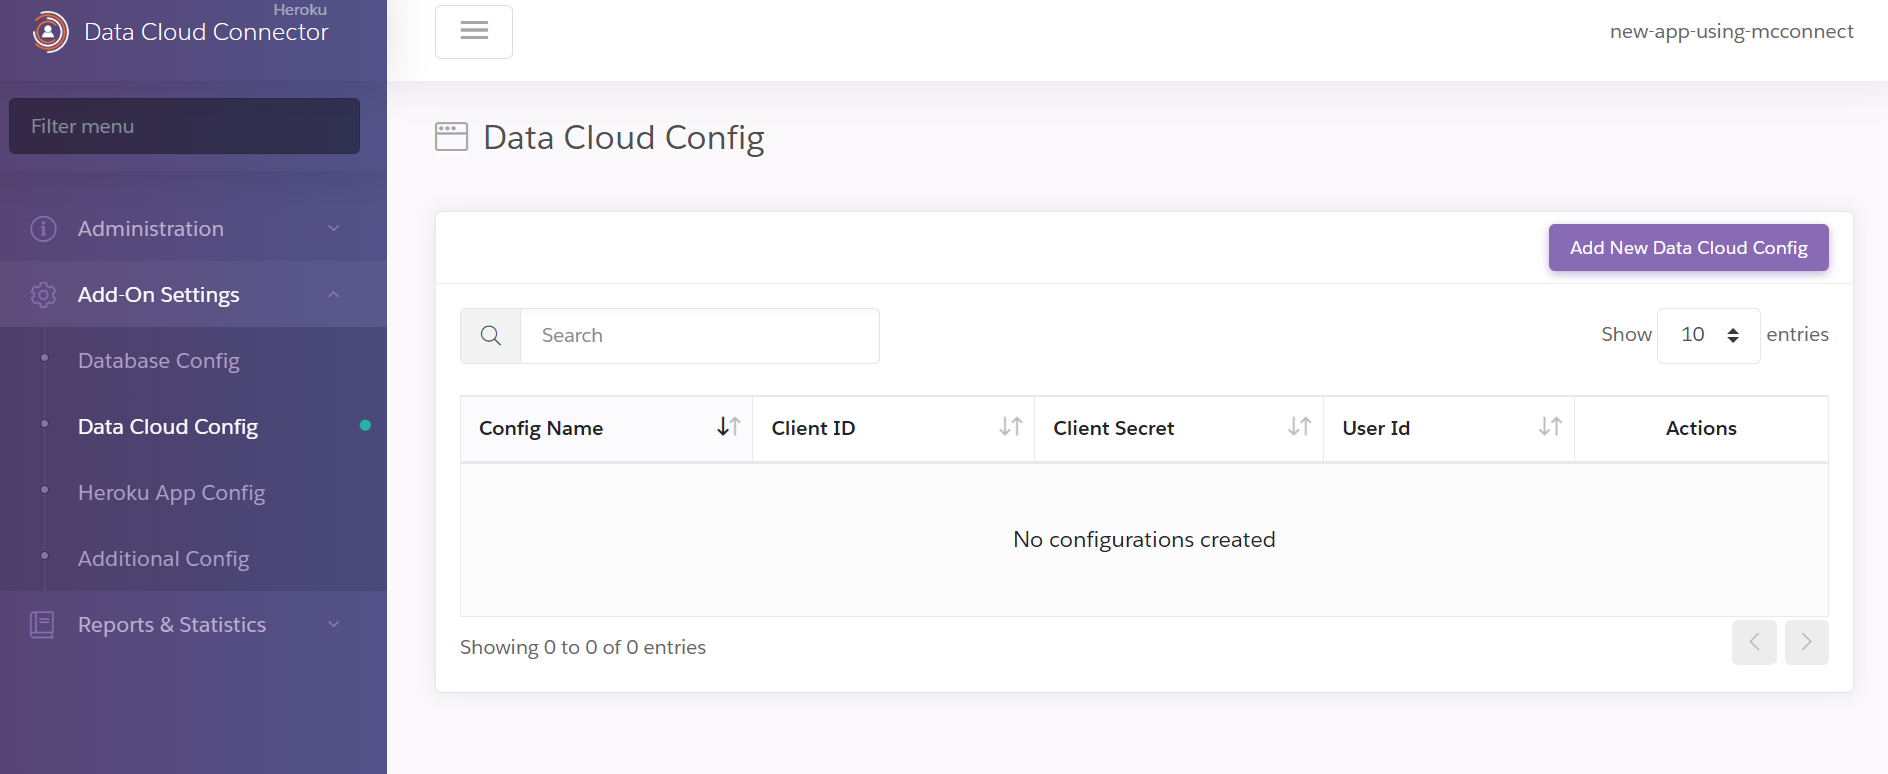
Configuration when accessing Add-on Settings for the First time
Click on Add New Data Cloud Config button and create the Configuration.
Add-on Plan Allows One Configuration
The configuration page shows a single configuration that you created. You can Edit the configuration, but the Configuration Name can’t be changed.
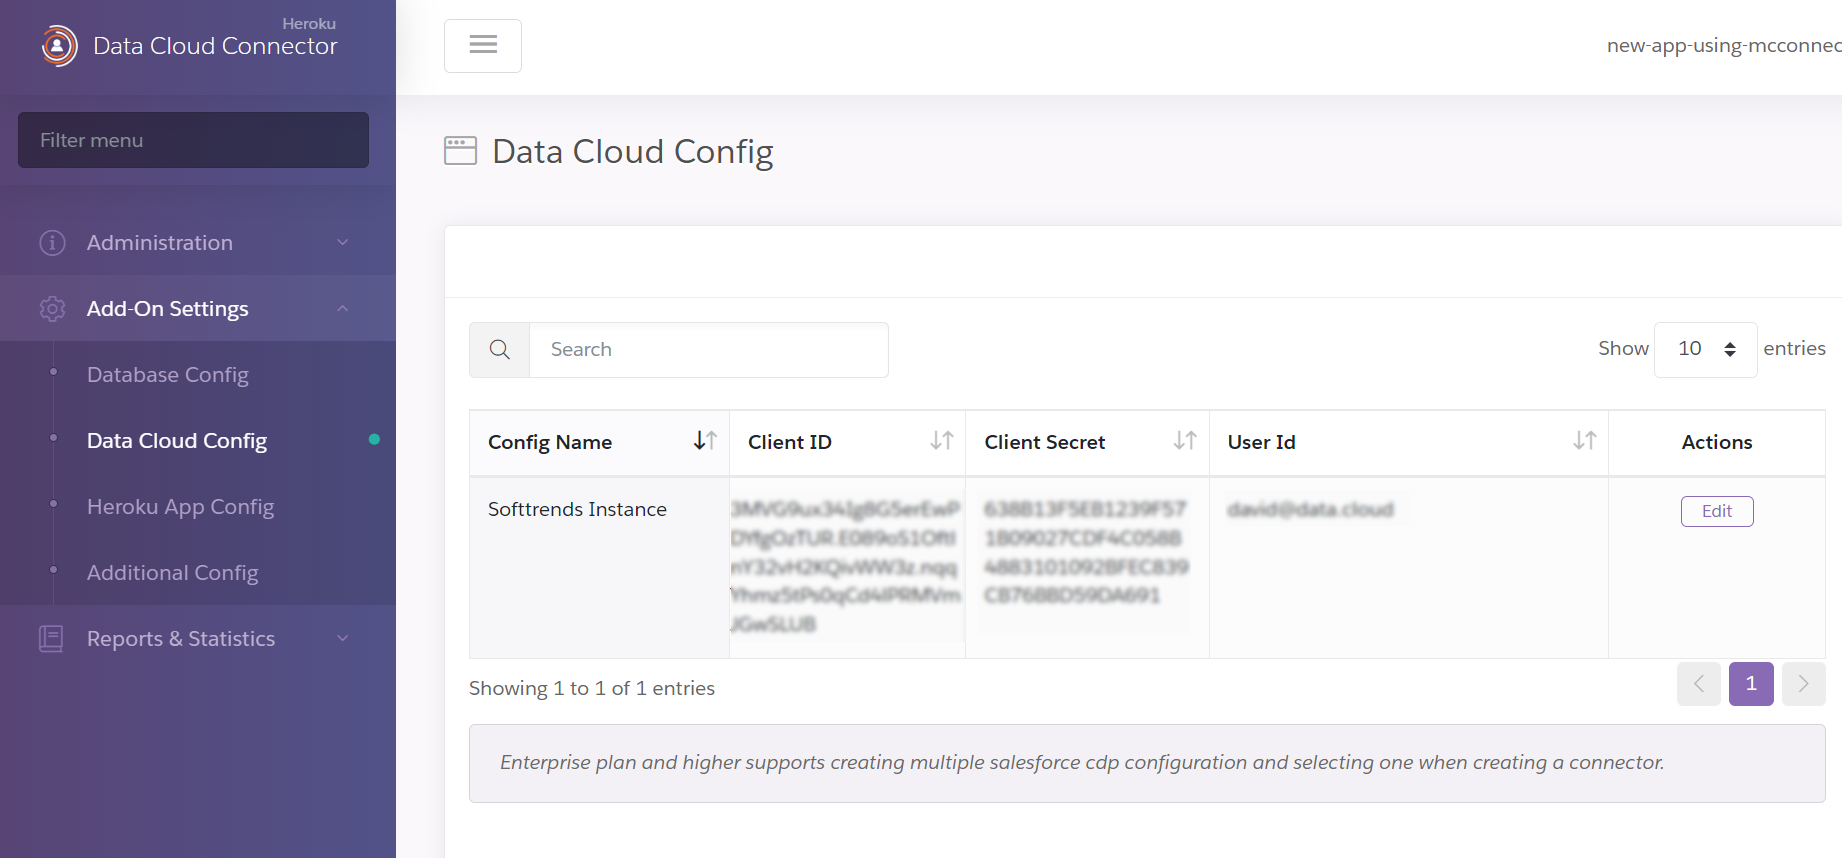
There will be No option to Add New Data Cloud Config.
Add-on Plan Allows Multiple Configurations
Configuration page shows a list UI of the configurations you have added, and the option to add new marketing configurations.
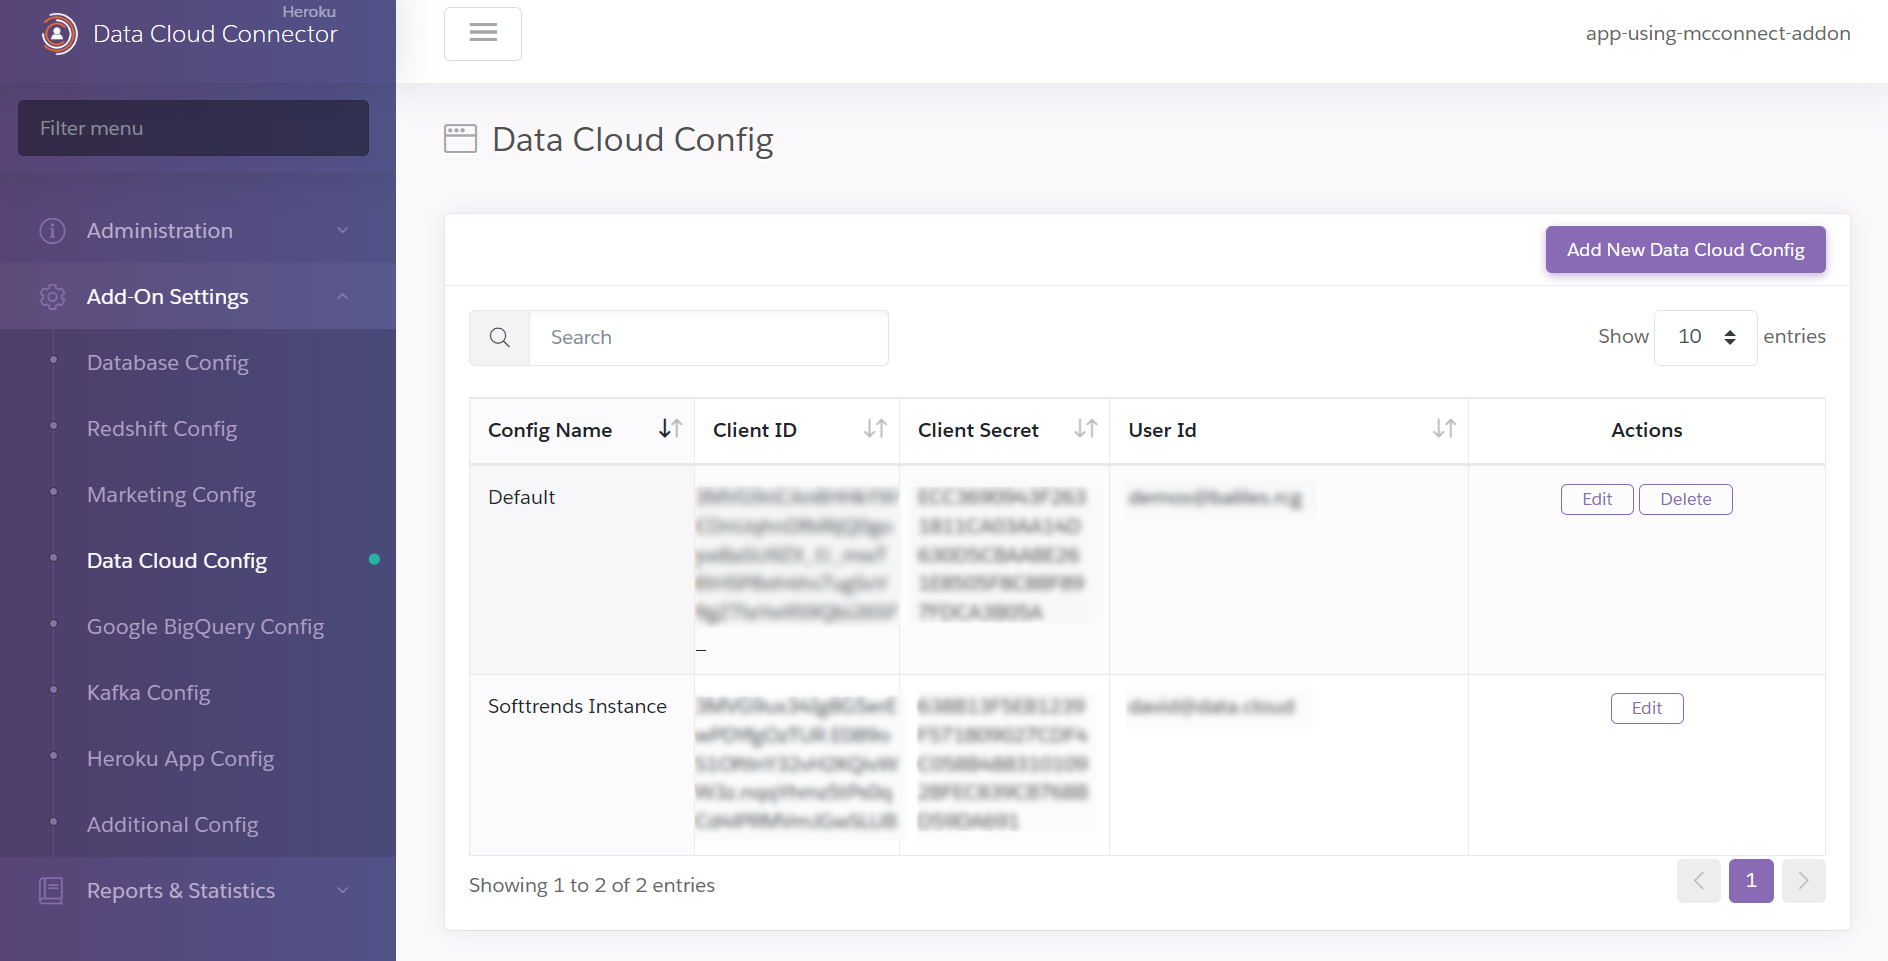
Clicking Edit on any of the listed configurations will let you edit the configuration or clicking Add New Data Cloud Config will allow you to create a new configuration.
Configure the Add-on for Redshift
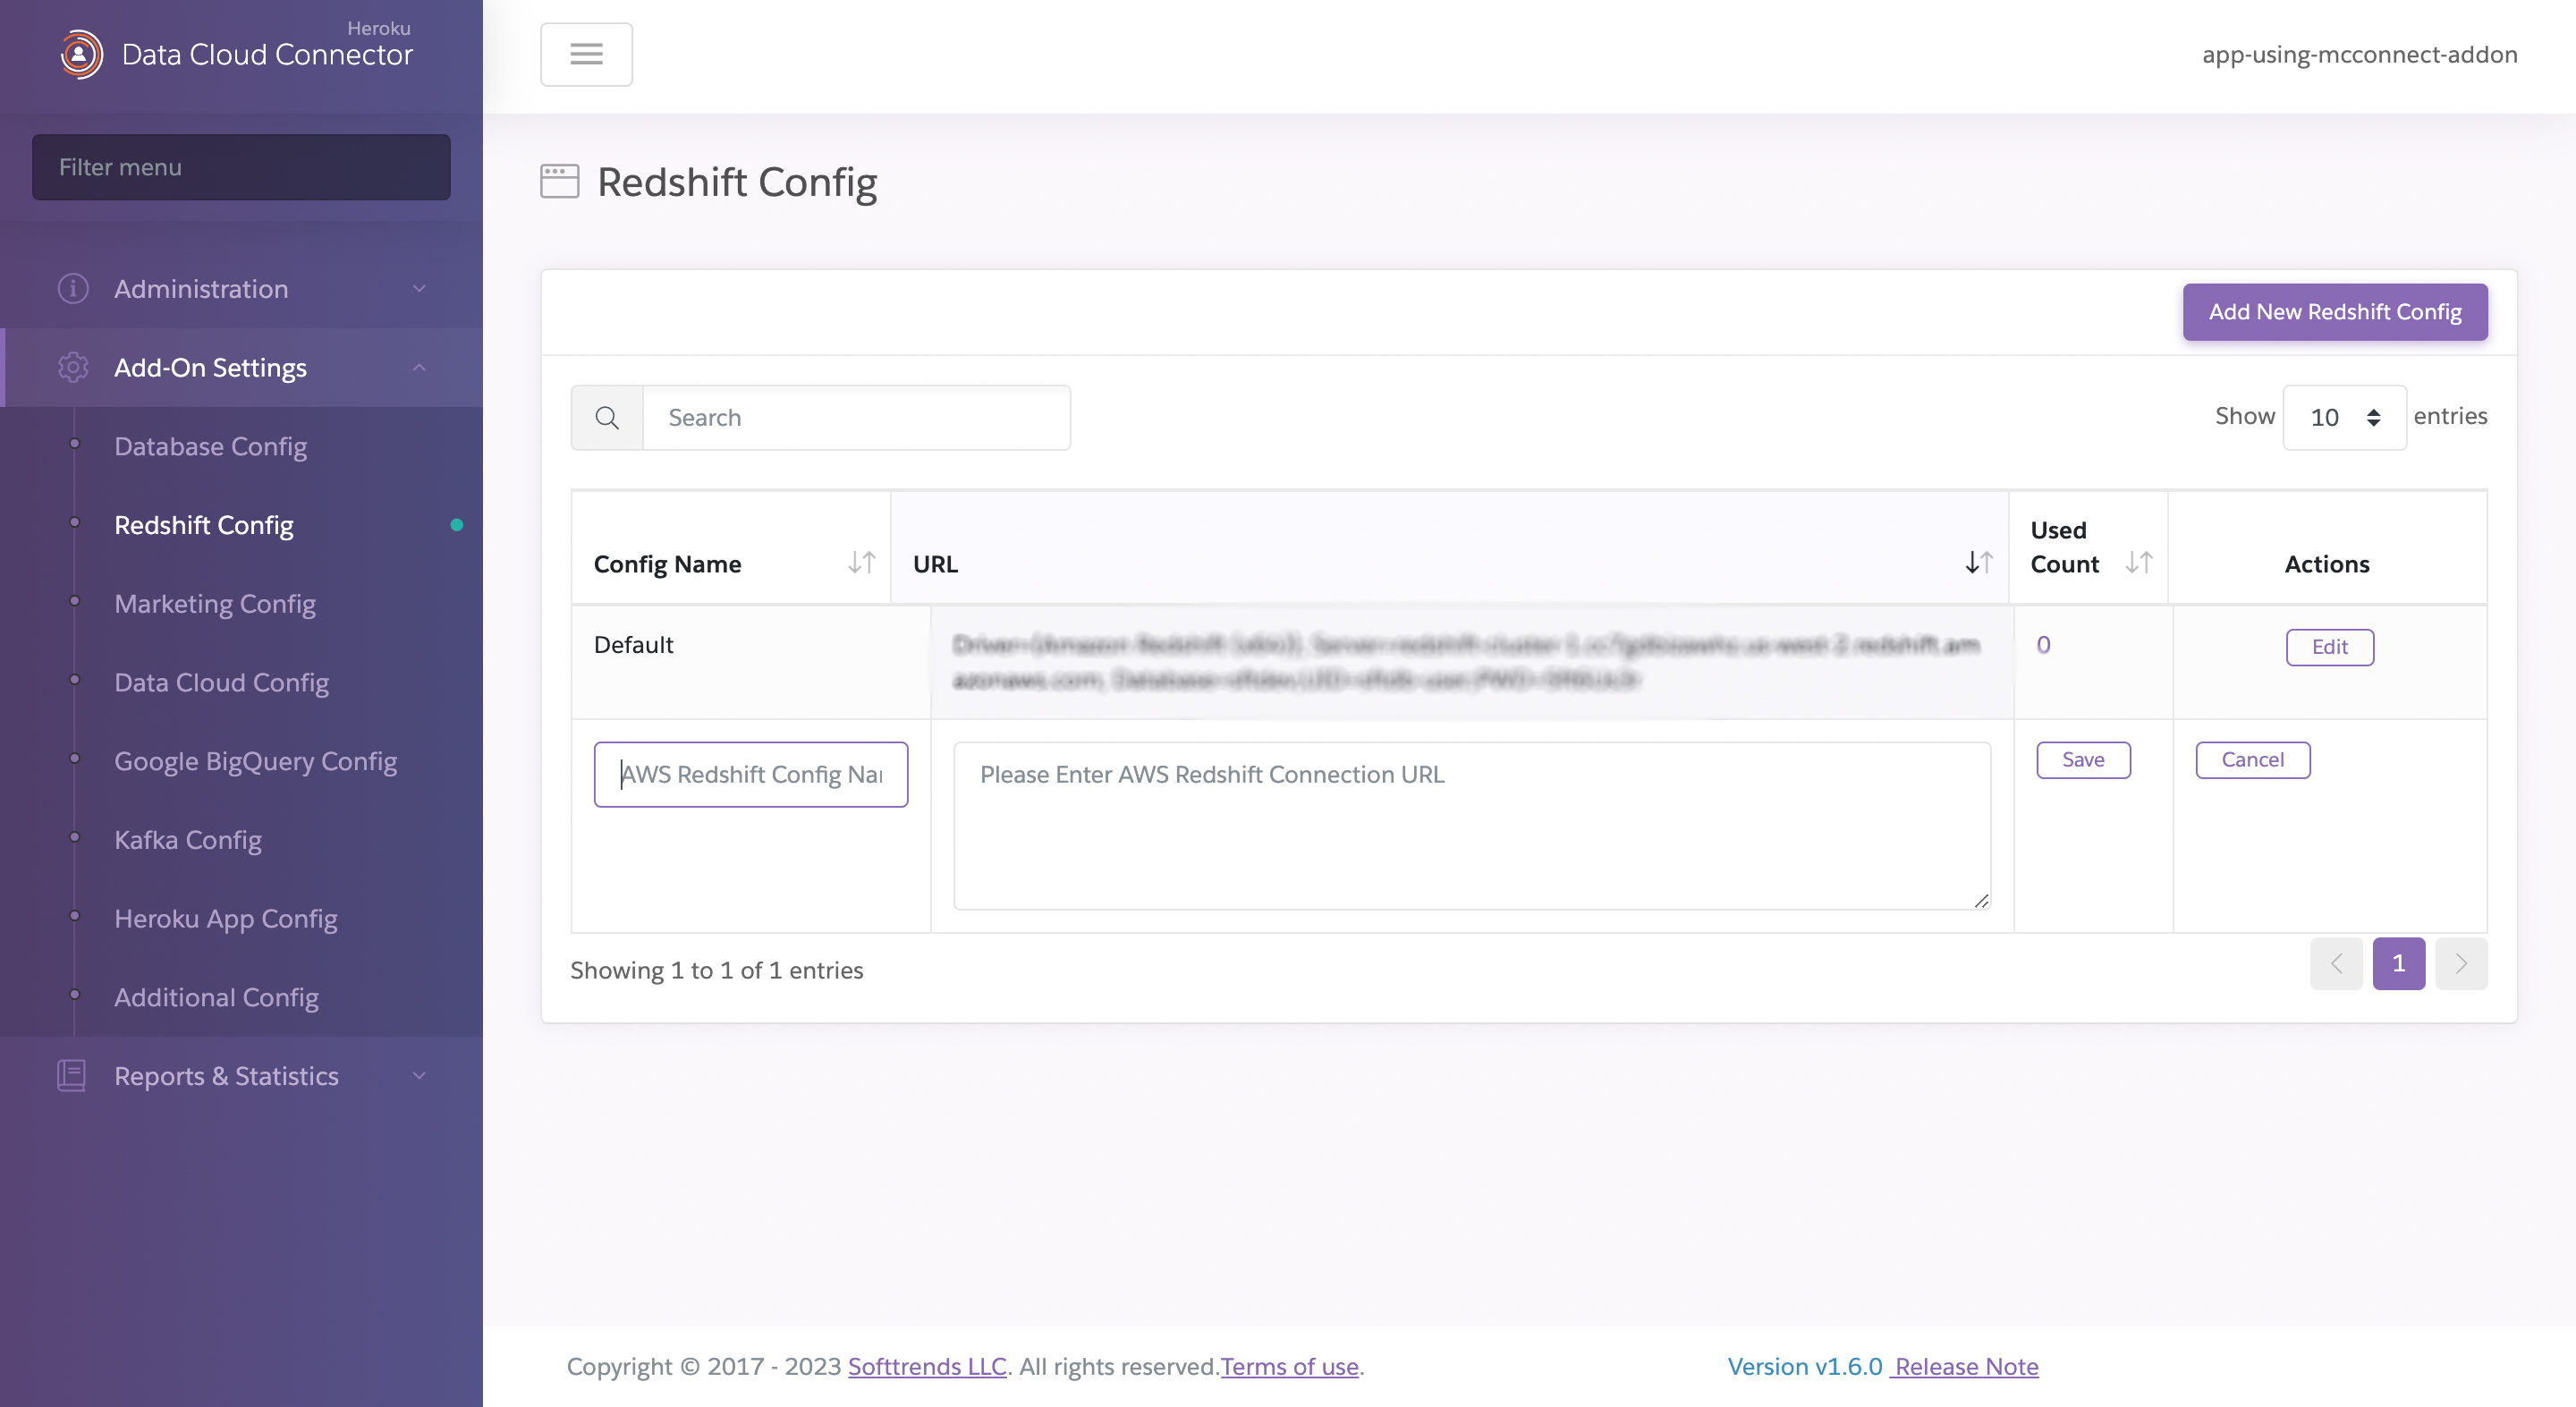
Click the Add-On Settings tab, then Redshift Config. For the first-time configuration, enter the Default AWS Redshift Database URL and click Save.
If a configuration exists, click Edit, update the URL as necessary and click Save.
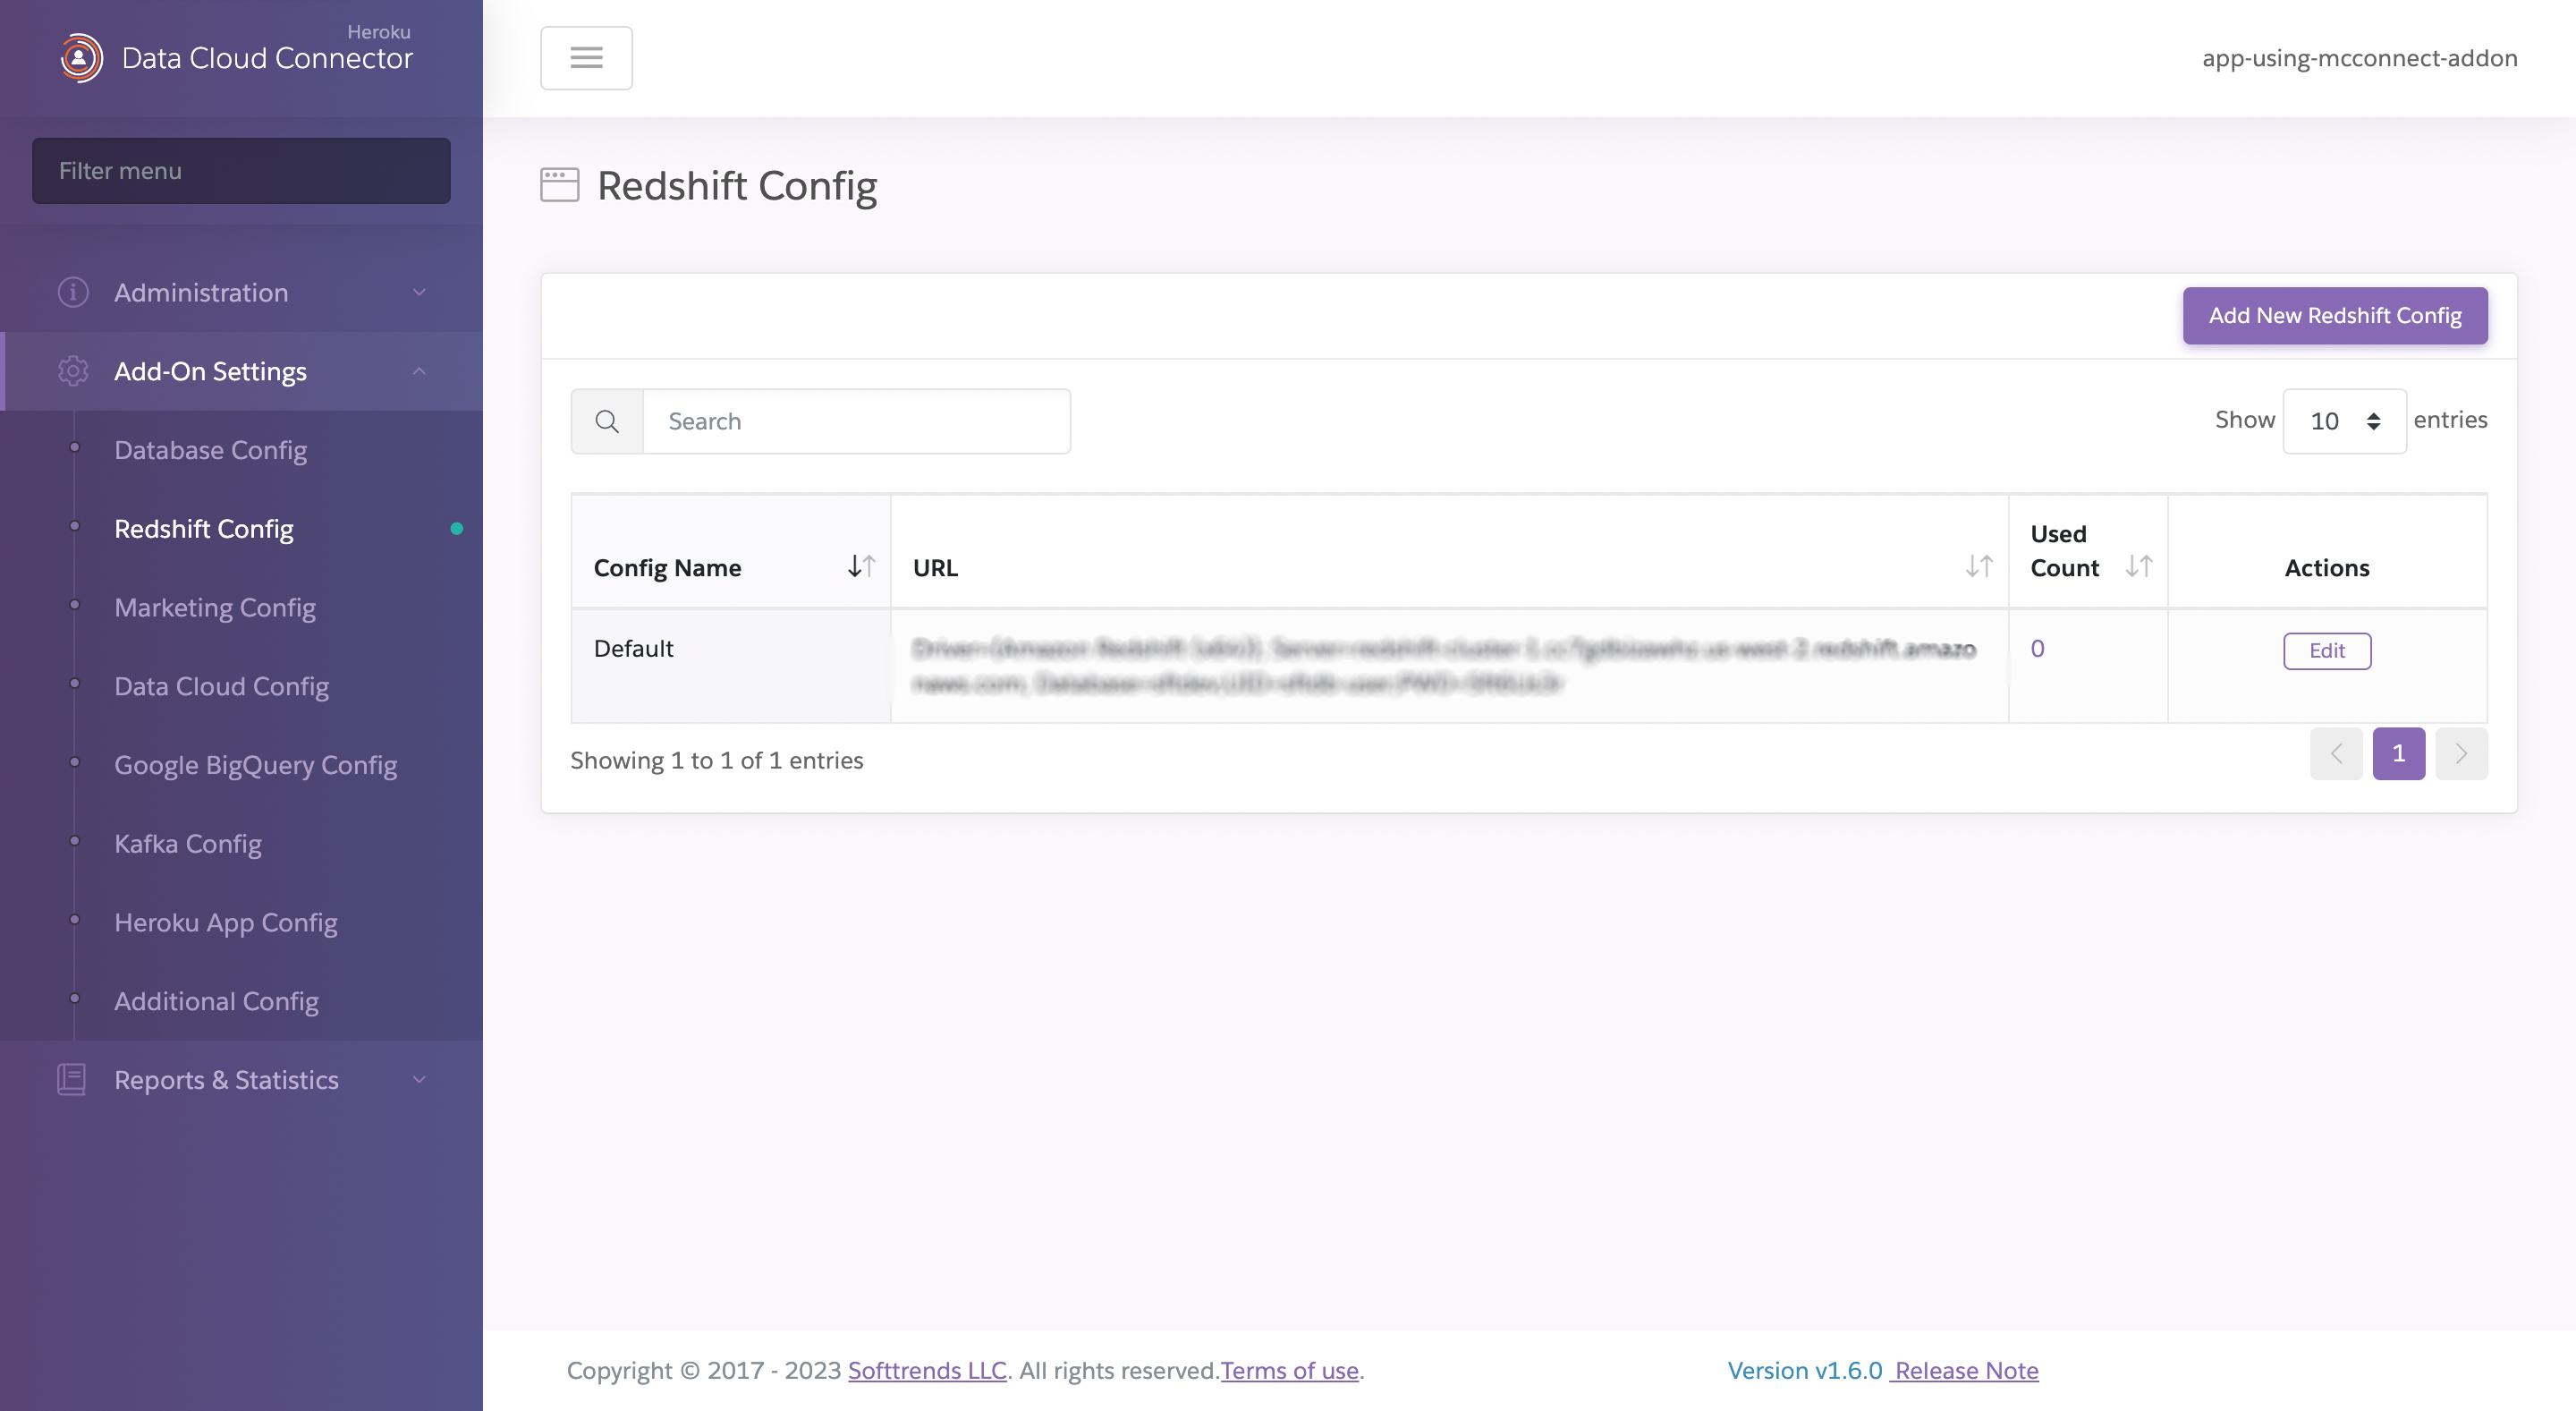
Multiple Redshift Configuration Support
Supported Data Cloud & Marketing Connector plans allow multiple database URLs. Click Add New URL** to add additional URLs with custom names to the configuration.

When creating a new connector that uses Redshift, a drop-down menu displays the available configured database URLs.
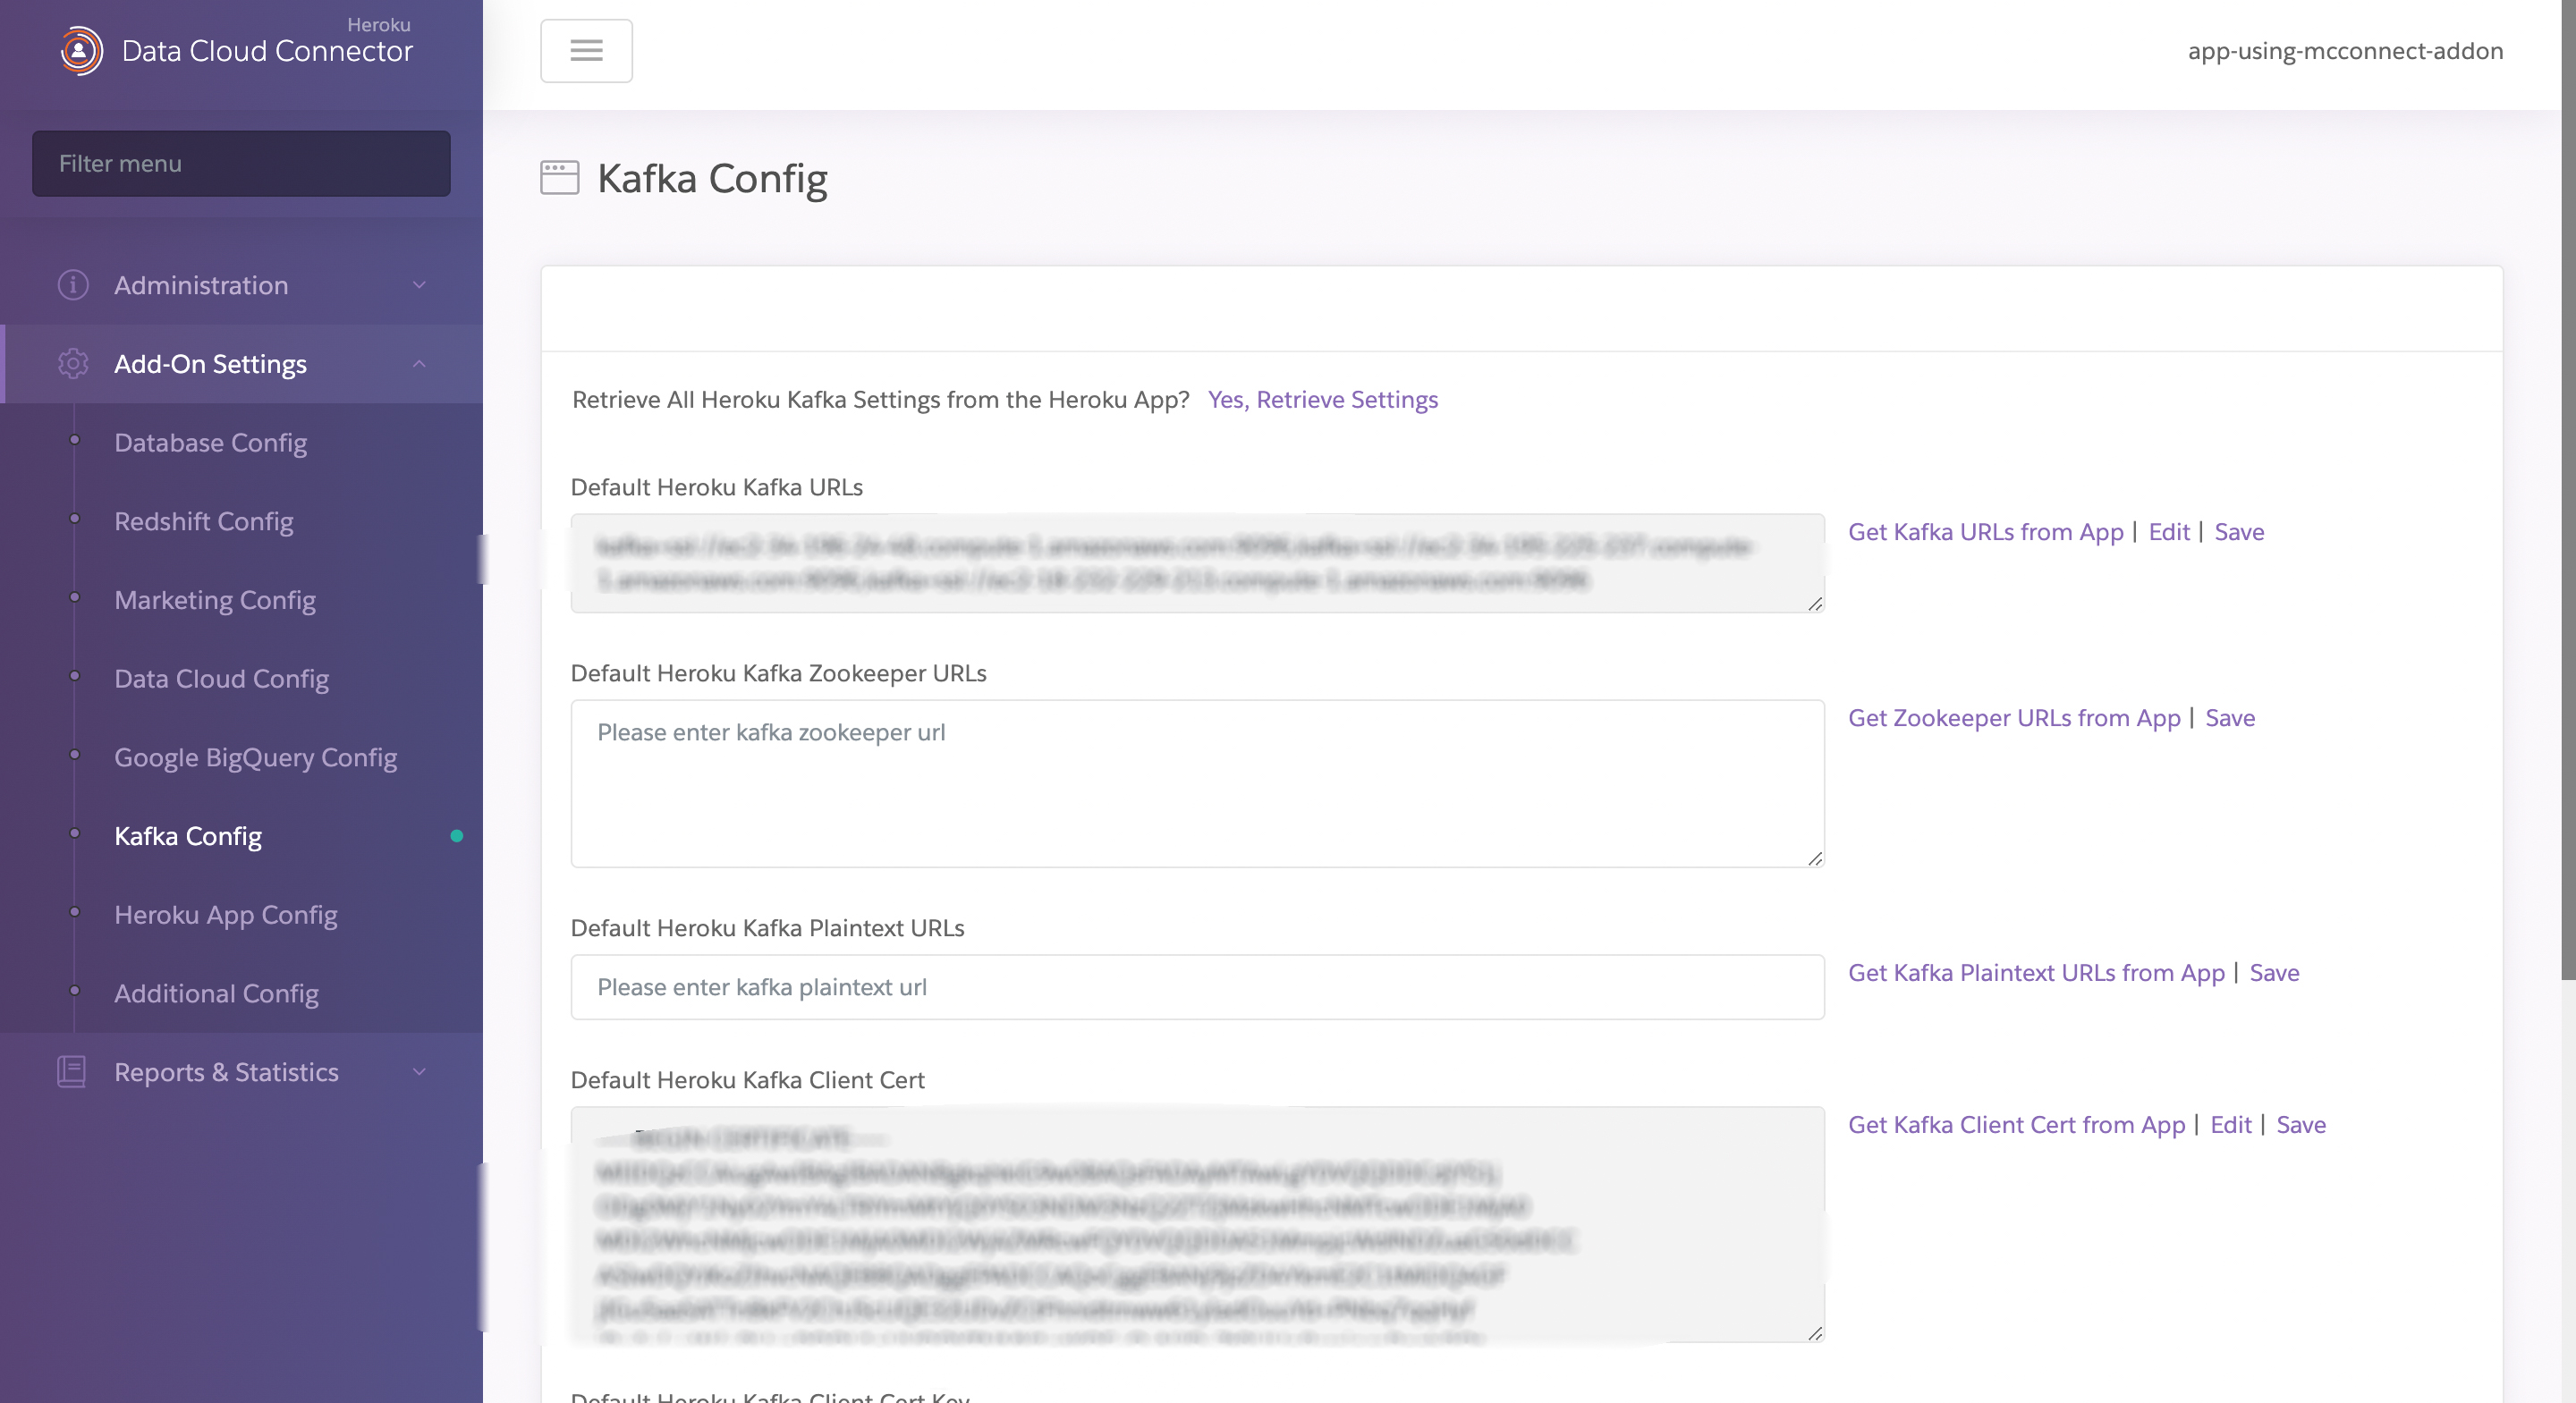
Configuring the Add-on for Kafka
Click the Add-On Settings tab, then Kafka Config. If Apache Kafka on Heroku is attached to the same app as Data Cloud & Marketing Connector, click Get Kafka URLs from App to auto-detect the cluster URLs.
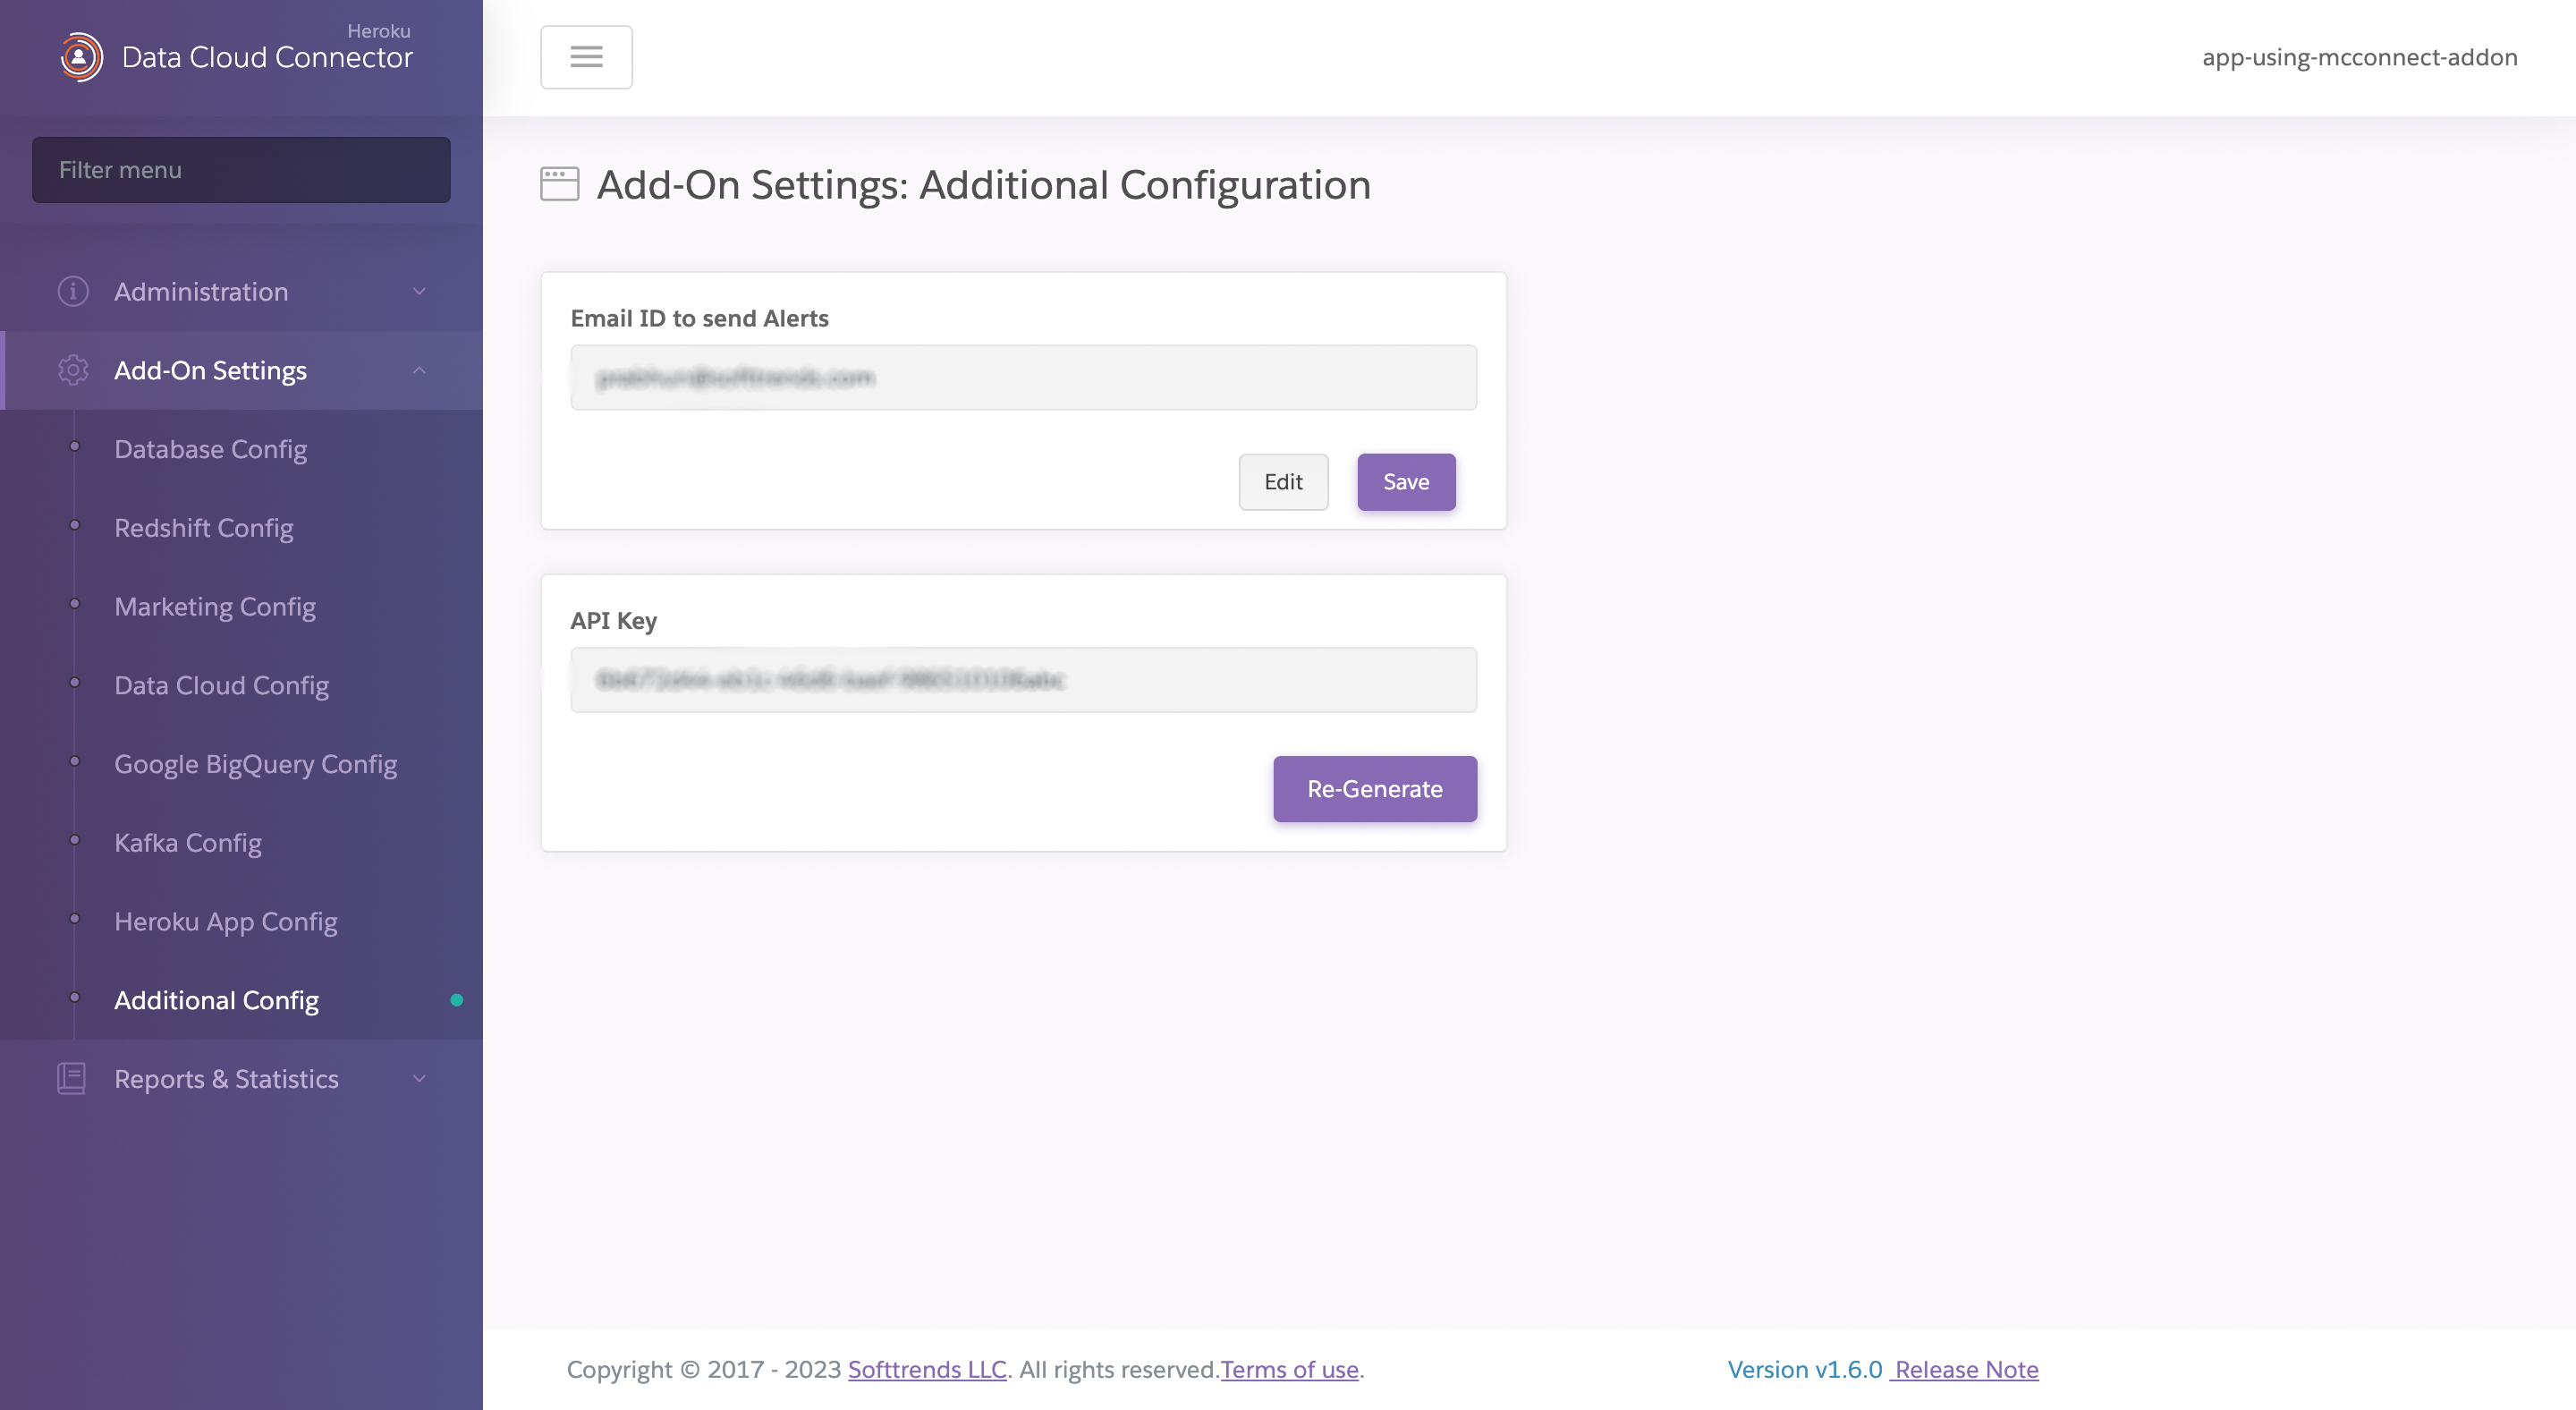
Configuring the Add-on for Alert Notification
Click the Add-On Settings tab, then Additional Config to configure Data Cloud & Marketing Connector to send alert notifications via Email. This page also displays the API Key used to access the Data Cloud & Marketing Connector API.

Create a Data Cloud to Postgres Sync Connector
Step 1: New Connector
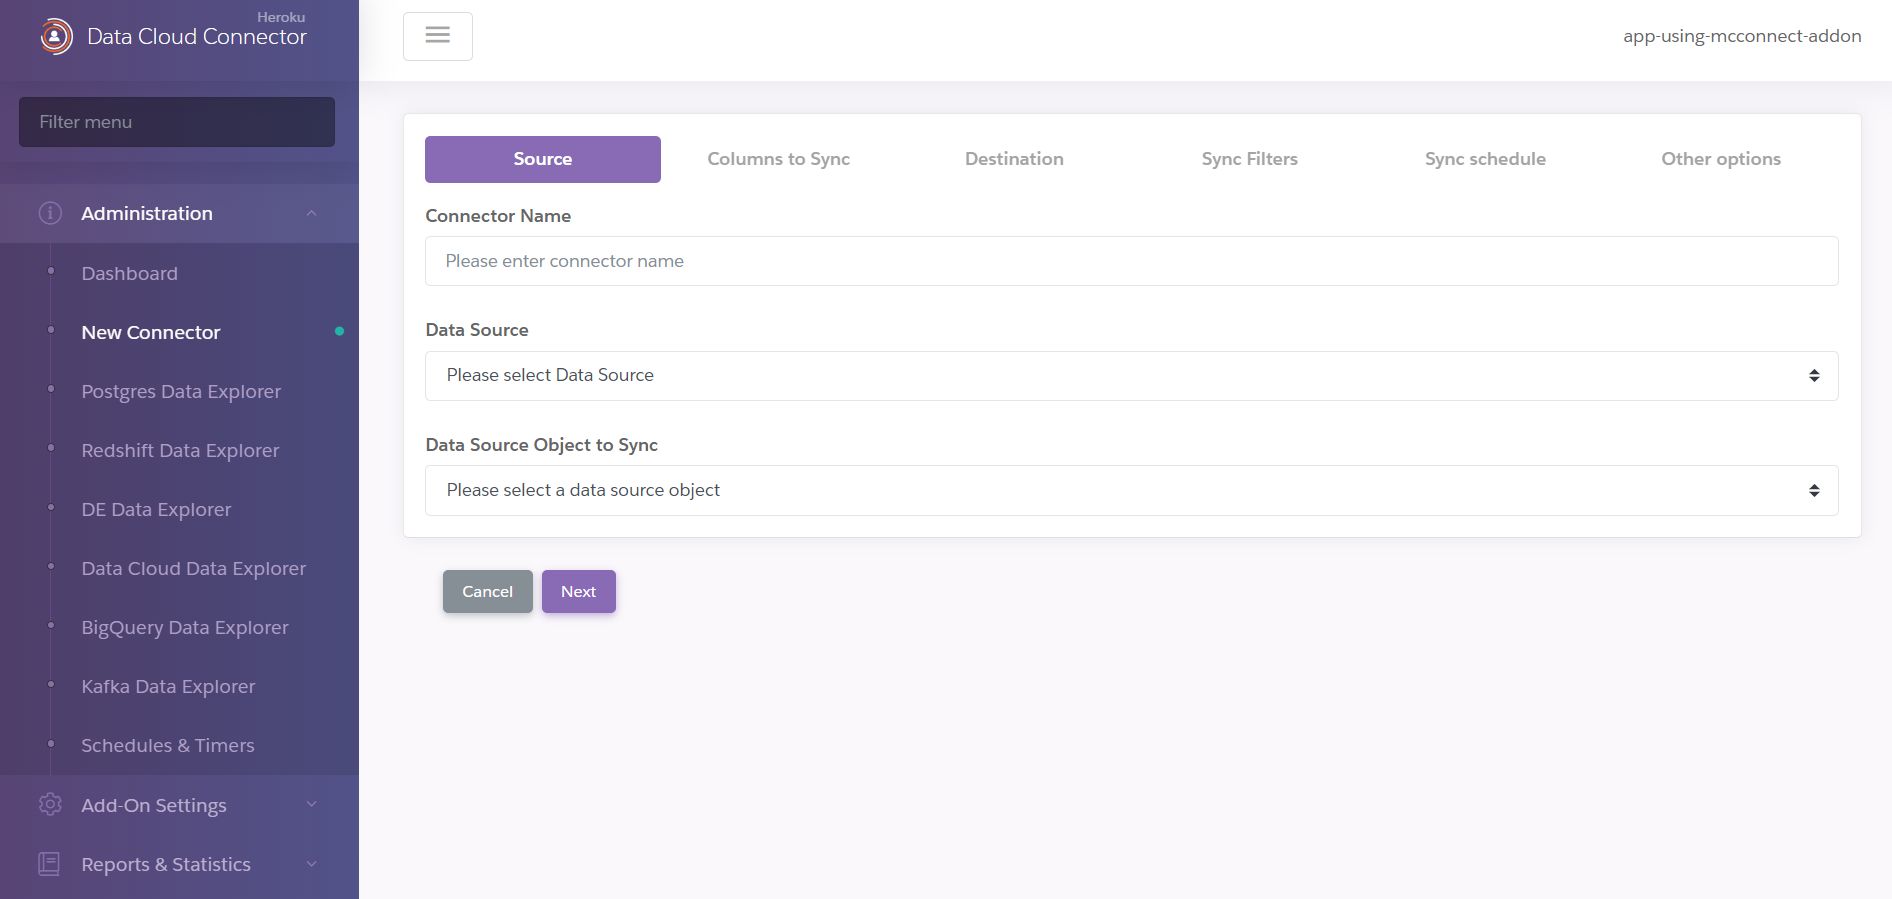
Select New Connector from the Administration Menu.
When it is selected, the first screen displayed for you to Specify Source. Since you want to sync Data Cloud to Postgres, you must select Data Cloud as Source.
Specify Data Cloud Source Details
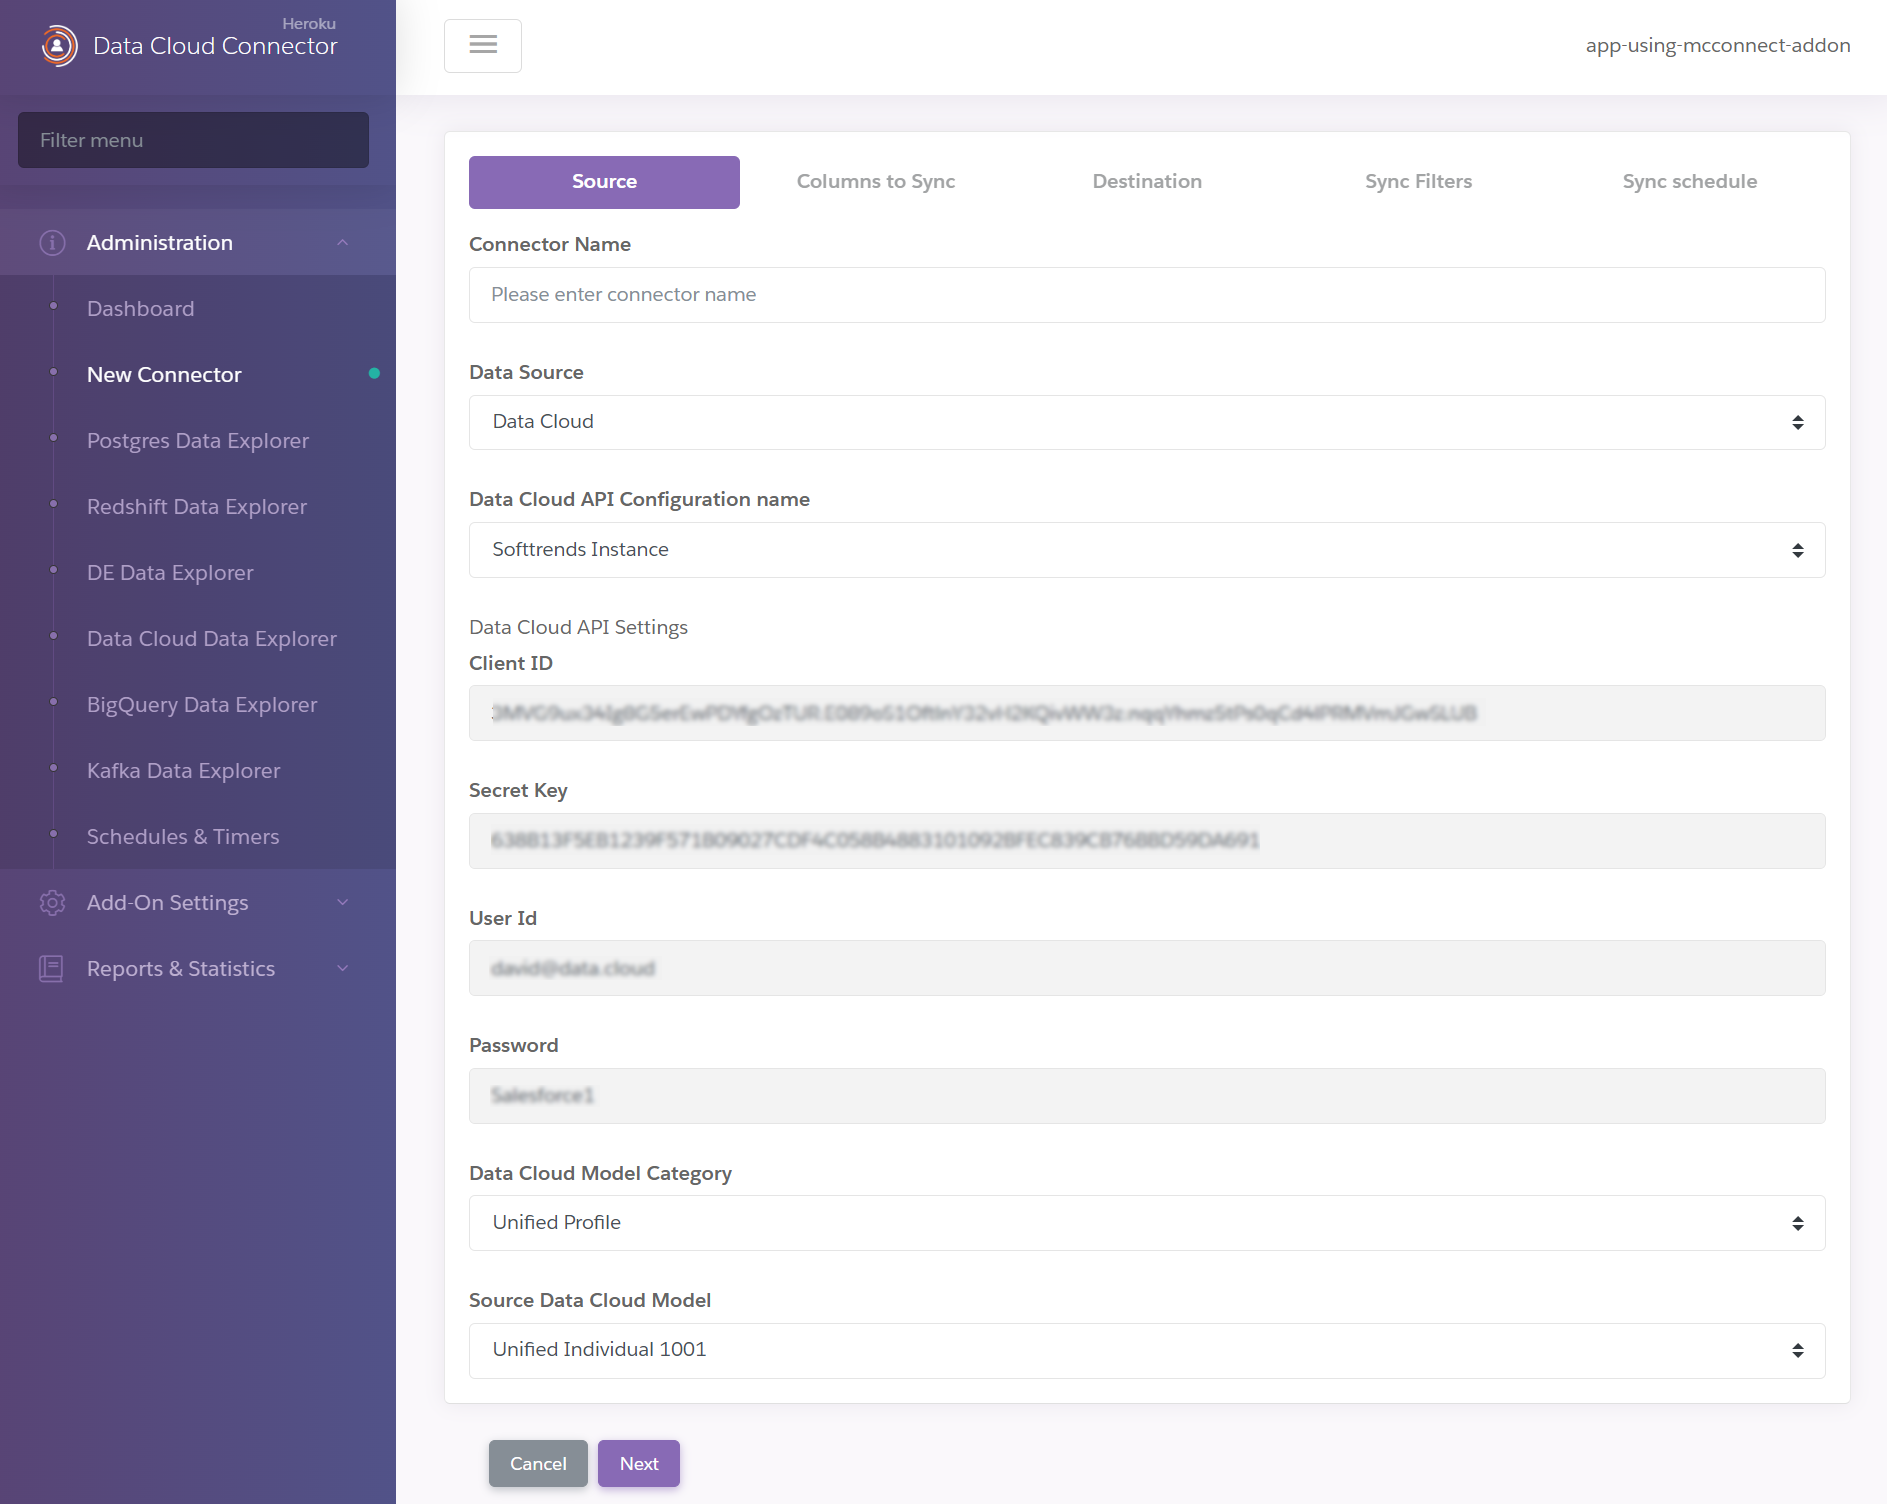
Connector Name: A custom value that describes the connector (for example, Subscriber Profiles).Data Source: Select Data Cloud.Data Cloud API Configuration Name: Select a configuration name (name you have used for the configuration in Data Cloud config menu). The parameters Data Cloud API Settings, Secret Key, User ID, Password will be automatically filled in from the selected API Configuration. If you have provisioned any of the Enterprise plans, you can also selectCustomas configuration name and enter the configuration parameters here.Data Cloud Model Category: Dropdown will show the category of Objects that you can sync from Data Cloud. Usually they are Profile, Engagement, Related, Segment_Membership, and Unified Profile.Source Data Cloud Model: A list of Data Cloud Models available in Data Cloud of the Data Cloud Model Category you selected above will be listed.
Click on Next to go to specify Object Columns.
Specify Data Cloud Source Object Columns
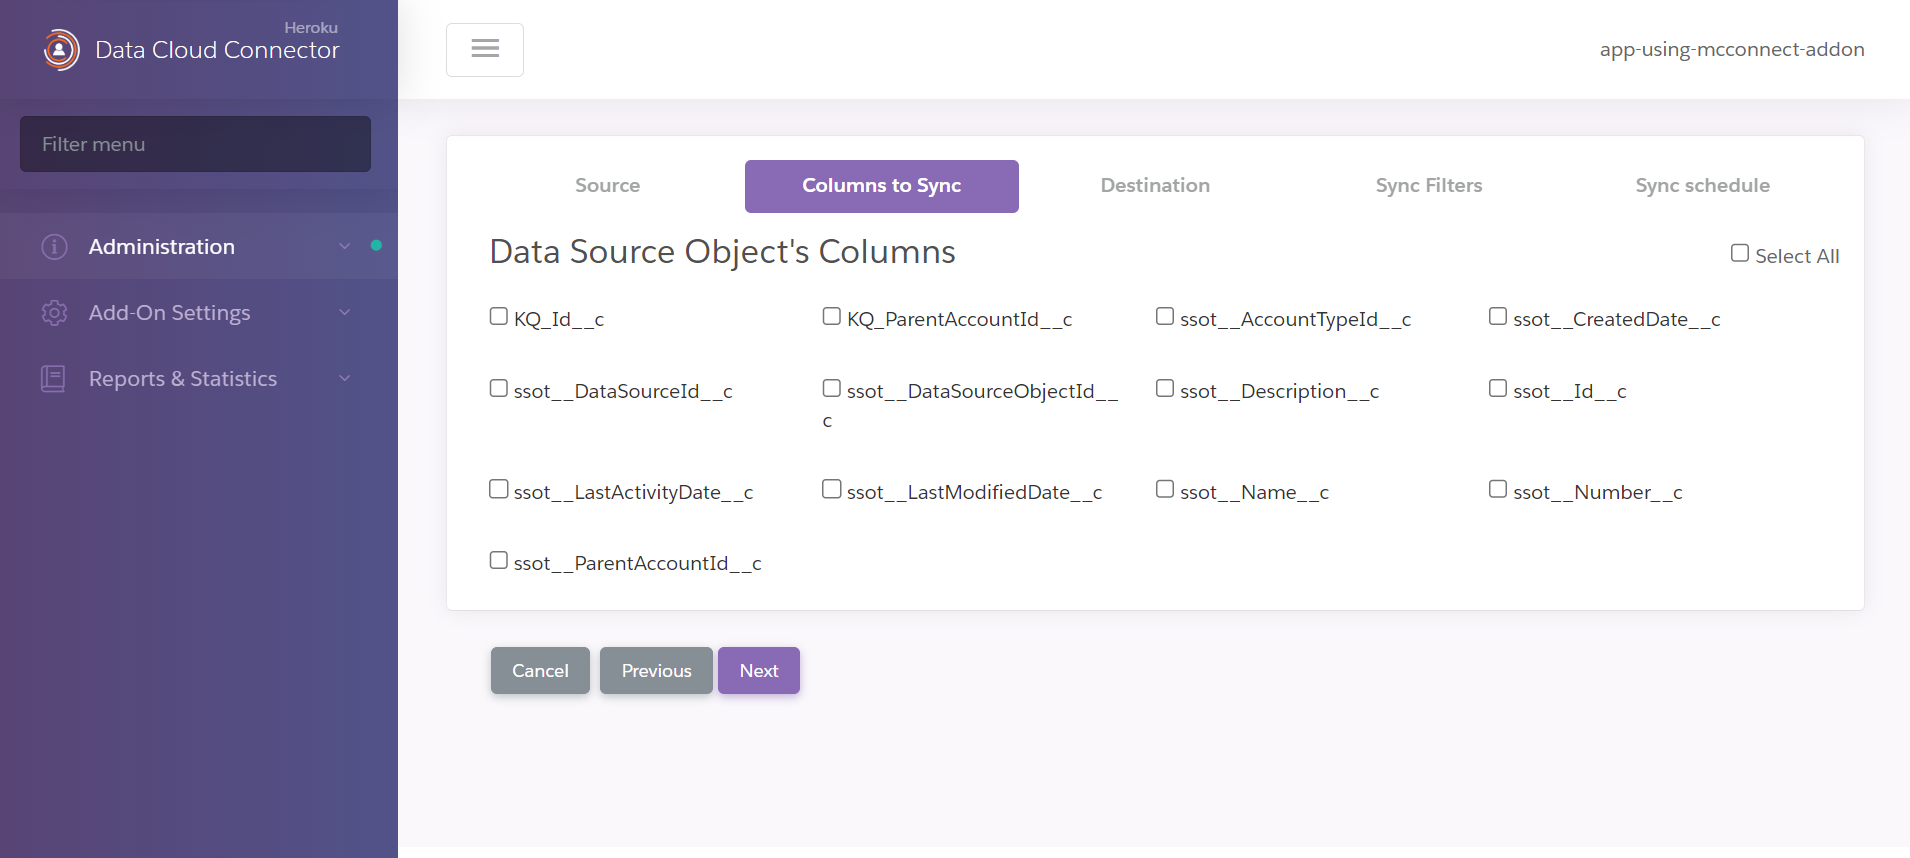
Data Source Object’s Columns: Select the columns you want to sync. You can use Select All if you want to sync all columns.
Click on Next to go to specify Postgres Destination.
Specify Postgres Destination Details

Destination: Select any Postgres e.g., Heroku Postgres.Database URL Name: Select a configuration name (name you have used for the configuration inDatabase configmenu).Postgres Database URL: Automatically filled from the configuration name selected above.Postgres Schema (Destination): Schema where you want the destination Postgres table to be created.Postgres table (Destination): Name of destination Postgres table.
Click on Next to go to Sync Filters.
Specify Sync Filters
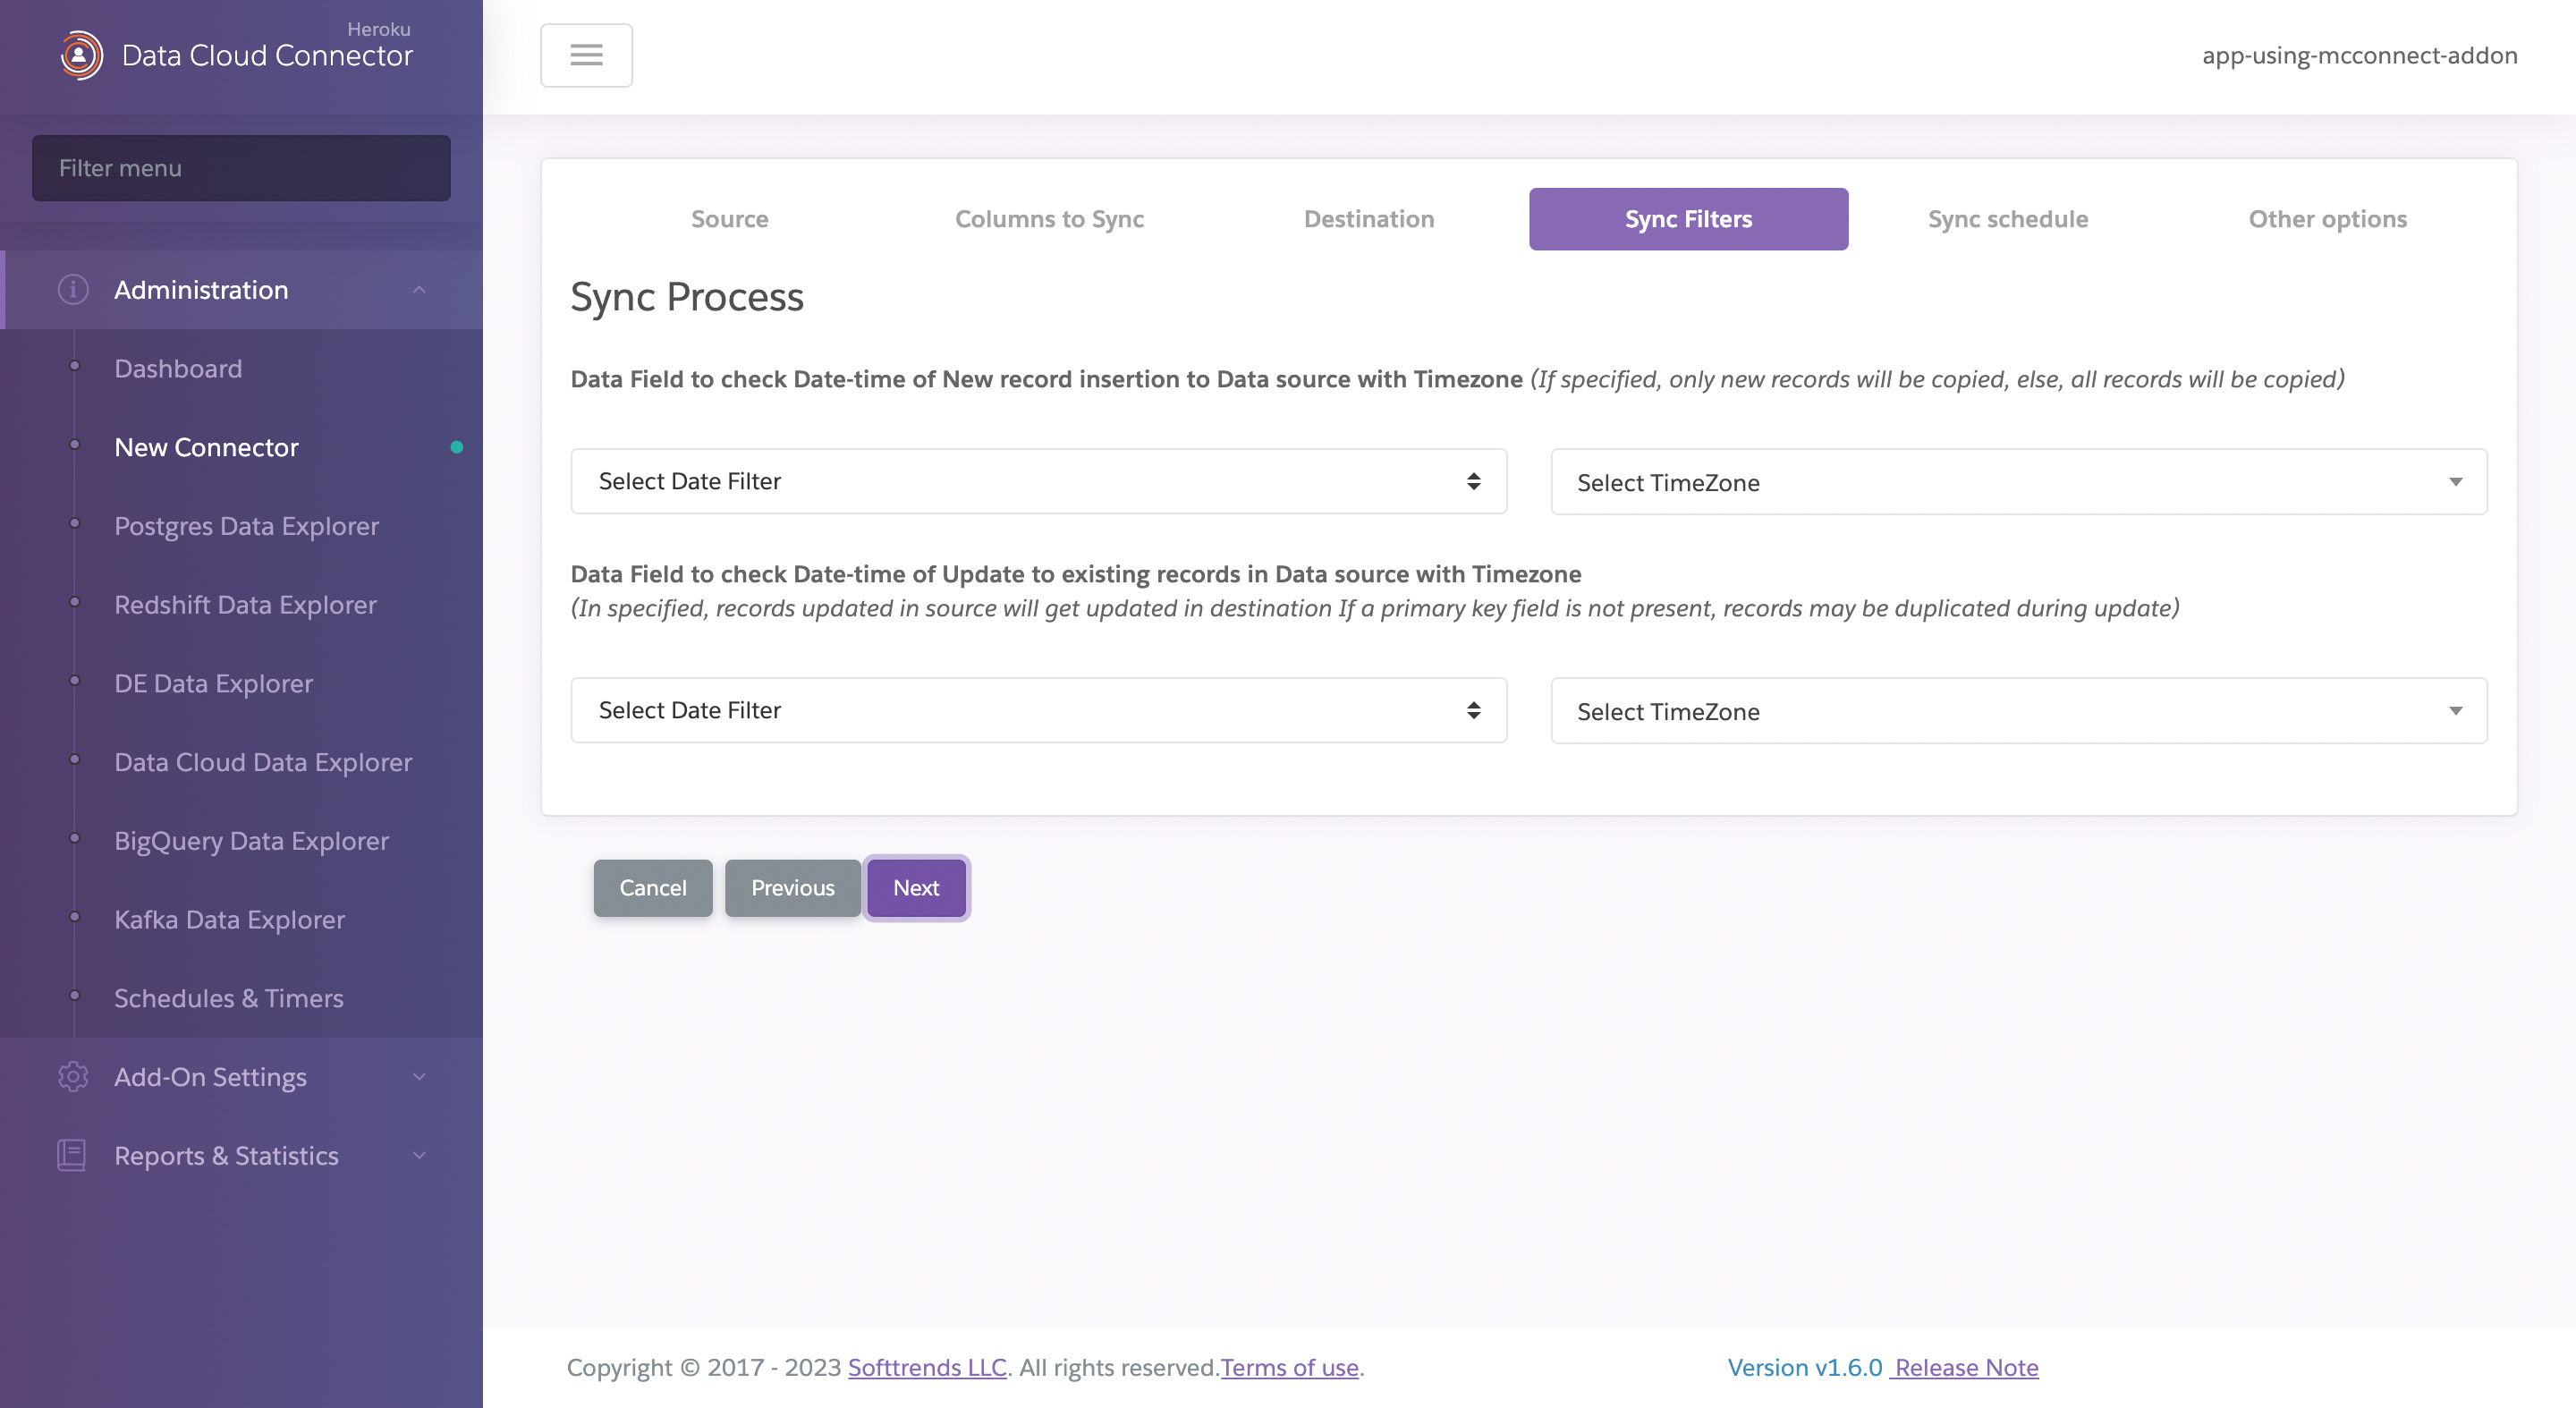
Sync Filter is optional, and it can be used if you maintain Created and Updated datetime stamps and want to sync only the records that are synced that are created/updated after the Last Sync. Since the first time when connector is synced, there is no previous Last Sync recorded, all records will be synced.
Date Filter for New record insertion: Select the Datetime field that you write current system time to when you insert a record to Data Cloud objectTime zone Insertion Date Filter: Select the Time Zone for the above date time field. You can write in any time zone but if you do not select it here, Sync process will assume it as UTC.Date Filter for Record update: Select the Datetime field that you write current system time to when you update a record in Data Cloud objectTime zone Update Date Filter: Select the Time Zone for the above date time field. You can write in any time zone but if you do not select it here, Sync process will assume it as UTC.
Click on Next to go to Sync Schedule
Specify Sync Schedule
Sync schedule allows you to schedule your connector to sync at one of the pre-set Scheduled, or you can select Custom you specify in how many minutes you want the connector to sync. You can also select Manual if you want to run the sync on demand and not on any schedule. Default is set to Manual.
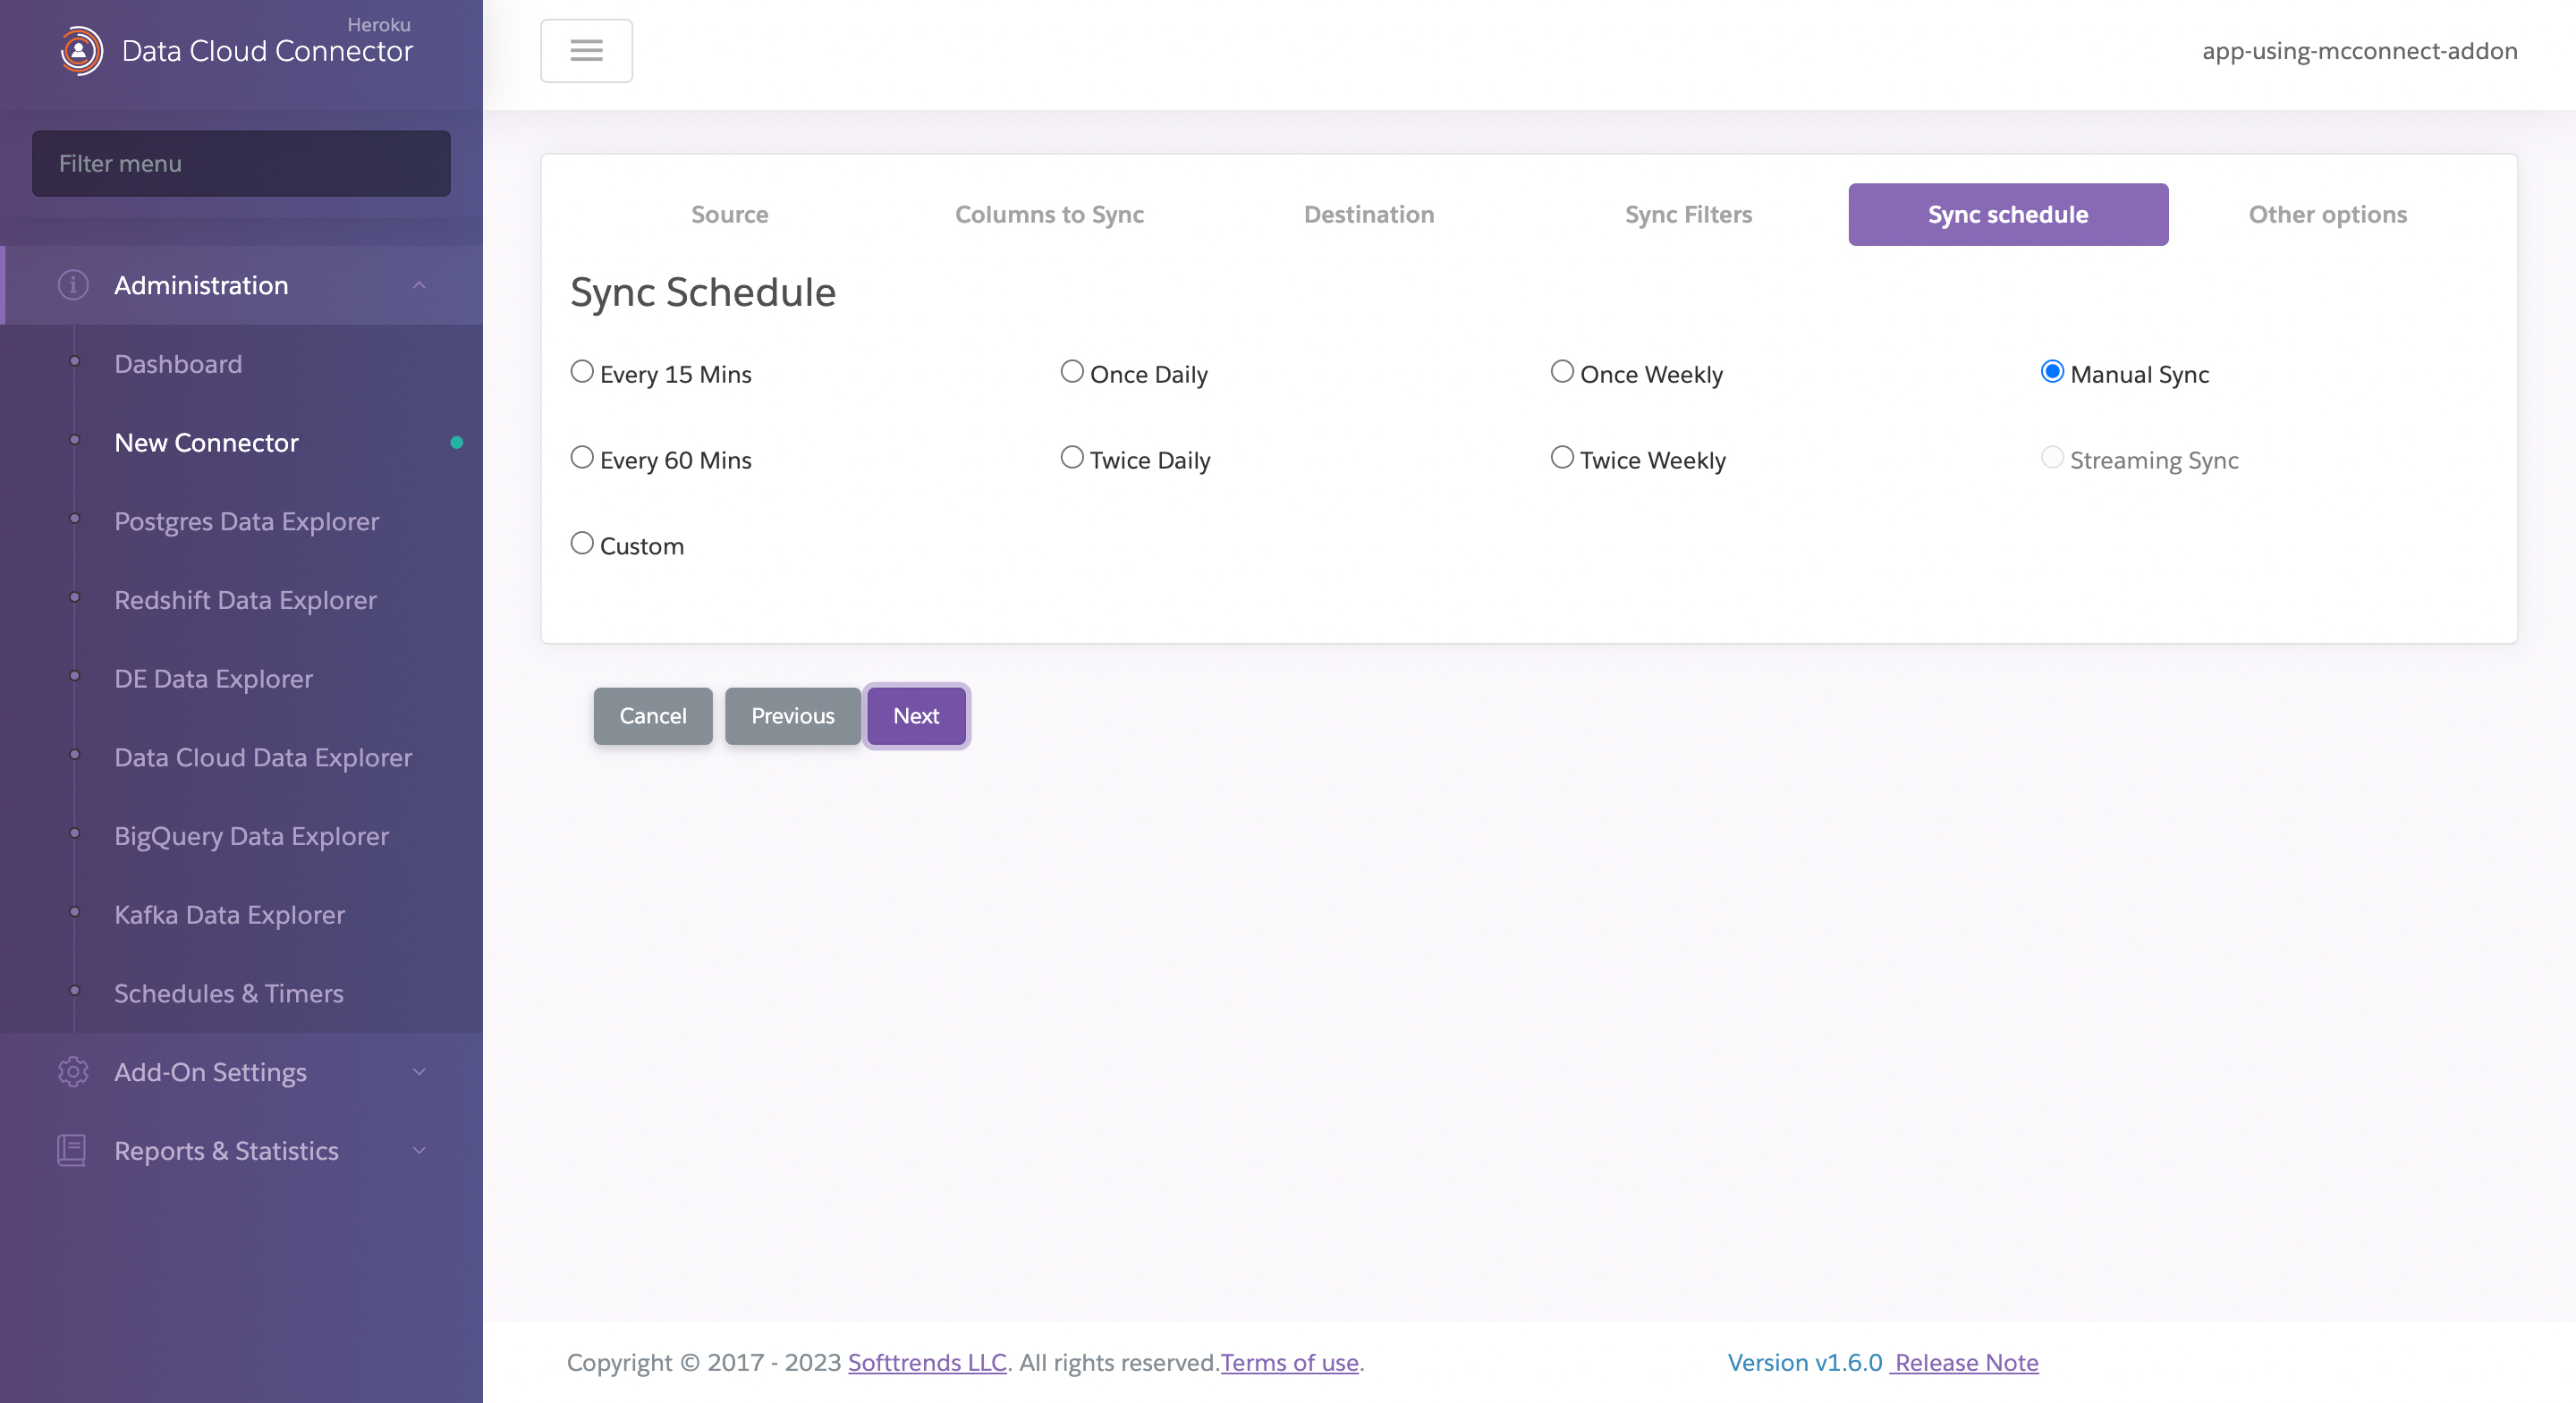
After this step you can Save the connector
Save the Connector
You click on Save to save the connector or Cancel if you want to discard all data you have entered and go back to dashboard without Saving the connector.
You can also select Previous and Next buttons to review and modify any information you have entered before Saving.
Step 2: Initiate the Sync
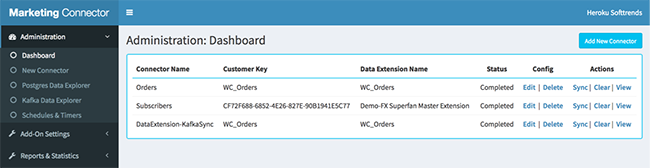
After saving, Data Cloud & Marketing Connector will return to the Dashboard, displaying the now-configured Connector. Once you are in Dashboard, you can click on the + sign before the connector to expose the actions you can perform on the connector.
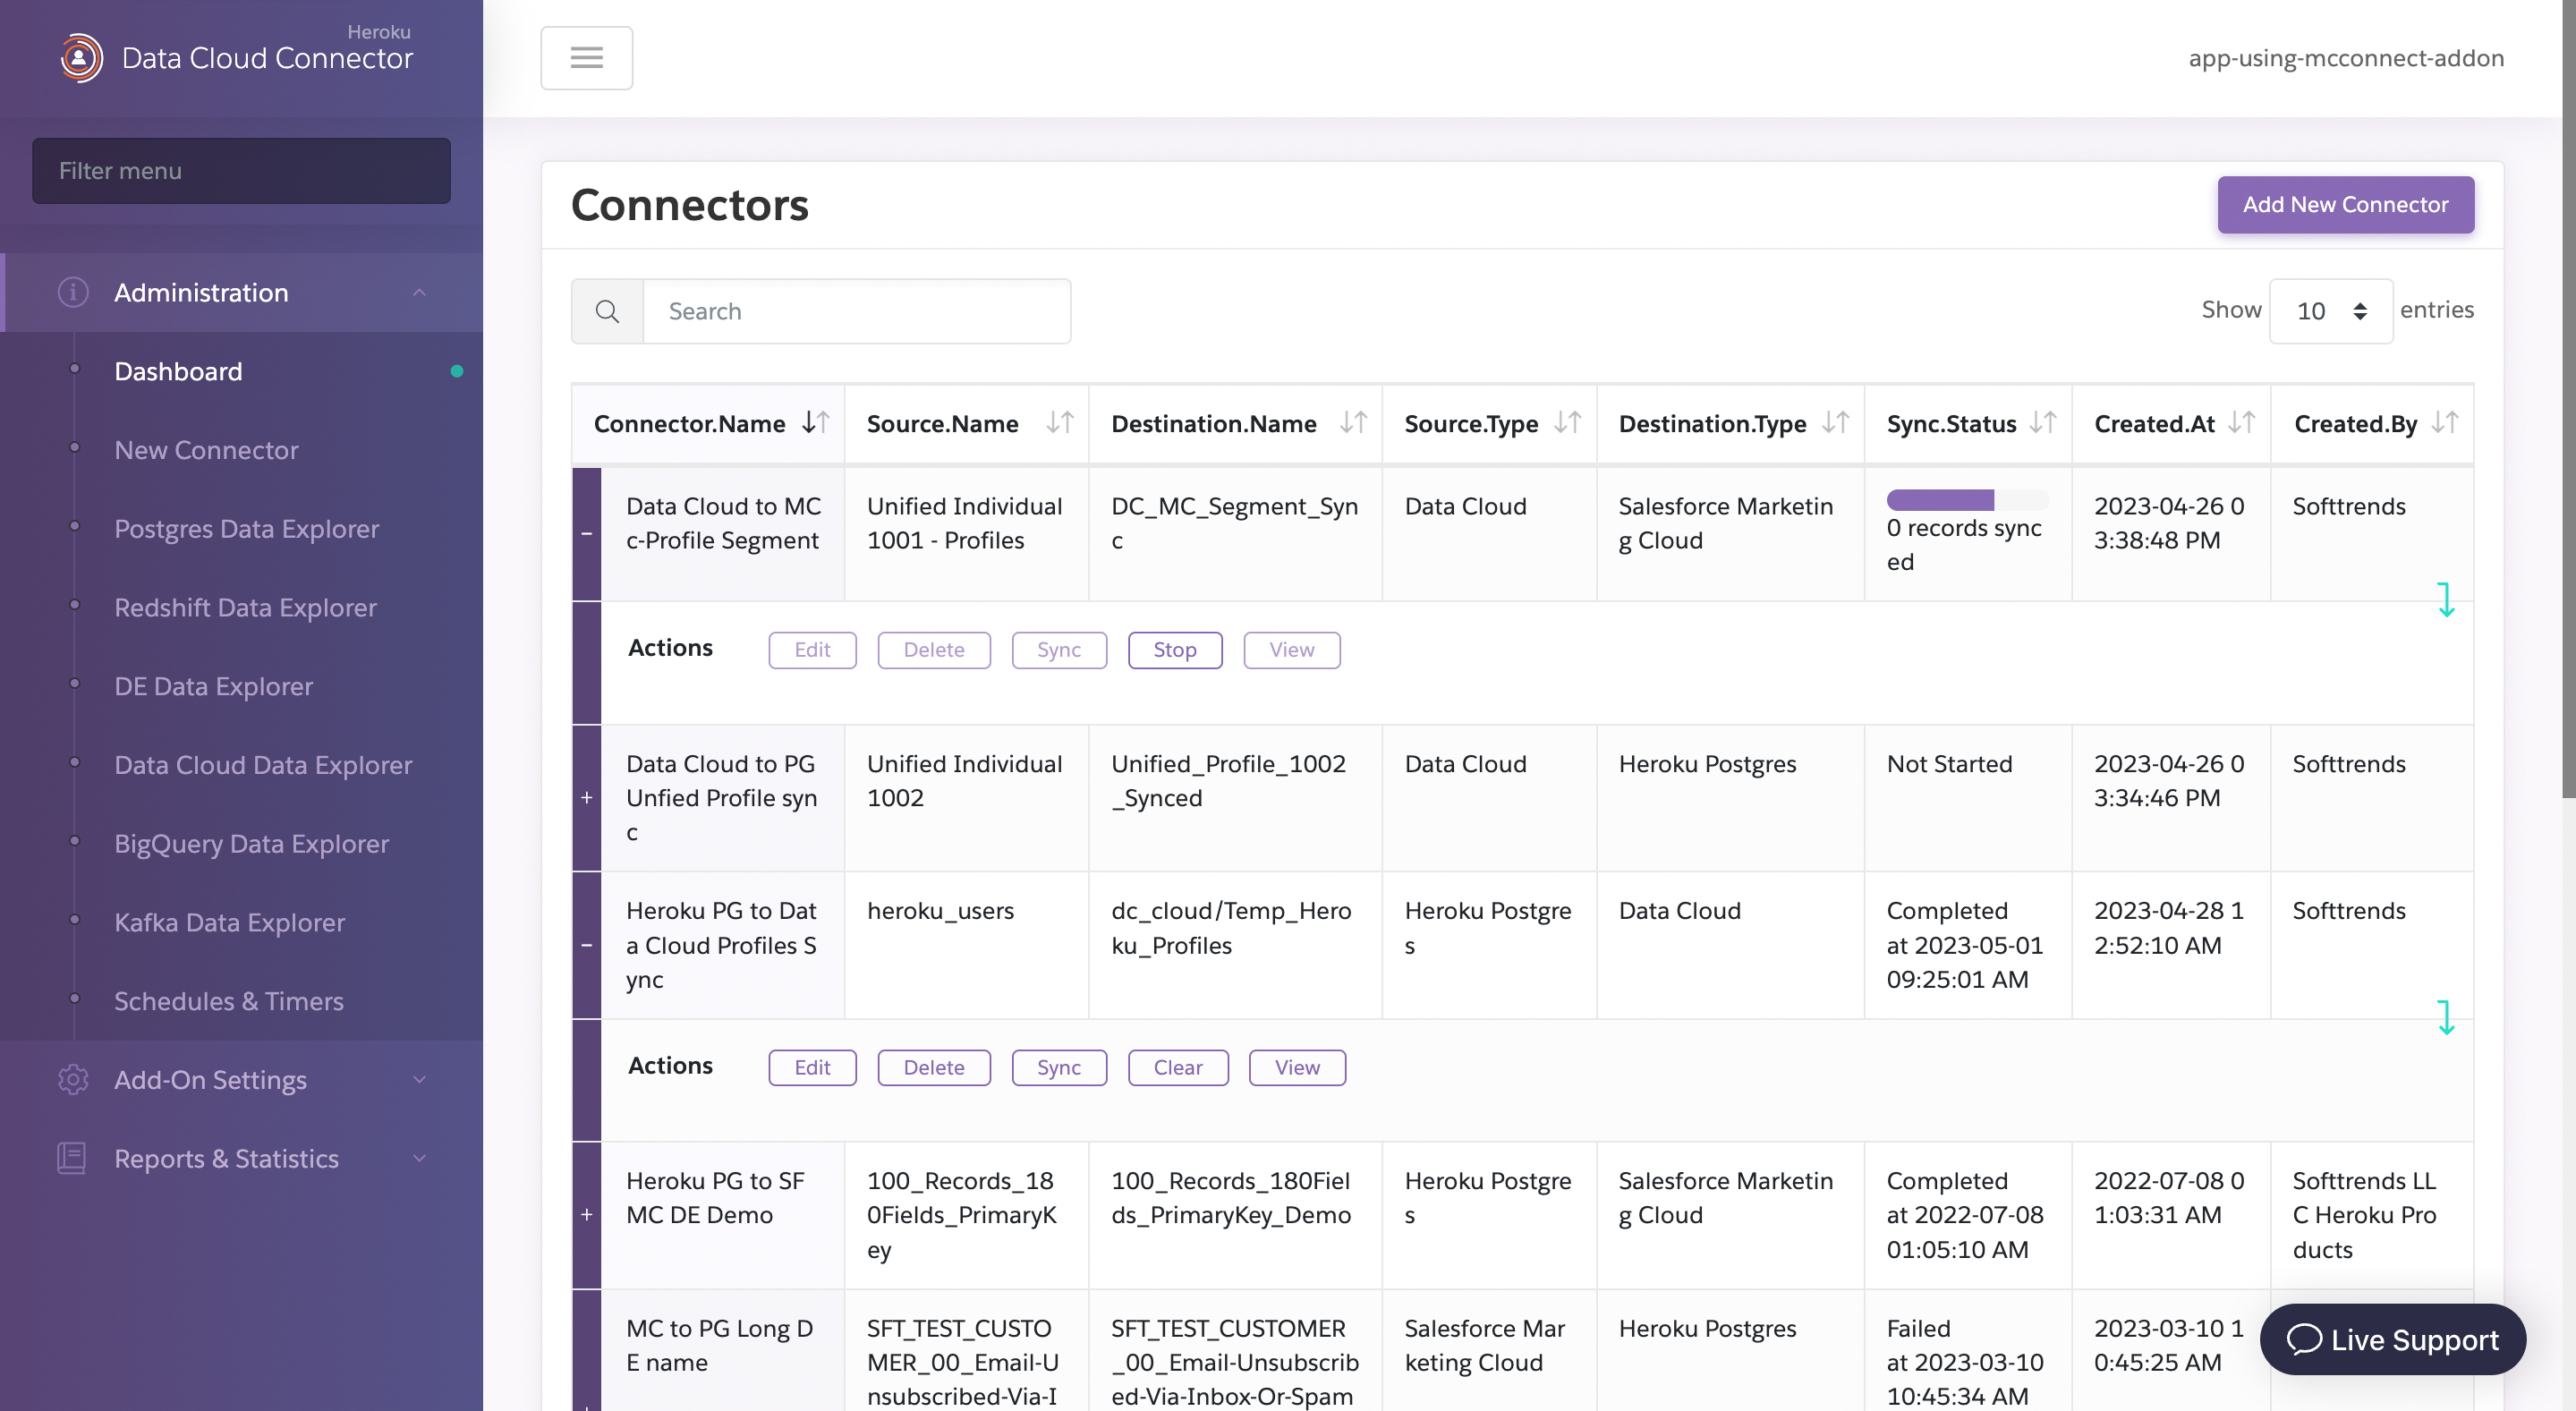
Select Sync to initiate the first synchronization from the defined Data Cloud Object to Postgres.
After the initial sync completes, the Status updates to Completed. View or modify the connector if needed, create new connectors, or select Postgres Data Explorer from the administration menu to view the data replicated into Heroku Postgres.
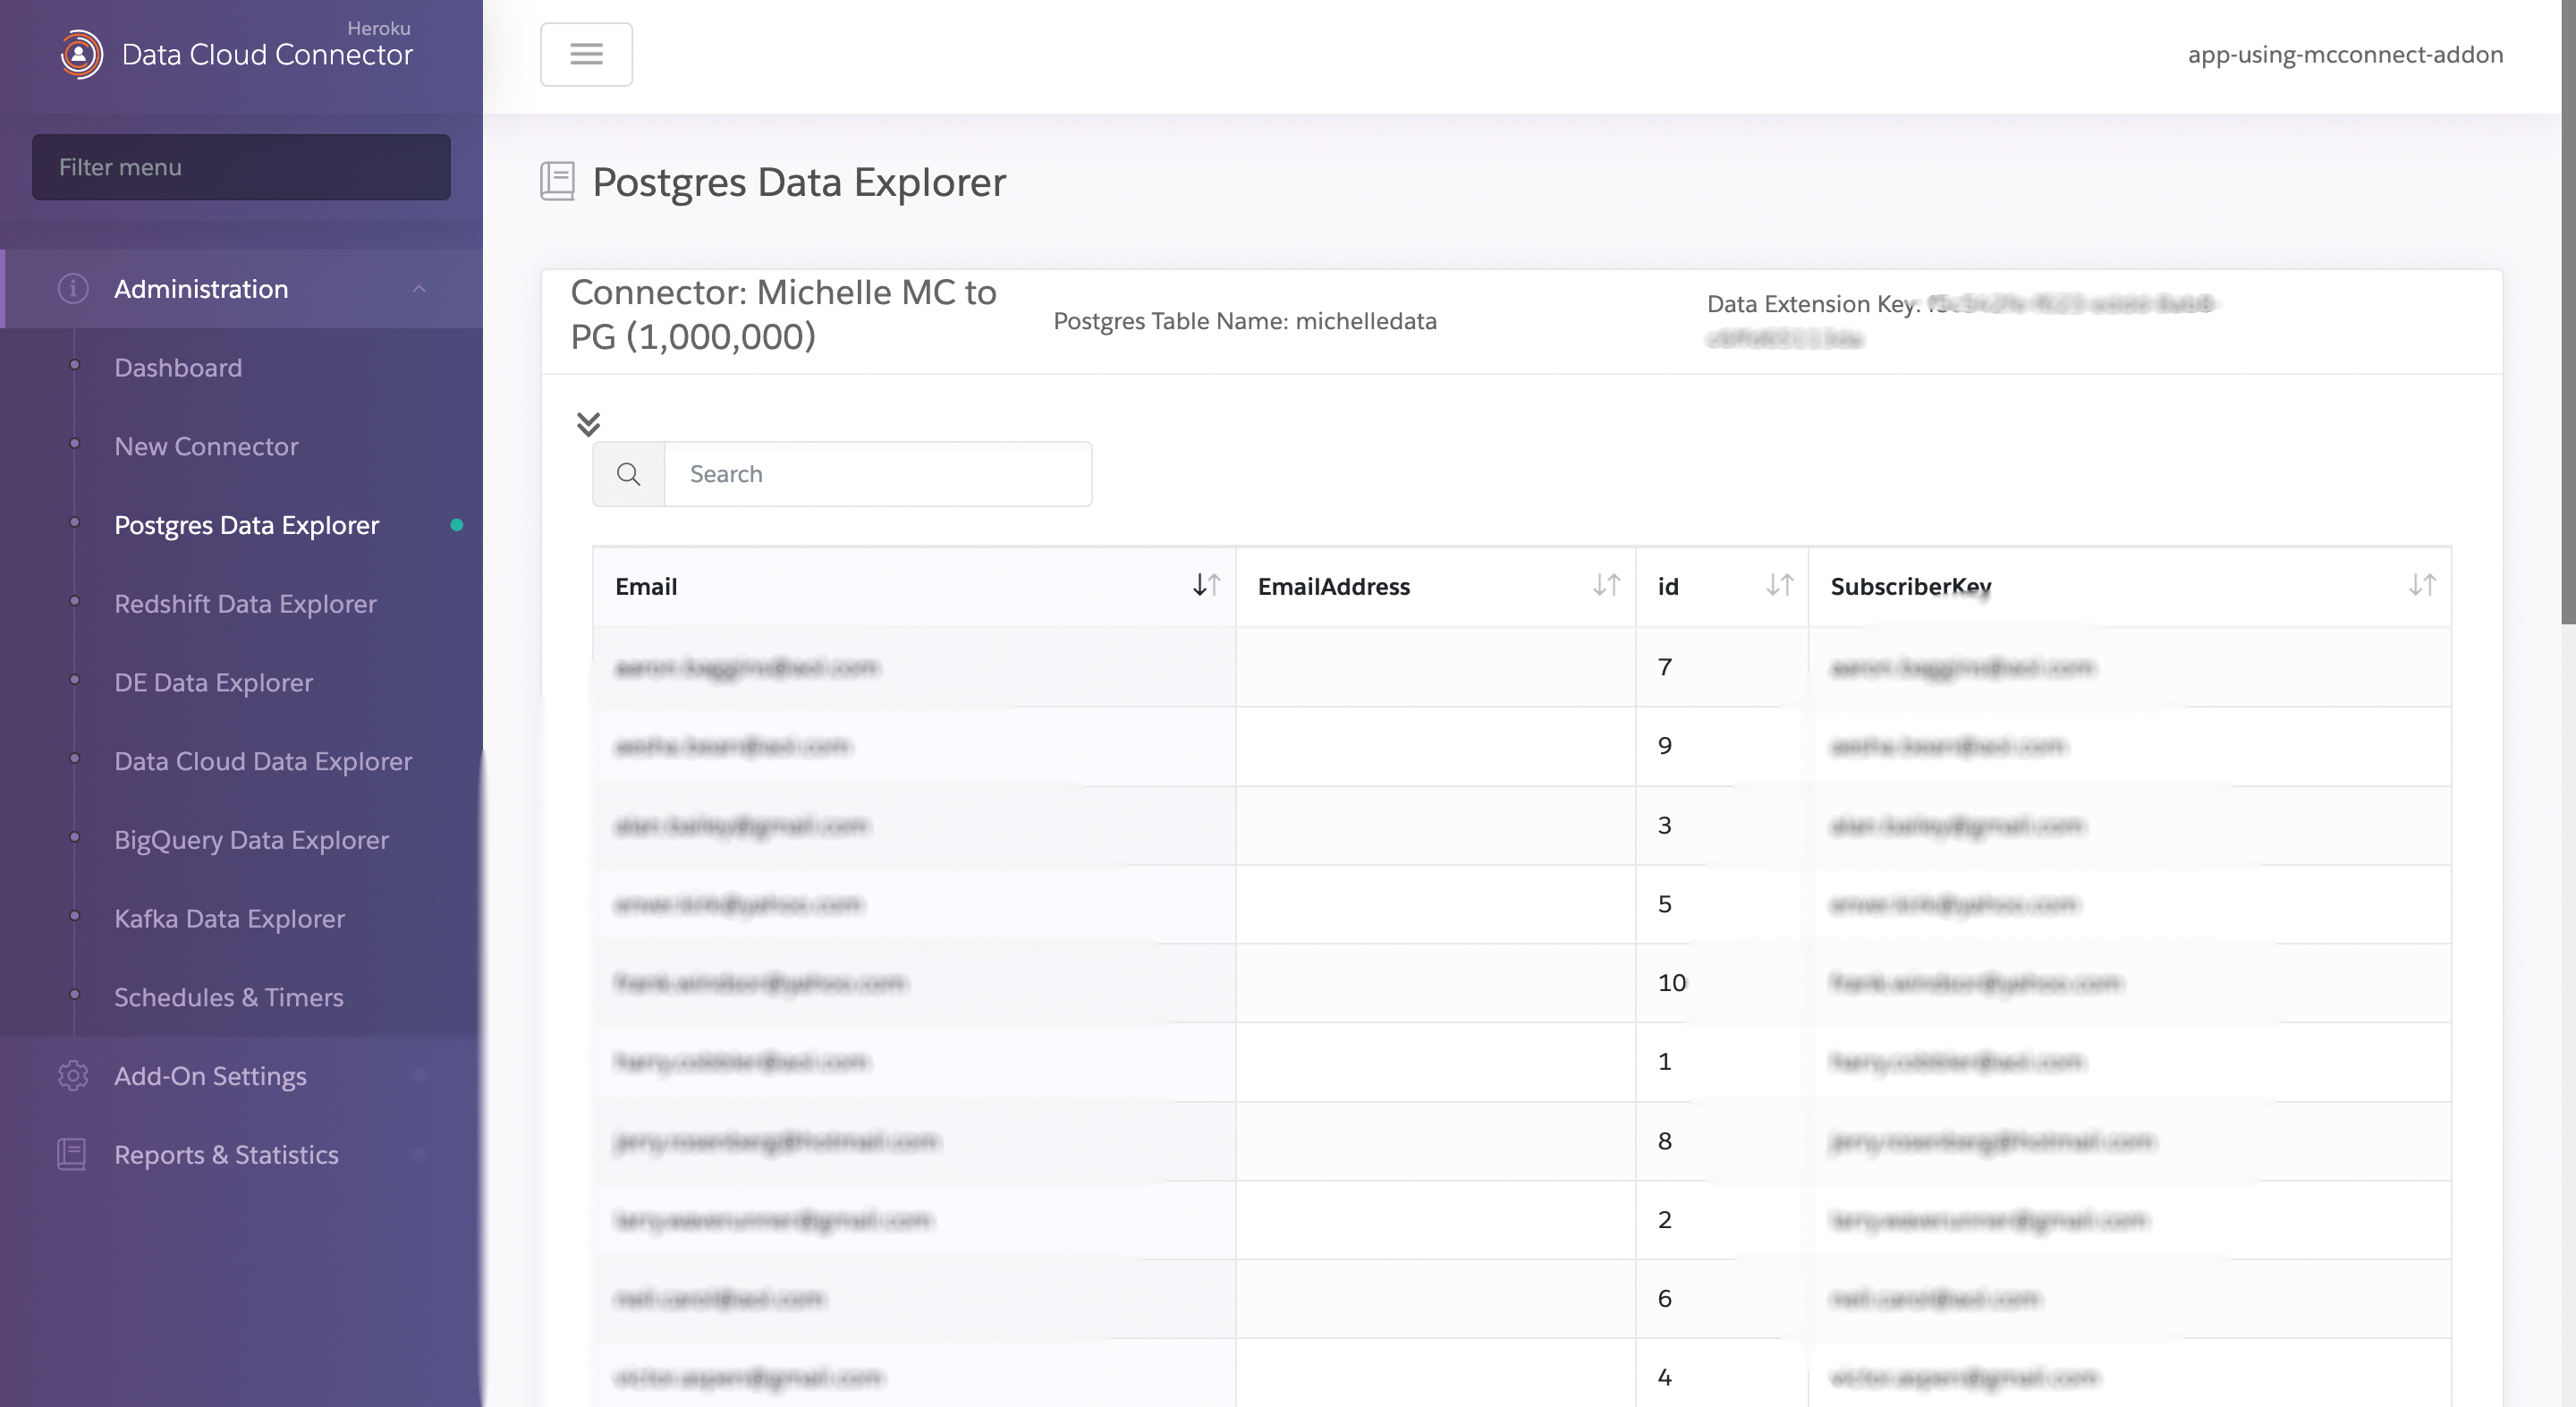
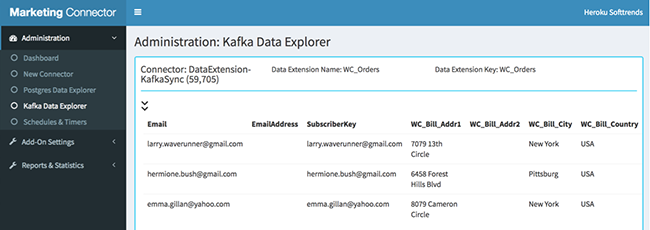
Step 3: View Postgres Explorer
Select View for the Connector. The Postgres Data Explorer displays a table of synchronized data from this connector.

Create a Marketing Cloud to Heroku Postgres Sync Connector
Step 1: New Connector
Select New Connector from the Administration Menu.

Connector Name: A custom value that describes the connector (for example, Subscriber Records).Data Source: Select Salesforce Marketing Cloud.Marketing Cloud API Configuration Name: Select a configuration name (name you have used for the configuration in Marketing config menu). The parameters from the selected API Configuration name will be automatically filled in. If you have provisioned any of the Enterprise plans, you can also select Custom and enter the configuration here.Data Source Folder: Dropdown will show the Data Extension folders for the Marketing cloud instance you have selected above. Select oneData Source Object to Sync: Select the Salesforce Marketing Cloud Data Extension for this connector.

Data Source Object Columns: The columns to include in the sync to Postgres.

Destination: Select Heroku Postgres.Database URL Name: Select a configuration name (name you have used for the configuration inDatabase configmenu). If you have provisioned any of the Enterprise plans, you can also selectNew Customand enter the Postgres URL here.Postgres Schema (Destination): Schema where you want the destination Postgres table to be created.Postgres table: Name of destination Postgres table.

Sync Process: Dropdown in first row can be used to selectCreated date filter field and it timezone, and the dropdown in second row can be used to selectUpdated date filter field and its timezone

Sync Schedule: Defines the frequency of synchronizations.

Clear Synced Records in Destination before each Sync: Default isDo not clear. If you set it to clear then all records in the destination Postgres table will be deleted and all records from the Source will be synced again.
Once Completed, click Save Connector to save it.
Step 2: Initiate the Sync
After saving, Data Cloud & Marketing Connector will return to the Dashboard, displaying the now-configured Connector.
Select Sync to initiate the first synchronization from the defined marketing Data Extension to Postgres.

After the initial sync completes, the Status updates to Completed. View or modify the connector if needed, create new connectors, or select Postgres Data Explorer from the administration menu to view the data replicated into Heroku Postgres.

Step 3: View Postgres Explorer
Select View for the Postgres Connector. The Postgres Data Explorer displays a table of synchronized data from this connector.
Create a Heroku Postgres to Marketing Cloud Sync Connector
Step 1: New Connector
Select New Connector from the Administration menu.

Connector Name: A custom value that describes the connector (for example,Subscribers_Data_Extension)Data Source: Select Heroku PostgresDatabase URL Name: Select a previously configured Database connection string or define it in the field below.Data Source Schema: Select a schema from the pre-populated list of detected schemas.Data Source Object Name: Select an object from the pre-populated list of detected objects.

Data Source Object Columns: Choose the columns Marketing Connector will sync, or chooseSelect AllUse Data field transformationThis feature is described in Data Science feature support.

Destination: SelectSalesforce Marketing CloudMarketing Cloud API Configuration name: Select a pre-defined configuration created within Marketing Config.It is a Child Business unit: Choose this option to create the Data Extension under a Business Unit. Enter the Business Unit name and MID.Data Extension Folder: Select the Data Extension folder from a pre-defined list of detected folders.Data Extension table: Enter the name of the Data Extension table for this connector. If the table doesn’t exist, Marketing Connector creates it.Mark as Sendable: Allows the Data Extension to be sendable after sync.Mark as Testable: Allows the Data Extension to be testable after sync.Sync Filters: Defines the sync filters.

Clear Synced Records in Destination before each Sync?: Defines the connector’s behavior for clearing all data within the Data Extension before syncing records from Heroku Postgres. Refer to the Truncate and Sync section for additional detail on this behavior.Data Field to check Date-time of New record insertion to Data source with Timezone: Define the timestamp field used for created records for incremental sync.Data Field to check Date-time of Update to existing records in Data source with Timezone: Define the timestamp field for updated records for incremental sync.Moment-in-time Sync for Updated records using database trigger: Selectable only if a timestamp for updated records is selected. SelectingConfigurewill create a trigger in the Heroku Postgres database. When a record is updated, the trigger will update the timestamp, allowing the next sync to pick up the changes.
Sync Schedule: Defines the sync schedule.
Create a Marketing Cloud to Apache Kafka on Heroku Sync Connector
Step 1: New Connector
Select New Connector from the Administration menu.
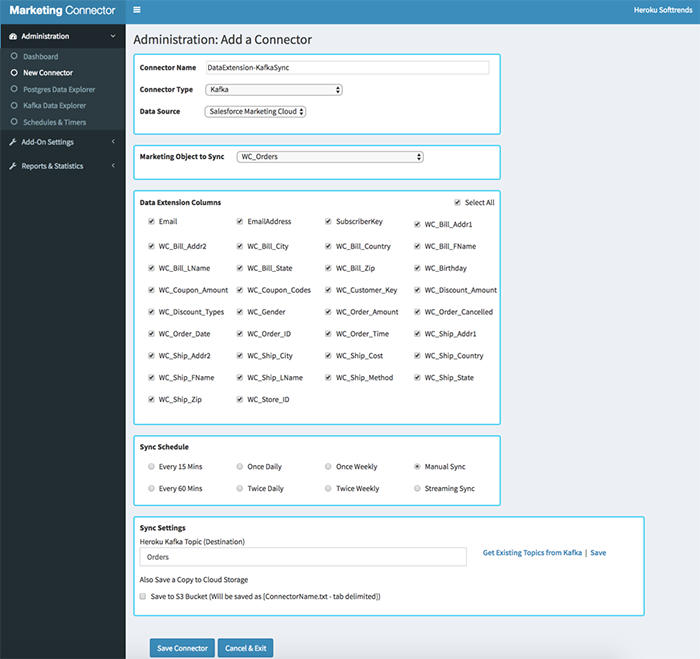
Connector Name: A custom value that describes the connector (for example,Subscribers_Data_Extension)Connector Type: SelectKafkaData Source: SelectSalesforce Marketing CloudMarketing Object to Sync: Select the Salesforce Marketing Cloud Data Extension for this connector.Data Extension Columns: The columns to include in the sync to the Kafka topic.Sync Schedule: Defines the frequency of synchronizations.Apache Kafka on Heroku Topic: Define the topic name or select Get Existing Topics from Kafka.
Step 2: Initiate the Sync
After saving, Data Cloud & Marketing Connector will return to the Dashboard, displaying the now-configured Connector.
Select Sync to initiate the first synchronization from the defined marketing Data Extension to the Kafka topic.
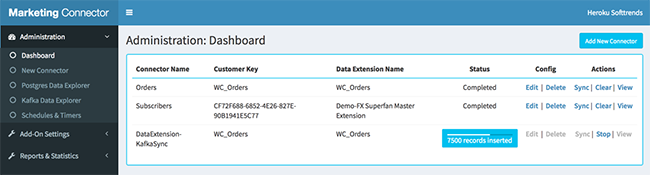
After the initial sync completes, the Status updates to Completed. View or modify the connector if needed, create new connectors, or select Kafka Data Explorer from the administration menu to view the Kafka topic.
Step 3: View Kafka Explorer
Select View for the Kafka Connector. The Kafka Data Explorer displays a table of synchronized data from this connector.
Sync Configuration Details
Scheduled Sync
Sync event timing is configured based on pre-defined frequencies or a custom interval. The pre-defined intervals of Once Daily, Once Weekly, Twice Weekly and Twice Daily, have the option to specify a time of day. The default timezones are GMT and the time for Daily is 00:00 UTC, and Weekly is Monday at 00:00 UTC. If you enter a custom time while accessing Data Cloud & Marketing Connector in US EST, then the value saved will be in US EST time expressed in UTC.
Streaming Sync
Streaming sync isn’t directly supported in Data Cloud & Marketing Connector. However, a Custom sync time is configurable for scheduled sync with a minimum of 1 minute and a maximum of 9,999 minutes.

Incremental Sync
Incremental Sync allows only new records or updates to existing records to be synchronized at the next sync interval, provided: - a connector is set up to sync a Data Extension to Heroku Postgres or vice versa, and - the connector has synced all records in the source to destination after setup.
Data Cloud & Marketing Connector maintains the Last Sync time of the connector and compares the timestamps for Created and Updated records as specified in the next section. The timestamps must be in reference to the Heroku system time based on your timezone. If you are creating/updating the records directly in Heroku Postgres then it will not be an issue, but, if you are importing records from an external system using (e.g. an ETL tool), then the timestamps imported to ‘Created’ and ‘Updated’ time fields will be in reference to the system from where records are imported which, you must adjust before you write the record to reflect the Heroku system timezone.
A timestamp field in the source data is required for Data Cloud & Marketing Connector to sync newly created or updated records. Specify the timestamp field and its timezone in the Sync Process settings section.


Truncate and Sync
Use Data Cloud & Marketing Connector’s truncate and sync capability when the source table is truncated and updated with new records before the records are synced with the destination. An example of this is a marketing campaign using an email list. The email list is defined every time the campaign is run. The destination should be cleared before the source is synced, again.

Support
Submit all support and runtime inquiries for Softtrends Data Cloud & Marketing Connector via the Heroku Support portal. Direct non-support-related topics or product feedback to heroku@softtrends.com.