Table of Contents [expand]
Last updated September 23, 2024
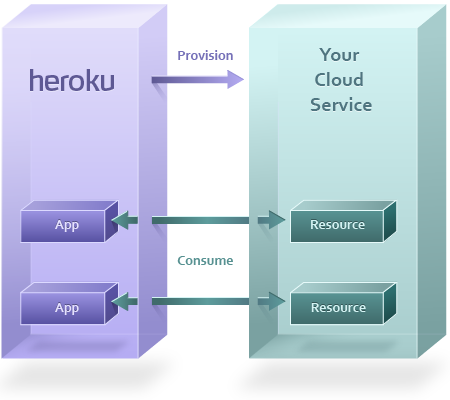
Heroku customers use the marketplace or the Heroku CLI to provision your add-on. When this happens, Heroku sends a request to your service, which creates a new private resource for the app.
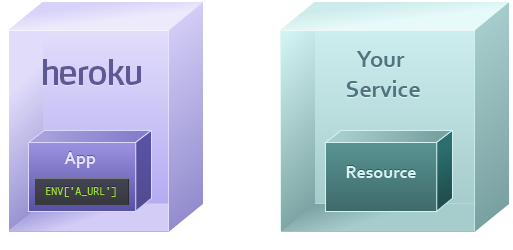
This resource represents your service, and is what the client application will interact with.
The URI representing the resource is made available to the app as a config var. The app can then consume its private resource via a library, plugin, or over HTTP, depending on your service.
Provisioning
Customer adds add-on
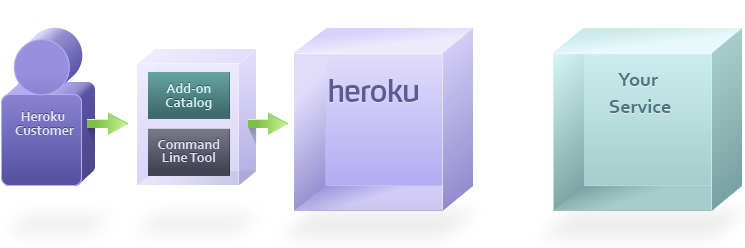
The provisioning process begins when a Heroku customer finds your add-on in the add-ons catalog and clicks Add, or alternatively, they can use the command line tool:
$ heroku addons:create addon-name
Heroku requests service provisioning
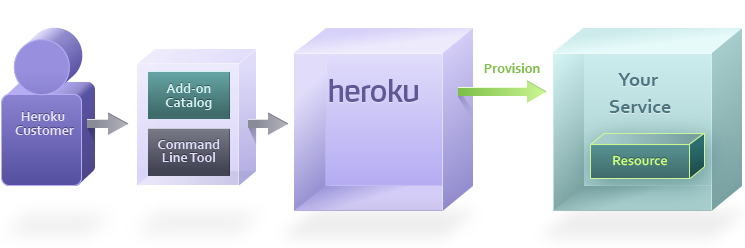
The make-up of the provisioned resource(s) depends on the type of service you’re operating.
In almost every case, you will want to provision a user account. However, a database add-on partner may choose to also immediately create a database that the app can start using, whereas exception reporting service may issue an API key in addition to the user credentials.
Return resource URL
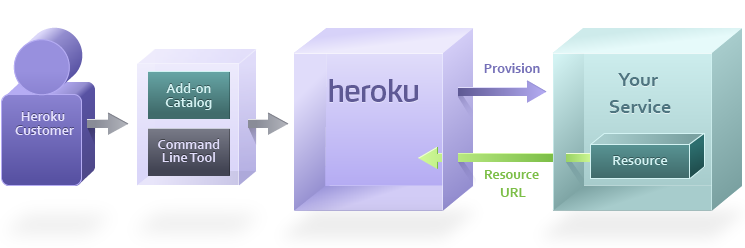
Once the resource is created, your service will respond with a URL with the exact location and credentials that the app can use to access their private resource.
For example, a database partner like Amazon RDS may return:
MYSQL_URL=mysql://user:pass@mysqlhost.net/database
A general partner such as New Relic may return:
NEW_RELIC_URL=http://newrelic.com/accounts/[apitoken]
Heroku rebuilds app
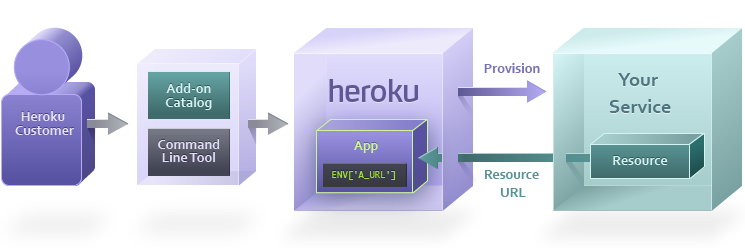
Heroku adds the returned URL as a config var in the app, rebuilds the slug and restarts all dynos. The user’s app is now ready to consume the resource your cloud service has provisioned for them.
Consumption
The app may wish to consume the resource when an end user makes a request to the app from their web browser. Or, a worker dyno in the app may need to consume the resource as part of performing a background job.
For example, a page might wish to consume a database resource by sending a query like “SELECT * FROM table”, or consume a web service with a call like POST /exceptions.
App accesses resource URL
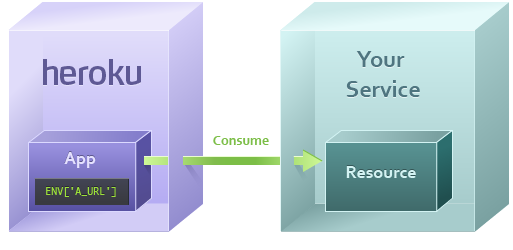
The app uses a URL, which was stored as a config var in the app during provisioning, to access the remote resource.
Datastore resources such as MySQL, MongoDB, or Memcache have their own protocol and will use a client library such as ActiveRecord, MongoMapper, or MemcacheClient to access the resource. These resources will have URLs that start with protocol names like mysql://, mongo://, or memcache://.
Web service resources such as Exceptional or New Relic use HTTP as their protocol, so their URLs will begin with https://.
Resource responds
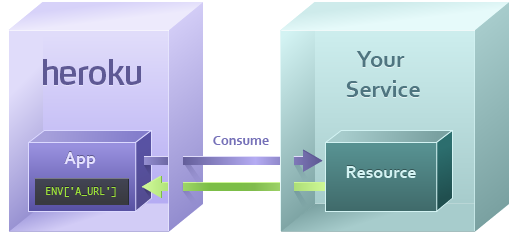
The invoked resource within your cloud service can now process the request, assuming the credentials are valid
If it’s a read request (such as SQL’s SELECT or HTTP’s GET) it will look up the information to return to the app. If it’s a write request (such as SQL’s INSERT or HTTP’s POST) it will store that information to the resource and return an acknowledgment.
Once the app has its response, it can use this to build a page for the end user (if this consume request came from a dyno processing a web request), or to continue processing its background job (if this consume request came from a worker).
Updating Config Vars and Add-on Security
An add-on partner can update the provided credentials in a config var at any time through the add-ons integration. Config var changes happen, for example, when a credentials roll is needed, customers change URLs on their end, or when upgrading an add-on plan with heroku addons:upgrade. Changing an add-on plan sets the config vars to the value previously set by the add-on provider. It’s recommended that you don’t overwrite config vars provided by an add-on, or use hard-coded add-on config var values in code or configuration.
Add-ons can only read the config vars they set on an app, and they can set zero, one, or many config vars. They can’t read config vars you manually set on your app nor the config vars that other add-ons set.
Single Sign-On
Heroku Dashboard
By providing us with your manifest, you will have described your add-on to our system in such a way that we can integrate it into our Marketplace as well as the Dashboard. The Dashboard is where customers manage the resources associated with their app.
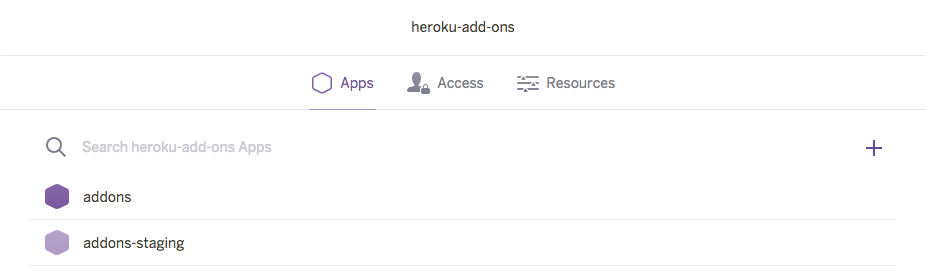
A Heroku customer can log into the Heroku Dashboard to view information about their app.
Add-on selection
Clicking an app will take you to an in-depth page about on the app, which also shows all the installed add-ons. The customer finds your add-on in the list and clicks on it.
Redirect to add-on property
Heroku generates a single sign-on token using the ID of the resource, the current time, and the salt (a shared secret known to both Heroku and your service).
This generates a request for the user looking something like this:
POST https://yourcloudservice.net/sso/login
id=123&token=4af1e20905361a570×tamp=1267592469&user@example.com
The add-on partner’s site receives this request, confirms that the token matches, and confirms that the timestamp is fresh. The site can set a cookie in the user’s browser to indicate that they are authenticated, and then redirect to the admin panel for the resource.
Logging users in via SSO
You can log users into your site quickly with SSO URLs. The link can be placed in email or Campfire notifications, and when the user clicks them they can proceed directly to your add-on dashboard.
SSO URLs follow this format:
https://api.heroku.com/myapps/<heroku_id>/addons/<addon_name>
Here is an example:
https://api.heroku.com/myapps/app123@heroku.com/addons/cloudcounter
Additional information can be supplied as GET parameters. The additional keys and values will then be submitted along with the rest of the user data via SSO POST and allow you to set relevant state or context for the user within your dashboard, e.g.:
https://api.heroku.com/myapps/app123@heroku.com/addons/cloudcounter?issue_no=42