Table of Contents [expand]
Last updated October 21, 2025
Only team administrators can create, destroy, or modify Private Spaces. All team members can view details about Private Spaces in the team.
There are two generations of the Heroku platform, Cedar, the legacy platform, and Fir, the future of Heroku. This article describes how to work with Private Spaces for both generations.
Create a Private Space
Only team administrators can create a new Private Space.
To create a Private Space using Dashboard, click the Spaces tab inside your team and click Create new Private Space. When creating the Private Space, you must choose a generation of the Heroku platform, and you can optionally choose a region (geographic location) for your apps and data services. When you fill out the form and click Create Private Space, your new space is created within ten minutes.
To create a Private Space using the Heroku CLI, use the spaces:create command. By default, a Cedar-generation space gets created:
$ heroku spaces:create my-space-name --team my-team-name
Creating space my-space-name in team my-team-name... done
=== my-space-name
Team:   my-team-name
Region: virginia
State:  allocating
To create a Fir-generation space instead, you must also pass in --generation fir to the command.
Creating a new Private Space can take a few minutes. To track its status, use the spaces:wait command:
$ heroku spaces:wait my-space-name
Waiting for space my-space to allocate... done
Choose a Region
To create a Private Space in a particular region, specify the --region option with the region’s name from the list of regions. For example:
$ heroku add-ons:create heroku-postgresql:standard-4 -a your-private-app-name -- --region=us
Creating space my-space-name in team my-team-name... done
=== my-space-name
Team:   my-team-name
Region: tokyo
State:  allocating
Choose Your Private Network CIDR Range
You can’t customize CIDR ranges for Fir-generation spaces.
To connect your Private Space to other networks, such as an Amazon VPC or an on-premises network, you might want to specify the dyno or data CIDR ranges that your Private Space will use to ensure no overlap with your private network. You can specify a private network CIDR range to connect services in your environment to Heroku.
The data CIDR range is used for Heroku private data add-ons.
It is not possible to modify CIDR values after a Private Space has been created.
To create a space with a custom dyno or data VPC CIDR range, the --cidr and --data-cidr flags can be specified via the CLI.
$ heroku spaces:create --cidr 172.16.0.0/16 --data-cidr 10.100.0.0/20 --team my-team-name
Creating space my-space-name in team my-team-name... done
=== my-space-name
Team:   my-team-name
Region: tokyo
State:  allocating
- A
/16CIDR range is required for the dyno VPC (--cidr) - A
/20is the minimum CIDR range size for the data VPC (--data-cidr) - You cannot specify a CIDR range that overlaps with
172.17.0.0/16or10.1.0.0/16 - After Private Space creation, these dyno and data CIDR values cannot be changed
- Specifying the Private Space CIDR ranges can only be done via the CLI (and not the Dashboard)
View Info About a Private Space
All team members can view information about the Private Spaces in a team.
In Dashboard, click the Spaces tab inside your team. The Space info displays the team to which the Space belongs, as well as the current state of the Space. The allocating state indicates that the Space is being set up and is not yet operational. When it becomes operational, the state will change to allocated.
In the Heroku CLI, use the spaces:info command:
$ heroku spaces:info --space my-space-name
=== my-space-name
ID:           12345678-abcd-1234-abcd-12345678abcd
Team:         acme
Region:       Tokyo, Japan
State:        allocated
Shield:       on
Outbound IPs: 52.198.127.12, 52.197.133.34, 52.199.6.12, 52.198.222.211
Created at:   2016-10-13T05:36:15Z
Destroy a Private Space
Only team administrators can destroy a Private Space. Private Spaces that contain applications or other resources cannot be destroyed. Apps must be explicitly deleted before destroying a Private Space.
In the Heroku dashboard, click Space Settings and choose Delete Space.
In the Heroku CLI, use the spaces:destroy command:
$ heroku spaces:destroy --space my-space-name
Destroying space my-space-name... done
=== my-space-name
Team:  my-team-name
State: deleting
View Outbound IPs
All team members can view the list of stable outbound IP addresses for a space.
You can find the stable outbound IP addresses for a space on the space’s Network tab in the dashboard. You can also use the CLI:
$ heroku spaces:info --space acme-prod
=== acme-prod
ID:           12345678-ed4a-4e96-b998-3fcb499439e0
Team: acme
Region:       virginia
State:        allocated
Outbound IPs: 192.0.2.2, 192.0.2.3, 192.0.2.4, 192.0.2.5
Created at:   2015-08-07T16:16:56Z
Transfer a Space
You can only transfer a space on Enterprise Teams. Transferring spaces on Heroku Teams isn’t supported.
You can transfer a space to another Enterprise Team within the same Enterprise Account. The user making the transfer must be an admin in both teams or have manage permissions in the company’s Enterprise account.
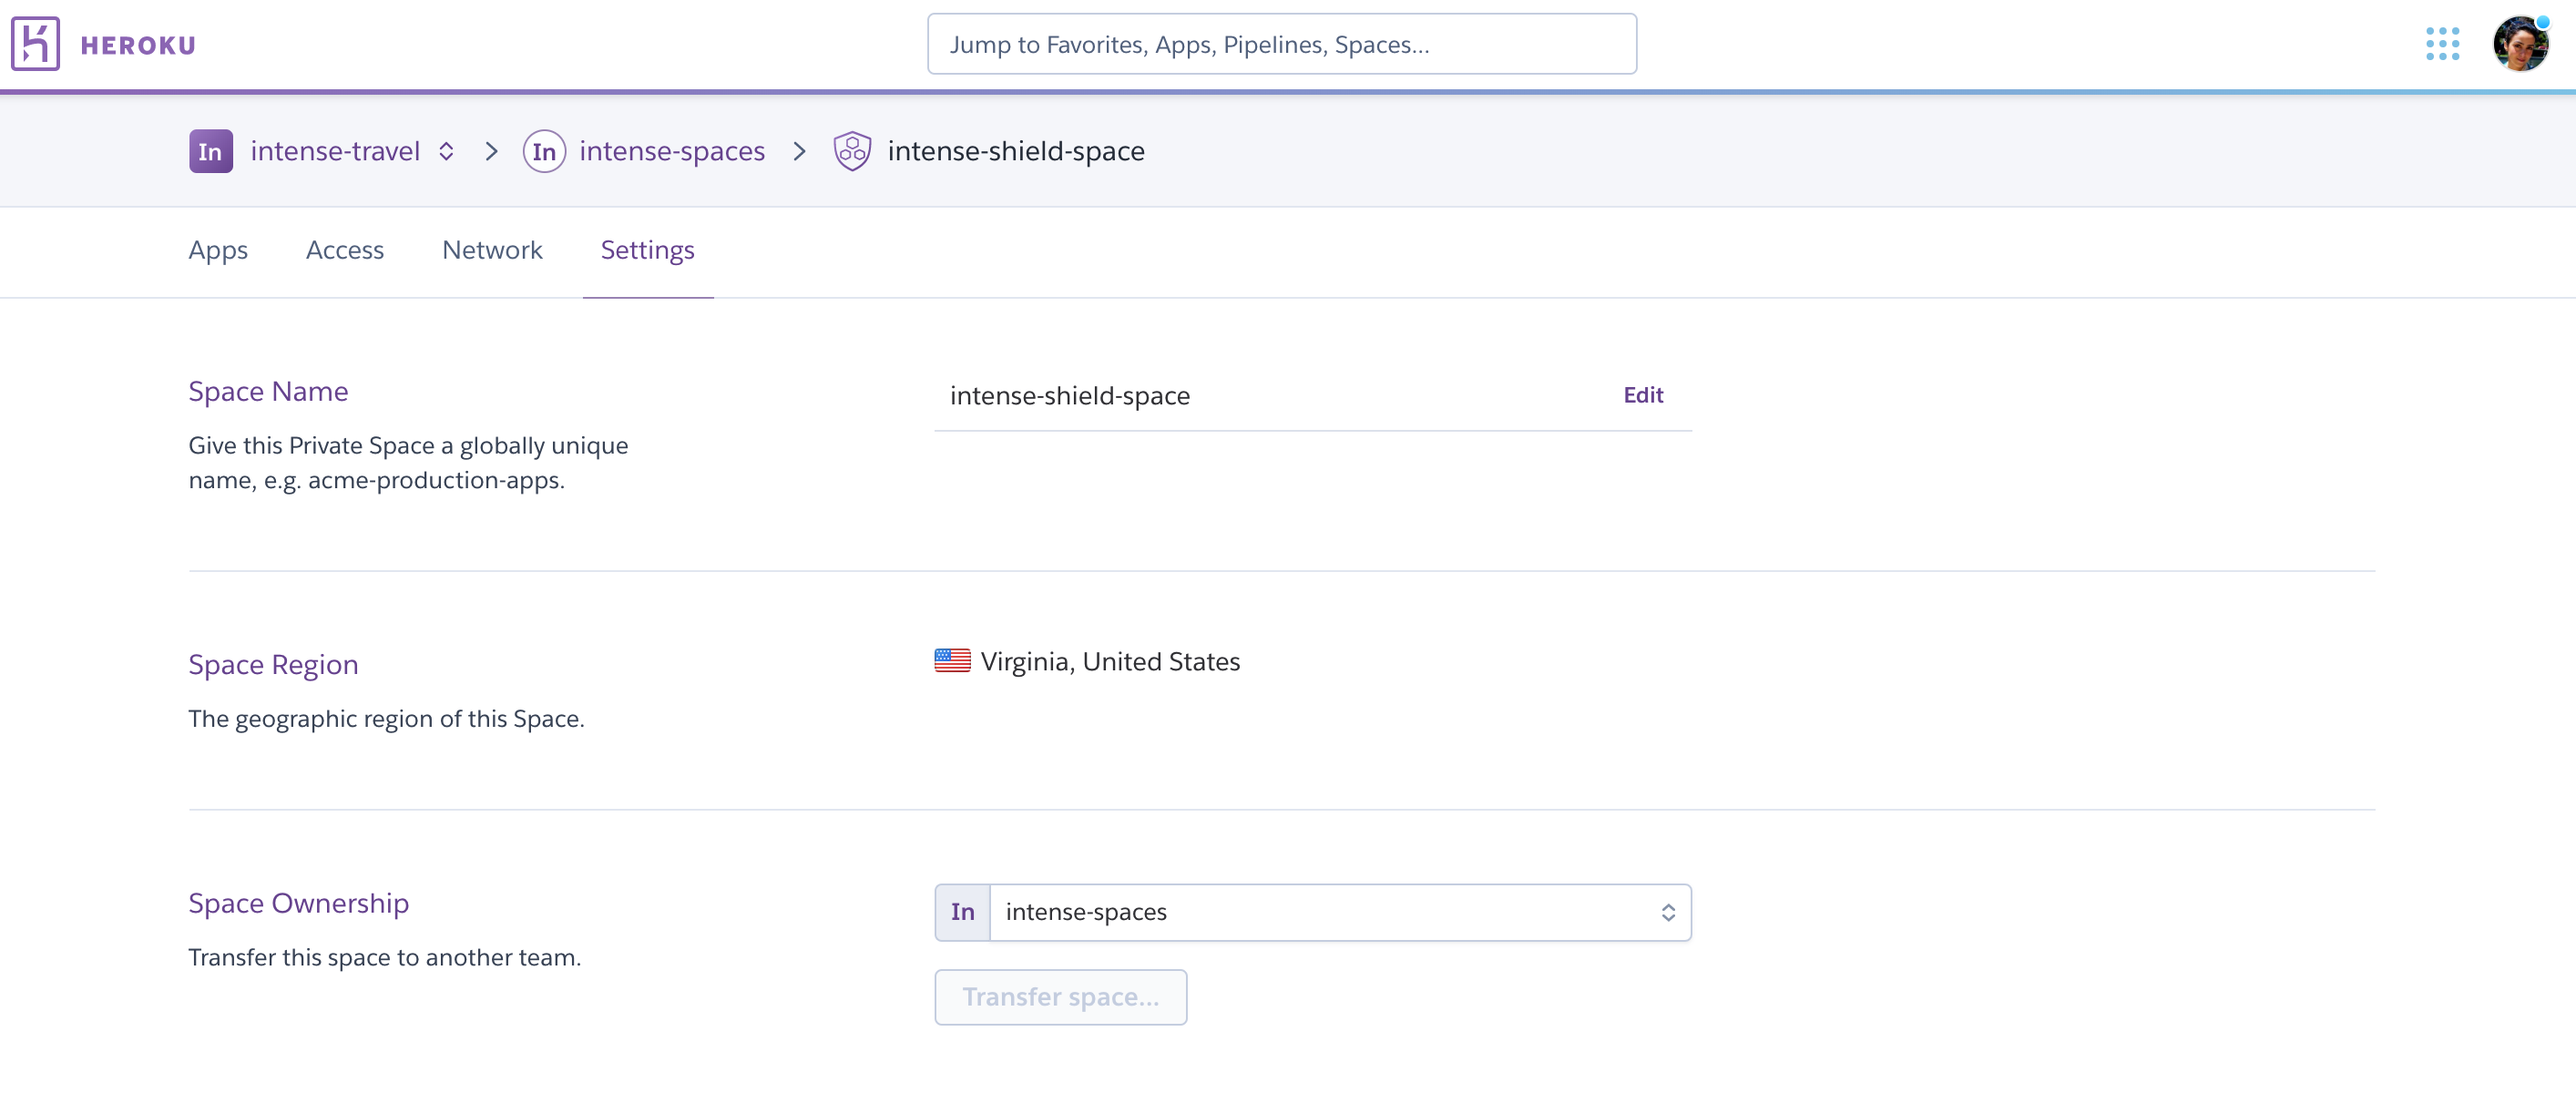
To transfer a space, go to the space’s Settings tab and find the team you want to move it to in the Space Ownership section.

When transferring spaces, only apps that are inside the space move to the new Enterprise Team. If you have a pipeline that contains apps both inside the space and outside, only the apps inside the space move to the new Enterprise Team. The pipeline stays in the old Enterprise Team with the apps that aren’t inside that space.