Table of Contents [expand]
Last updated February 12, 2025
The WebSocket protocol is a core technology of modern, real-time web applications. It provides a bidirectional channel for delivering data between clients and servers. It gives you the flexibility of a TCP connection with the additional security model and meta data built into the HTTP protocol.
For more details on the WebSocket protocol refer to RFC 6455, which is the version supported on Heroku.
Previous drafts may be compatible, but not directly supported. A known incompatibility exists with draft hixie-76, which used a mechanism breaking reverse-proxies and gateways by including key data after the headers without advertising it.
Application architecture
Process and application state
The WebSocket protocol introduces state into a generally stateless application architecture. It provides a mechanism for creating persistent connections to a node in a stateless system (e.g. a web browser connecting to a single web process). Because of this, each web process is required to maintain the state of its own WebSocket connections. If application data is shared across processes, global state must also be maintained.
Imagine a chat application that pushes messages from a Redis Pub/Sub channel to all of its connected users. Every web process would have a collection of persistent WebSocket connections open from active users. Each user would not, however, have its own subscription to the Redis channel. The web process would maintain a single connection to Redis, and the state of each connected user would then be updated as incoming messages arrive.
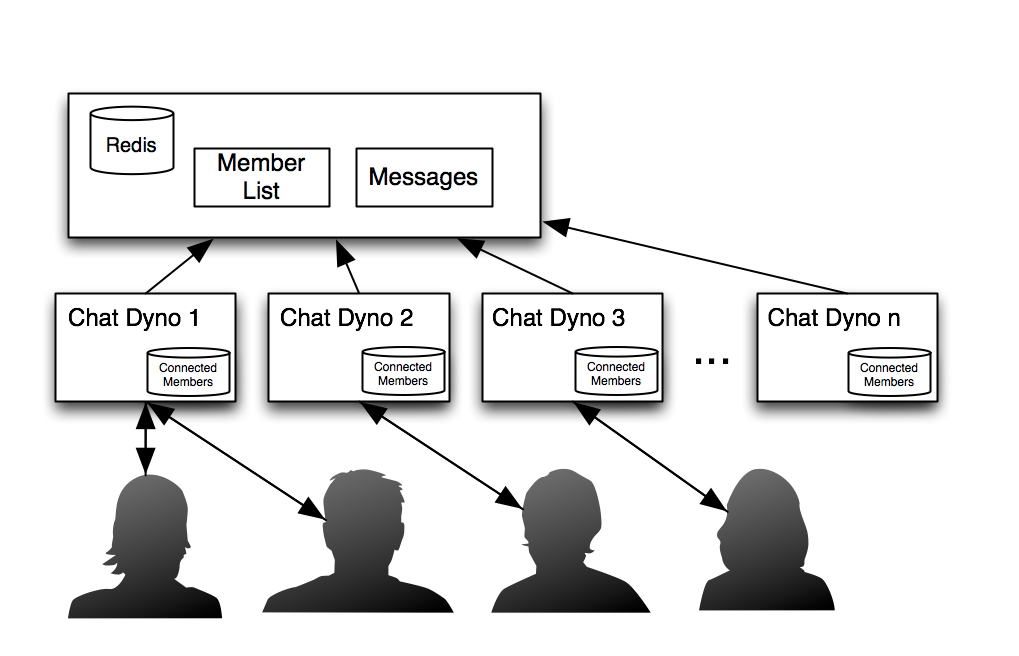
In this example, web process state is maintained by your application while global state is maintained by Redis.
Security considerations
Refer to the WebSocket Security article for information on best practices.
Timeouts
The normal Heroku HTTP routing timeout rules apply to WebSocket connections. Either client or server can prevent the connection from idling by sending an occasional ping packet over the connection.
Keep-alive
WebSocket capable endpoints support HTTP keep-alive. Refer to the documentation for the Heroku router for complete details.
Example implementations
The following examples demonstrate the minimal code required to establish a WebSocket connection and send/receive data. Refer to the Further reading section for language specific guides for developing more powerful applications.