Table of Contents [expand]
Last updated July 16, 2025
Many apps need to run jobs at scheduled times. For example, an app might need to poll a remote API every 5 minutes, or send an email report every night at midnight. The cron tool is commonly used for this use case, but it is ill-suited for horizontally scalable environments such as Heroku. A more powerful, flexible solution is a job scheduler.
See the simple job scheduling section for less demanding use-cases.
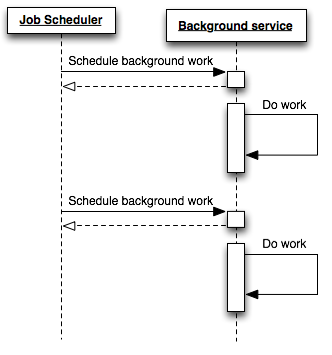
A job scheduler uses the process model to run a lightweight, singleton process that wakes up at a specified interval and schedules work to be performed. When paired with background workers, it forms a clean and extensible approach to job scheduling.
Overview
Scheduling a job and executing the job are independent tasks. Separating a job’s execution from its scheduling ensures that the responsibilities of each component are clearly defined, resulting in a more maintainable system.
Use a job scheduler only to queue background jobs, not to execute them. Background workers then independently receive and execute the queued jobs.

By decoupling your scheduling and execution components, you can easily scale your number of background workers to meet demand. For simplicity, do not scale your job scheduler beyond a single process if possible. Otherwise, you might schedule duplicate work unless you implement complicated locking logic.
Simple job scheduling
Apps with simple scheduling requirements (such as executing a task on a very coarse-grained interval (daily, hourly, or every 10 minutes) can use the Scheduler add-on as a job scheduler. This free tool usually suffices for simple recurring jobs.
Apps that define more specific execution intervals (such as three times a day, every two hours, or even every 5 seconds) instead need to implement a custom clock process to schedule jobs.
Custom clock processes
Beyond the ability to specify a custom schedule, a clock process has the additional benefit of being defined as part of the process model - consistent with other logical application components. This simplifies testing, reduces external dependencies and increases environment parity between development and production.
Defining custom clock processes
Custom clock implementations vary greatly by language. However, as part of an application’s process model, defining a clock process is very simple. Here is the Procfile for a typical Node.js application.
web:    node web.js
worker: node worker.js
clock:  node clock.js
Conceptually, the contents of clock.js are immaterial. What is important is that the clock.js process is responsible only for determining what jobs to run at what interval and for scheduling those jobs to be run in the background.
The background worker defined in worker.js is then responsible for receiving and immediately executing the scheduled work.
Clock processes on Heroku
As previously mentioned, the clock component should be a singleton process to avoid scheduling duplicate jobs and the need for complicated locking logic. Once deployed to Heroku simply scale the clock process to a single dyno.
$ heroku ps:scale clock=1
Scaling 'clock' processes... done, now running 1
The clock process needs to remain scaled up and running in order to determine suitable times to schedule a job. Billing hours accrue on the dyno as long as there is a running clock process, not just when it goes to schedule a job.
The worker process may need additional dynos if the scheduled jobs represent a material increase in processing. At the very least one worker dyno will need to be running to receive and execute scheduled jobs.
Since dynos are restarted at least once a day some logic will need to exist on startup of the clock process to ensure that a job interval wasn’t skipped during the dyno restart.
Implementation
There are many libraries and services that allow you to implement scheduled jobs in your applications. For example, here’s how you can do it in Python.