Last updated March 11, 2025
This add-on is operated by Stackhero
InfluxDB on dedicated instances, up-to-date versions and attractive prices.
Stackhero for InfluxDB provides a preconfigured and ready to use InfluxDB instance, running on a fully dedicated instance.
Stackhero for InfluxDB is easy to setup, fast and has a simple and predictive pricing: writes, queries, dashboards, tasks, buckets and network transfers are unlimited.
With your Stackhero for InfluxDB add-on you will get:
- A private instance (dedicated VM) for high performances and security
- Super fast servers with SSD disks
- TLS encryption (aka SSL)
- An automatic backup every 24 hours
- One click to update to new InfluxDB versions
Provisioning the add-on
Stackhero for InfluxDB can be attached to a Heroku application via the CLI:
A list of all plans available can be found here.
$ heroku addons:create --wait ah-influxdb-stackhero --app <your app name>
Creating ah-influxdb-stackhero...
Your add-on is being provisioned on Stackhero. It will be available in around 2 minutes.
Create the initial user
On add-on creation, you will have to create an initial user.
To do that, open your Stackhero dashboard:
$ heroku addons:open ah-influxdb-stackhero
Opening ah-influxdb-stackhero for sharp-mountain-4005
Then select your InfluxDB instance and click on Admin panel.
You will arrive on InfluxDB web UI where you will be able to create your first user.
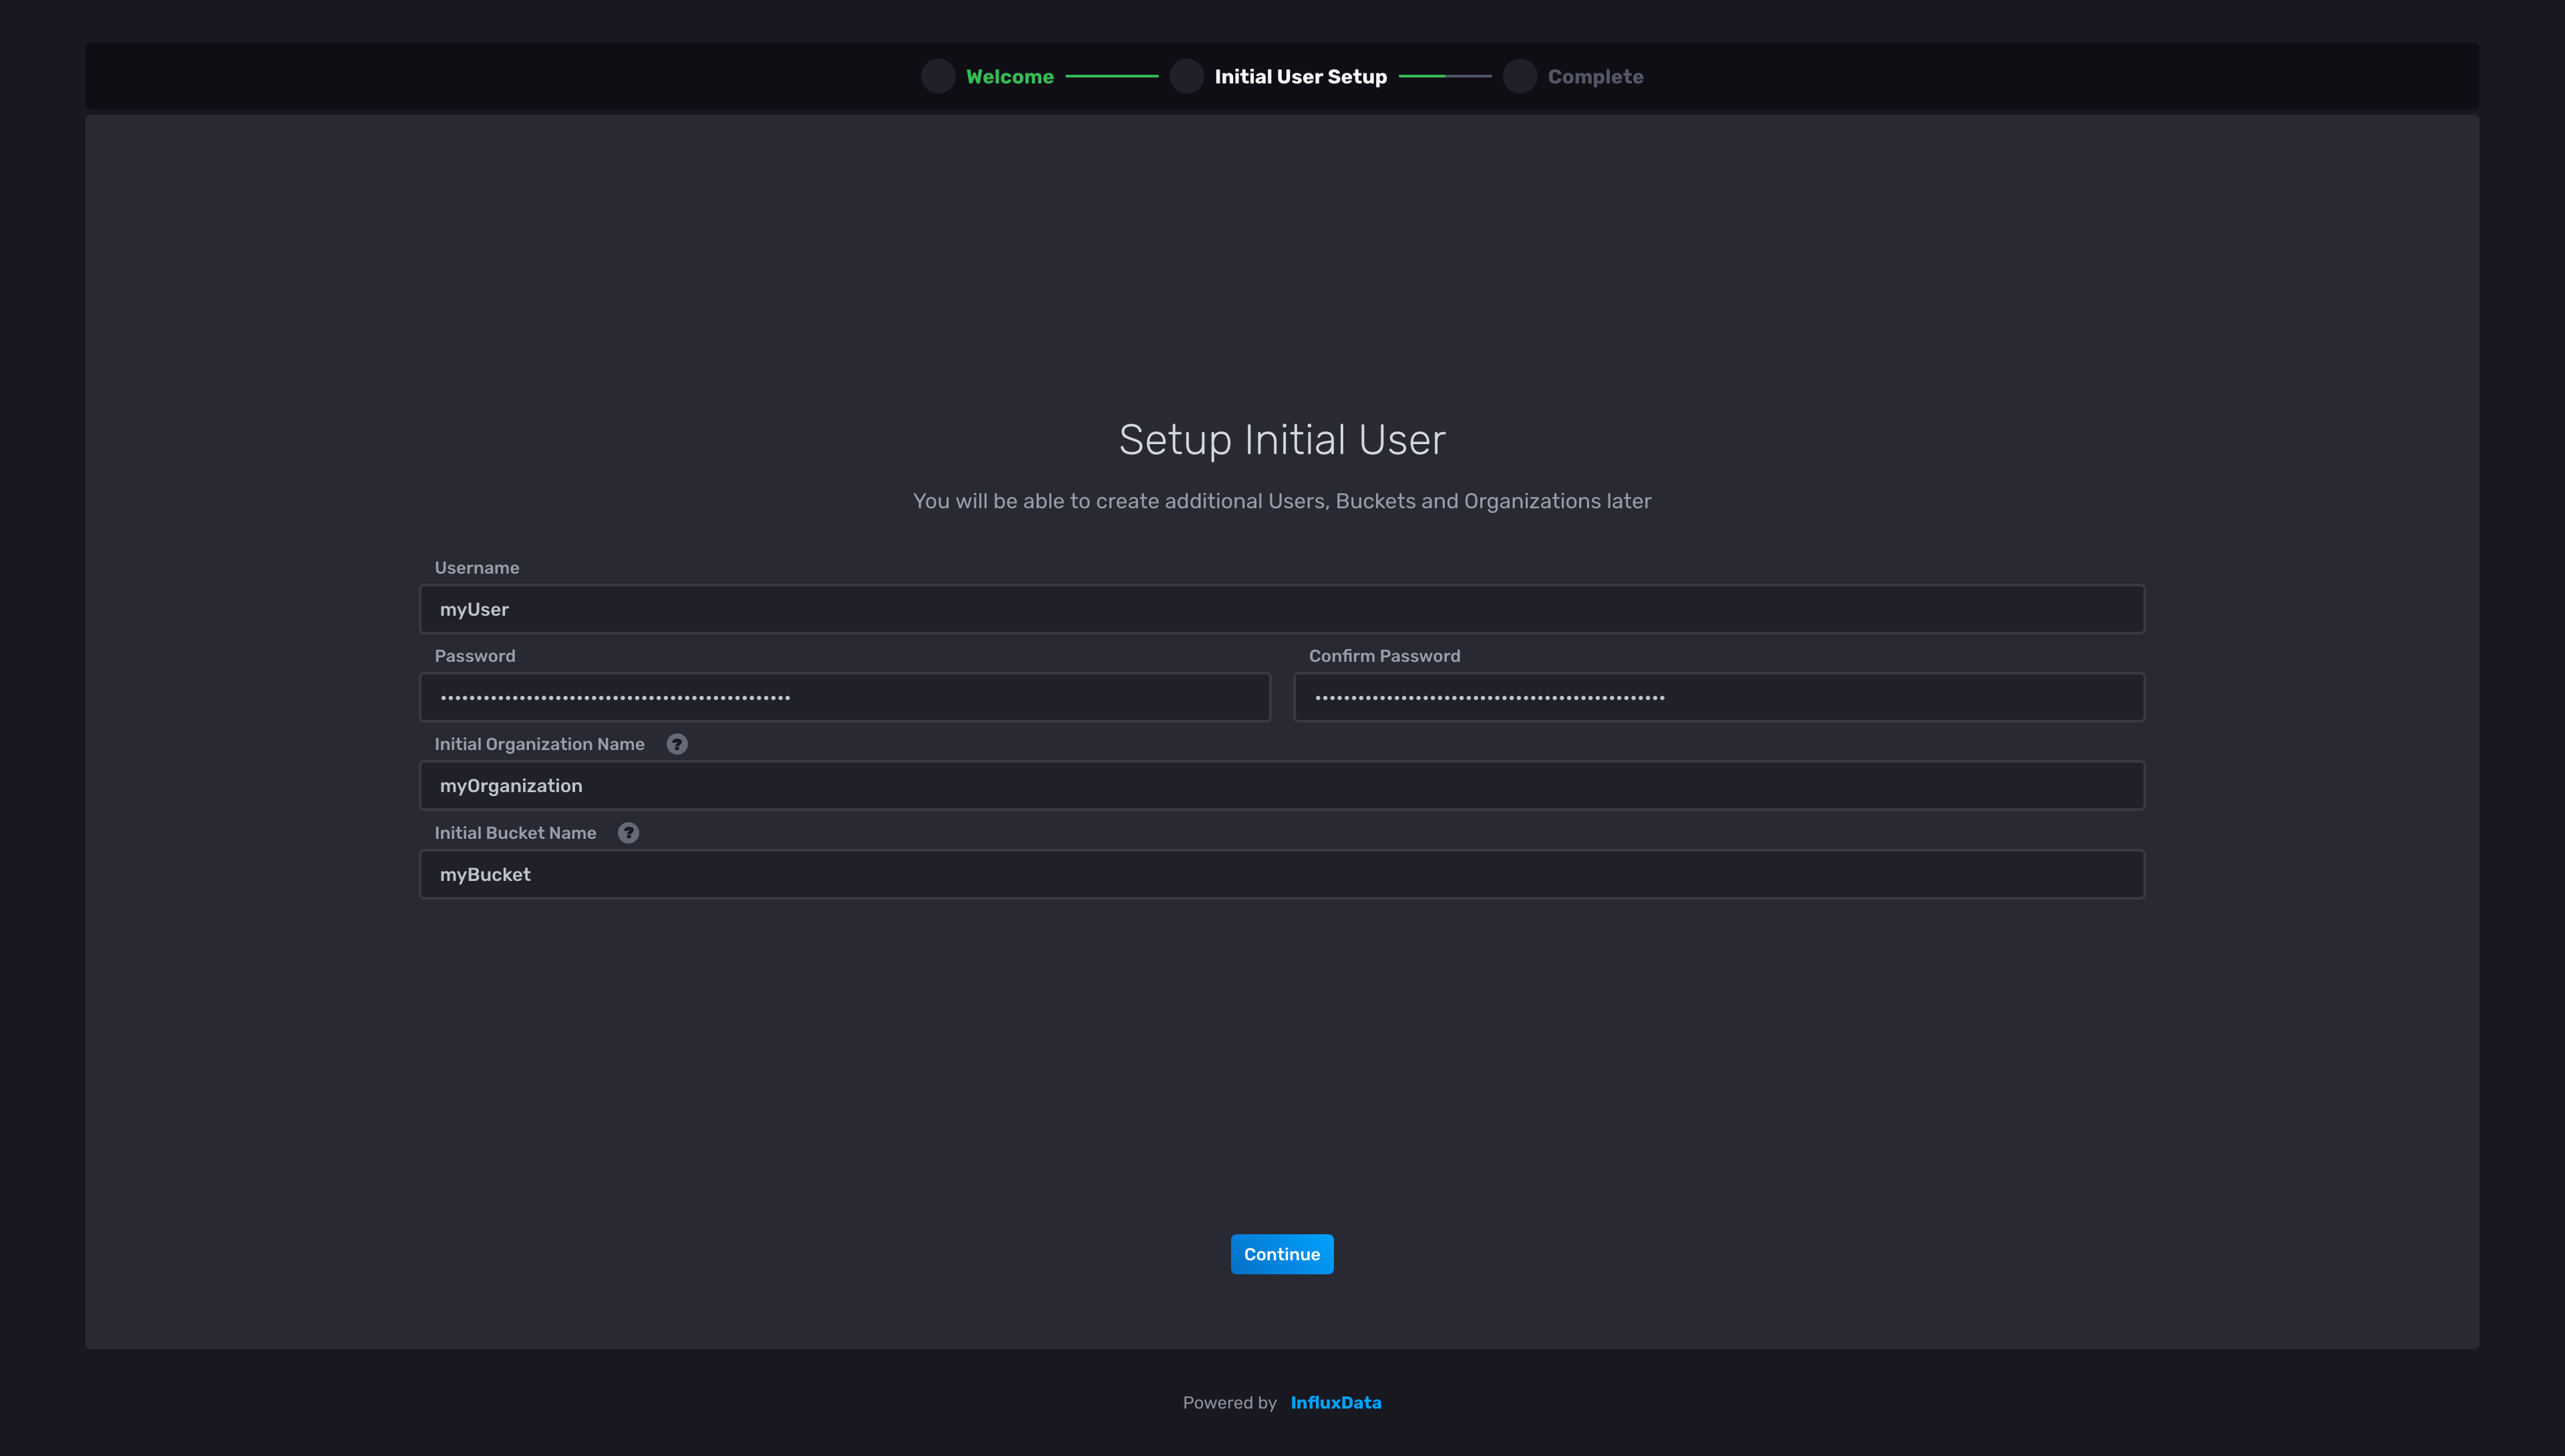
Once your initial user created, you will have to create a token to let you app connect to InfluxDB.
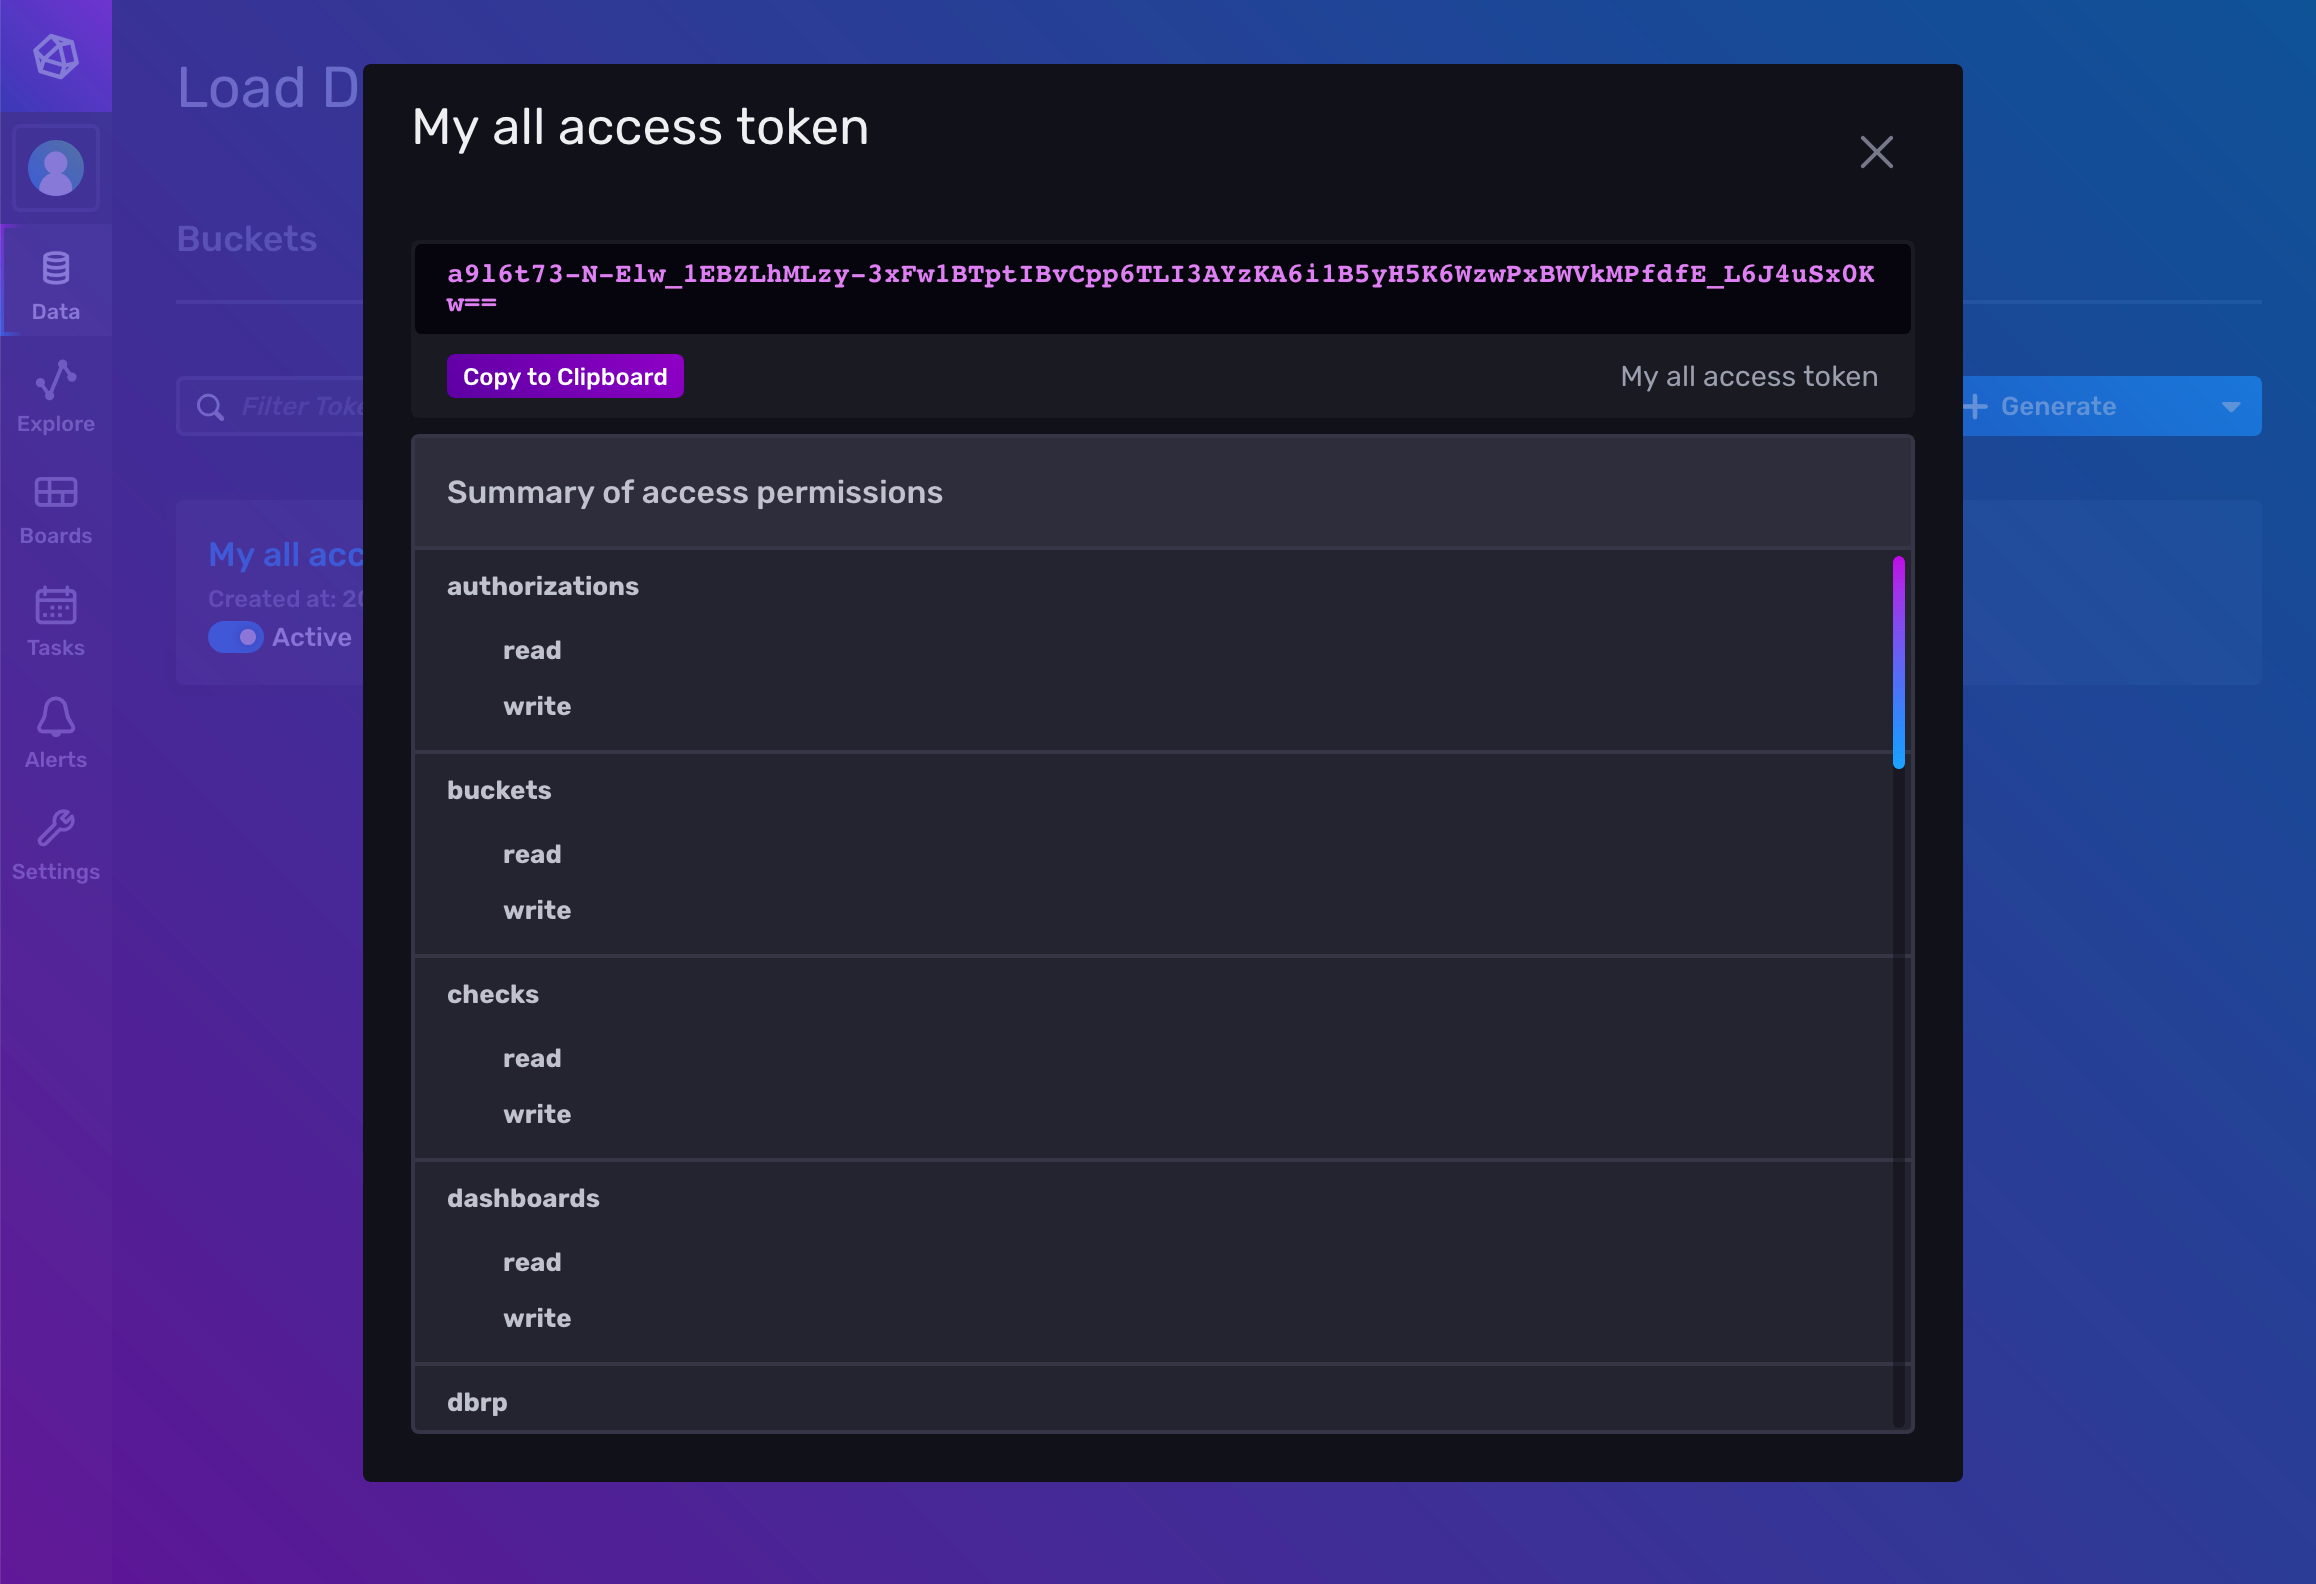
Create a token
To allow your app to connect to InfluxDB, you have to create a token.
First, connect to your Stackhero dashboard:
$ heroku addons:open ah-influxdb-stackhero
Opening ah-influxdb-stackhero for sharp-mountain-4005
Then select your InfluxDB instance and click on Admin panel to go to the InfluxDB WEB UI.
To retrieve your credentials, go to your Stackhero dashboard and click on the “Configure” button. Another way to retrieve them is using the environment variables:
$ heroku config:get STACKHERO_INFLUXDB_ADMIN_USERNAME
$ heroku config:get STACKHERO_INFLUXDB_ADMIN_PASSWORD
Click in the menu on “Data”, “Tokens”, “Generate token” and select “Read/write token”. Give it a description, select the bucket your token has access to and save.
Once the token created, click on its description to retrieve it and click on the “Copy to clipboard” button to copy it to clipboard.
You can now add this token to your environment variables:
$ heroku config:set STACKHERO_INFLUXDB_TOKEN=<yourToken>
Setting RAILS_ENV and restarting ⬢ ah-influxdb-stackhero... done
Client libraries
InfluxDB can be accessed diretly using its HTTP API or using a client library.
You can find all the client libraries on the InfluxDB official documentation.
To connect to your instance, you can retrieve its hostname with the following command: heroku config:get STACKHERO_INFLUXDB_HOST.
Or you can simply read the environment variable STACKHERO_INFLUXDB_HOST in your application.
Local setup
After you provision the add-on, it’s necessary to locally replicate its config variables so your development environment can operate against the service.
Use the Heroku Local command-line tool to configure, run and manage process types specified in your app’s Procfile. Heroku Local reads configuration variables from a .env file.
$ heroku config:get STACKHERO_INFLUXDB_HOST -s  >> .env
$ echo "STACKHERO_INFLUXDB_TOKEN=XXXXXXX" >> .env
Simply replace XXXXXXX per the the token you have generated.
Credentials and other sensitive configuration values should not be committed to source-control. In Git, exclude the .env file with: echo .env >> .gitignore.
For more information, see the Heroku Local article.
Dashboard and InfluxDB console web UI
Stackhero dashboard allows you to see your instance usage, restart it, and apply updates. It also gives you the ability to access the InfluxDB console web UI to consult your InfluxDB data directly in a graphical way.
You can access the dashboard via the CLI:
$ heroku addons:open ah-influxdb-stackhero
Opening ah-influxdb-stackhero for sharp-mountain-4005
or by visiting the Heroku Dashboard and selecting the application in question. Select “Stackhero for InfluxDB from the Add-ons menu.
Upgrading your plan
You cannot downgrade an existing add-on.
Application owners should carefully manage the migration timing to ensure proper application function during the migration process.
Use the heroku addons:upgrade command to migrate to a new plan.
$ heroku addons:upgrade ah-influxdb-stackhero:newplan
-----> Upgrading ah-influxdb-stackhero:newplan to sharp-mountain-4005... done
       Your plan has been updated to: ah-influxdb-stackhero:newplan
Removing the add-on
You can remove Stackhero for InfluxDB via the CLI:
This will destroy all associated data and cannot be undone!
$ heroku addons:destroy ah-influxdb-stackhero
-----> Removing ah-influxdb-stackhero from sharp-mountain-4005... done
Support
Stackhero for InfluxDB support and runtime issues should be submitted via one of the Heroku Support channels. We recommend adding support@stackhero.io in copy for urgent issues.
Additional resources
- InfluxDB documentation by Stackhero
- InfluxDB managed cloud