Skip Navigation
Show nav
Heroku Dev Center
  • Get Started
  • Documentation
  • Changelog
  • Search
  • Get Started
    • Node.js
    • Ruby on Rails
    • Ruby
    • Python
    • Java
    • PHP
    • Go
    • Scala
    • Clojure
  • Documentation
  • Changelog
  • More
    Additional Resources
    • Home
    • Elements
    • Products
    • Pricing
    • Careers
    • Help
    • Status
    • Events
    • Podcasts
    • Compliance Center
    Heroku Blog

    Heroku Blog

    Find out what's new with Heroku on our blog.

    Visit Blog
  • Log inorSign up
View categories

Categories

  • Heroku Architecture
    • Dynos (app containers)
    • Stacks (operating system images)
    • Networking & DNS
    • Platform Policies
    • Platform Principles
  • Command Line
  • Deployment
    • Deploying with Git
    • Deploying with Docker
    • Deployment Integrations
  • Continuous Delivery
    • Continuous Integration
  • Language Support
    • Node.js
    • Ruby
      • Working with Bundler
      • Rails Support
    • Python
      • Background Jobs in Python
      • Working with Django
    • Java
      • Working with Maven
      • Java Database Operations
      • Working with the Play Framework
      • Working with Spring Boot
      • Java Advanced Topics
    • PHP
    • Go
      • Go Dependency Management
    • Scala
    • Clojure
  • Databases & Data Management
    • Heroku Postgres
      • Postgres Basics
      • Postgres Getting Started
      • Postgres Performance
      • Postgres Data Transfer & Preservation
      • Postgres Availability
      • Postgres Special Topics
    • Heroku Data For Redis
    • Apache Kafka on Heroku
    • Other Data Stores
  • Monitoring & Metrics
    • Logging
  • App Performance
  • Add-ons
    • All Add-ons
  • Collaboration
  • Security
    • App Security
    • Identities & Authentication
    • Compliance
  • Heroku Enterprise
    • Private Spaces
      • Infrastructure Networking
    • Enterprise Accounts
    • Enterprise Teams
    • Heroku Connect (Salesforce sync)
      • Heroku Connect Administration
      • Heroku Connect Reference
      • Heroku Connect Troubleshooting
    • Single Sign-on (SSO)
  • Patterns & Best Practices
  • Extending Heroku
    • Platform API
    • App Webhooks
    • Heroku Labs
    • Building Add-ons
      • Add-on Development Tasks
      • Add-on APIs
      • Add-on Guidelines & Requirements
    • Building CLI Plugins
    • Developing Buildpacks
    • Dev Center
  • Accounts & Billing
  • Troubleshooting & Support
  • Integrating with Salesforce
  • Security
  • Identities & Authentication
  • Security Keys

Security Keys

English — 日本語に切り替える

Last updated August 31, 2021

Security keys are small physical devices that are easy to use because there’s nothing to install and no codes to enter. This is a great option if you are unable to use a mobile device for logging in to Heroku.

Options for security keys include Yubikey or Google Titan Key.

Choosing a Security Key

You can use any USB, Lightning, or NFC security key that’s compatible with the FIDO WebAuthn (FIDO2) standard, including Yubico’s YubiKey or Google’s Titan Key.

Security keys require a supported browser such as Chrome™, Firefox®, Edge™, Safari® to act as an intermediary between the key and Salesforce.

WebAuthn-compatible keys aren’t supported in non-Chromium versions of the Edge browser.

Heroku has verified security key functionality in multiple environments. Be sure to consult vendor documentation for specific questions related to security key support in your environment to ensure compatibility.

As always, we strongly recommend configuring a secondary MFA verification method such as Recovery Codes to avoid loss of access if you don’t have your primary method available.

Registering a Security Key

To register a security key as an MFA verification method:

Go to Account Settings and select Setup Multi-Factor Authentication (or Manage Multi-Factor Authentication if you have already enabled other verification methods).

Choose Add Security Key option on the next page and follow the prompts to complete registration. Your registration experience may vary based on the browser and the form factor of the key in use but generally involves these steps -

  • Click Register to add a security key.
  • When prompted, ensure that the security key is inserted in the appropriate port or connected via NFC and activate it.
  • Name your key and complete registration.

Add Security Key

MFA Verification with a Security Key
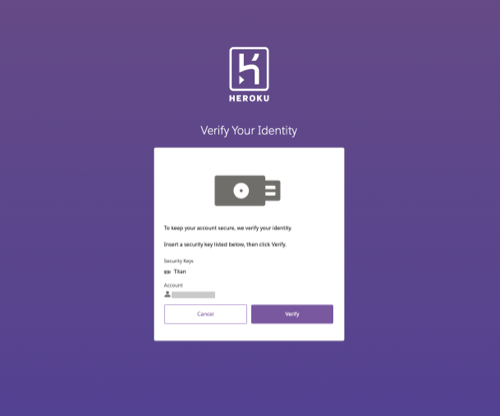
To log in using a security key:

  • After entering your email and password, you are prompted to verify your login using your security key.
  • Insert or connect the key, then click Verify. (Your specific experience to complete logging in may vary based on the browser and the form factor of the key.)

Login with Security Key

Keep reading

  • Identities & Authentication

Feedback

Log in to submit feedback.

Two-Factor Authentication (deprecated) SMS as an MFA Verification Method (DEPRECATED)

Information & Support

  • Getting Started
  • Documentation
  • Changelog
  • Compliance Center
  • Training & Education
  • Blog
  • Podcasts
  • Support Channels
  • Status

Language Reference

  • Node.js
  • Ruby
  • Java
  • PHP
  • Python
  • Go
  • Scala
  • Clojure

Other Resources

  • Careers
  • Elements
  • Products
  • Pricing

Subscribe to our monthly newsletter

Your email address:

  • RSS
    • Dev Center Articles
    • Dev Center Changelog
    • Heroku Blog
    • Heroku News Blog
    • Heroku Engineering Blog
  • Heroku Podcasts
  • Twitter
    • Dev Center Articles
    • Dev Center Changelog
    • Heroku
    • Heroku Status
  • Facebook
  • Instagram
  • Github
  • LinkedIn
  • YouTube
Heroku is acompany

 © Salesforce.com

  • heroku.com
  • Terms of Service
  • Privacy
  • Cookies
  • Cookie Preferences