Table of Contents [expand]
Last updated April 20, 2021
Cloudcube is an add-on that provides fast and easy uploading and privacy management for static files on Amazon S3 via an intuitive dashboard.
Provisioning the add-on
Cloudcube can be attached to a Heroku application via the CLI:
A list of all plans available can be found here.
$ heroku addons:create cloudcube:PLANNAME -a HEROKU_APPNAME
Upon provisioning, 3 config vars are set for your application automatically. Your app can use these to interact with your cube programmatically via one of the AWS SDKs or the AWS REST API.
CLOUDCUBE_ACCESS_KEY_IDis the AWS Access key for accessing the underlying AWS bucket.CLOUDCUBE_SECRET_ACCESS_KEYis the AWS Secret that, when paired with the Access Key, allows manipulation of your cube from your app code.CLOUDCUBE_URLis the base URL root of a cube. All public files have a URL path that begins with this value. For example, ifCLOUDCUBE_URLishttps://cloudcube.url/mycube, then a public file within the cube (e.g.,public/example.txt) is accessible fromhttps://cloudcube.url/mycube/public/example.txt
Custom cube names
Some plans allow a custom name for your cube to be supplied via the Heroku CLI during provision. The command for doing so is:
$ heroku addons:create cloudcube:PLANNAME -a HEROKU_APPNAME --cubename=CUSTOMCUBENAME
E.g. If you are planning to attach a Cloudcube with plan prototype to your application (my-startup-dev) and want to give your cube the custom name my-startup, you would use the following CLI command:
$ heroku addons:create cloudcube:prototype -a my-startup-dev --cubename=my-startup
If the custom cube name is not available, the provision attempt will return an error.
Dashboard
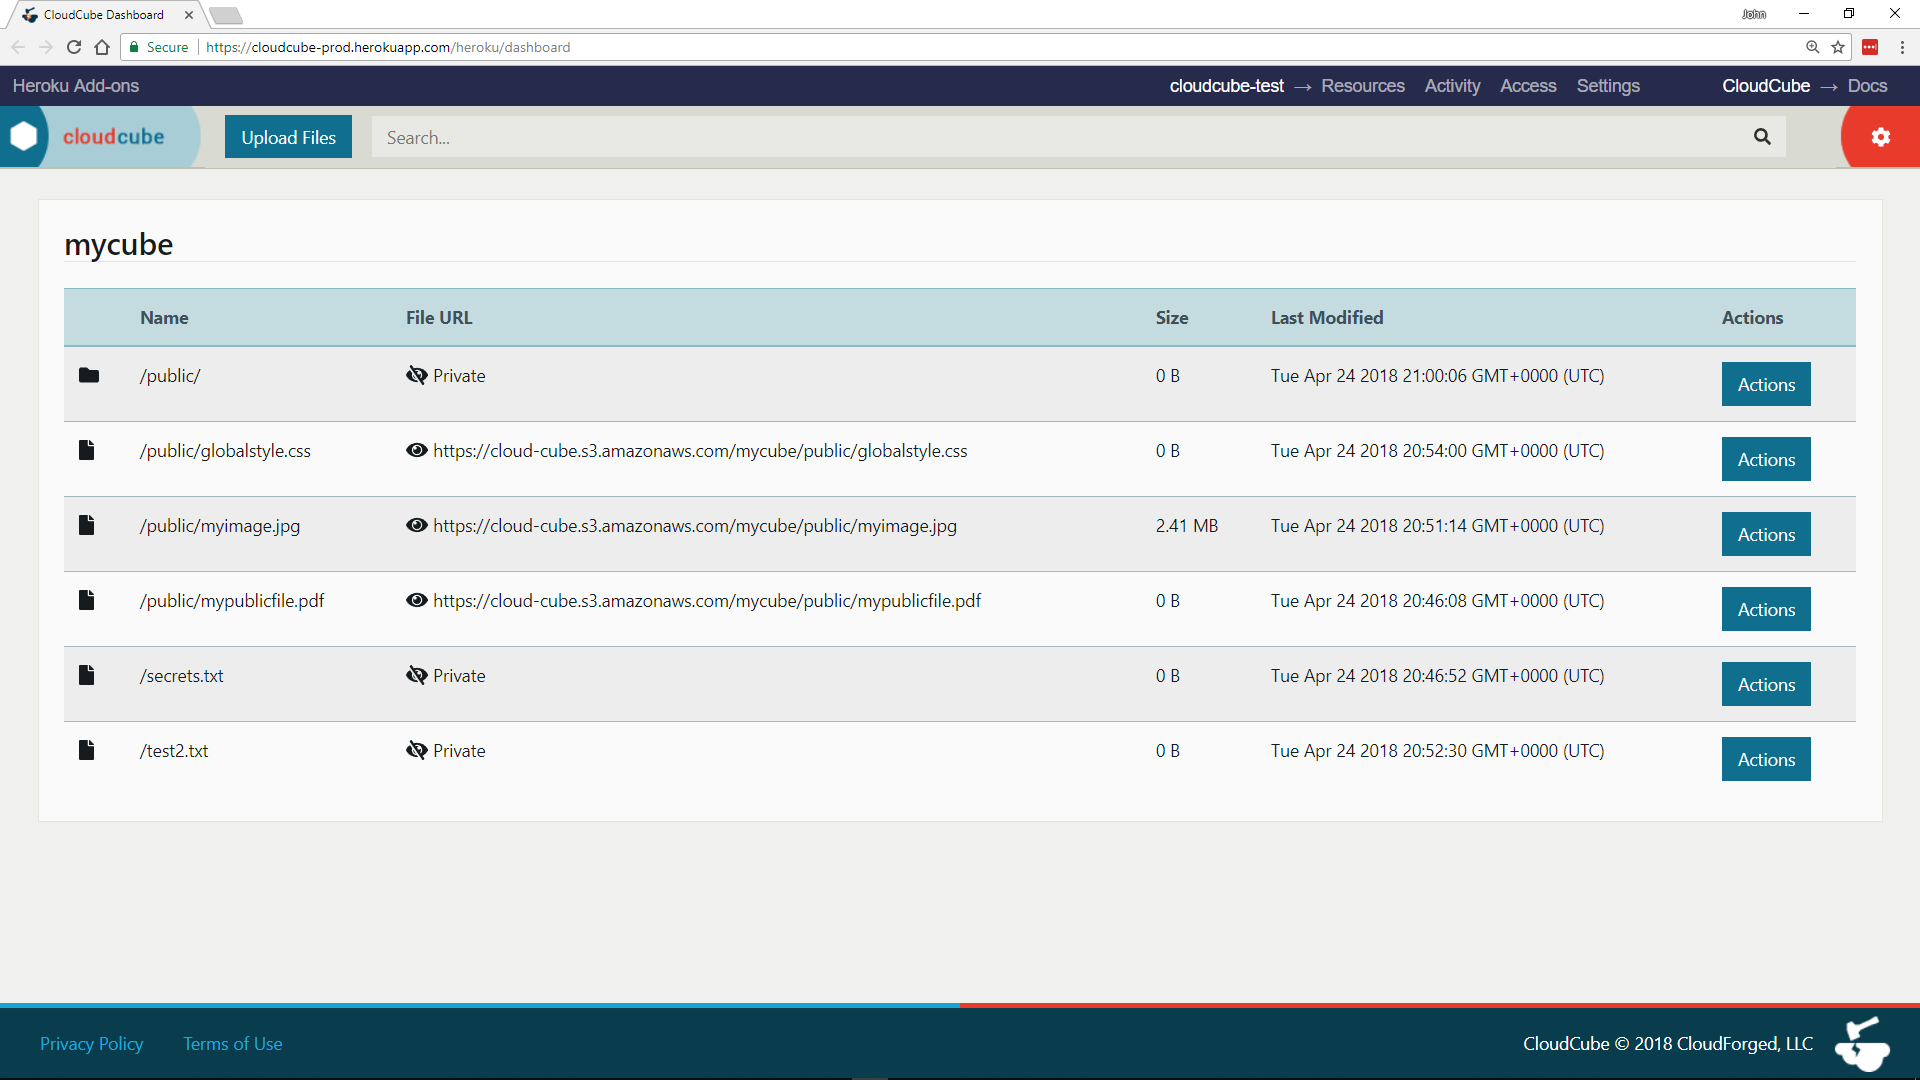
The Cloudcube dashboard is a GUI representation of your cube and its contents. You can use it to upload and search for files, as well as move, rename, and delete them.

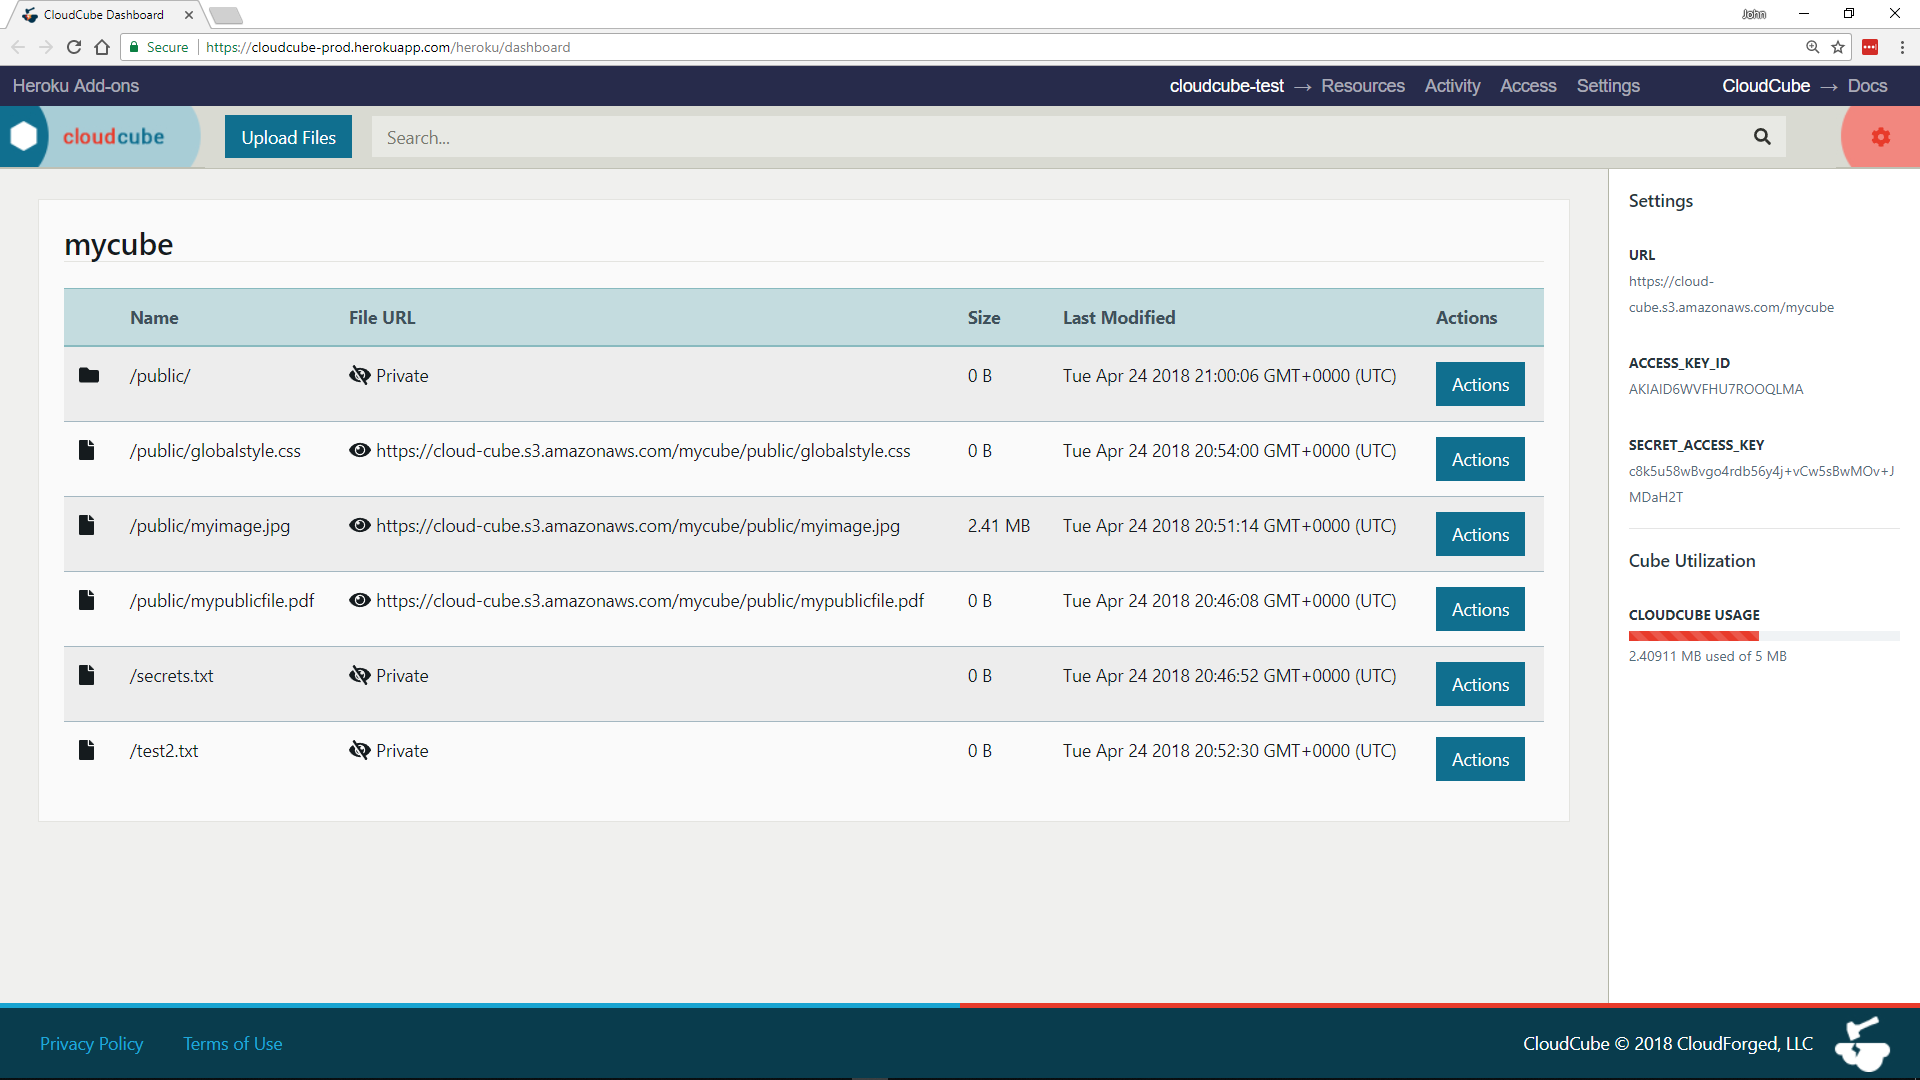
You can also reveal your cube’s AWS IAM credentials and current storage usage from the side pane:

File privacy
Cloudcube files can be either public or private. Public files are given a URL that can be shared with others or used from your application code. Private files are not given a URL and cannot be accessed. The privacy of a file is determined by its file path within the cube.
Making a file public or private
To make a file public, its path must include a directory named public. All other files are private by default.
For example, the following file is public because its path includes a public directory:
/public/i_am_a_public_file.txt
The following file is private because its path does not contain a public directory:
/i_am_a_private_file.txt
A directory named public anywhere in a file’s path will cause the file to be public. For example, the following file is public:
/private/public/private/i_am_still_public.txt
Connecting from within your Heroku app
Cloudcube provides AWS IAM credentials that you can use to access your cube programmatically.
Take care to NEVER hard-code your credentials into your application. Pushing your code to a public place like Github will expose these hard-coded values to the world and alert us that your account has been compromised. Cloudcube will subsequently rotate your credentials without notice and any code or client relying on the old credentials will lose cube access until the new credentials are used. It is good practice to have your application refer to the Config Vars set on your Heroku application rather than the literal values themselves. This keeps them hidden and your account secure.
S3 API and Bucket Name
Your cube is your unique private space within our pre-configured S3 buckets and is implemented as a key prefix to your files within the bucket. When connecting to AWS directly with your IAM credentials, you may need to provide the name of the S3 bucket you are connecting to. The bucket name can be found in the URI provided with your credentials on your dashboard and in your Heroku Configuration Variables. The format of the URI is as follows: https://BUCKETNAME.s3.amazonaws.com/CUBENAME
E.g. If your URI is https://cloud-cube-eu.s3.amazonaws.com/mycube, then your bucket name is cloud-cube-eu.
When interacting with files, the cube name must appear as the prefix to any key you upload, modify, or delete.
E.g. If you wish to upload a file, example.pdf, to the public folder within your cube mycube, you would specify the key as mycube/public/example.pdf
AWS Region
Buckets are hosted in different AWS regions and these regions can be determined from the following table.
| Bucket Name | AWS Region |
|---|---|
| cloud-cube | us-east-1 |
| cloud-cube-us2 | us-east-1 |
| cloud-cube-eu | eu-west-1 |
| cloud-cube-eu2 | eu-west-1 |
| cloud-cube-jp | ap-northeast-1 |
Accessing from your language of choice
AWS offers SDKs in several languages as well as a CLI which can be used to manipulate your cube files.
Migrating between plans
Your Cloudcube plan can be upgraded or downgraded from your Heroku application’s dashboard under Resources by choosing Edit Plan.
It can also be changed via the following CLI command:
$ heroku addons:upgrade cloudcube:NEW_PLANNAME -a HEROKU_APPNAME
Removing the add-on
Removing the add-on will result in the permanent loss of all files in your cube!
Cloudcube can be removed from your application via the Heroku Dashboard under ‘Resources’.
It can also be removed via the following CLI command:
$ heroku addons:destroy cloudcube -a HEROKU_APPNAME
Support
Support requests can be submitted via one of the Heroku Support Channels or to our support email support@cloudforged.com. Service news, updates, and status, can be viewed on our Twitter account.