Skip Navigation
Show nav
Heroku Dev Center Dev Center
  • Get Started
  • Documentation
  • Changelog
  • Search
Heroku Dev Center Dev Center
  • Get Started
    • Node.js
    • Ruby on Rails
    • Ruby
    • Python
    • Java
    • PHP
    • Go
    • Scala
    • Clojure
    • .NET
  • Documentation
  • Changelog
  • More
    Additional Resources
    • Home
    • Elements
    • Products
    • Pricing
    • Careers
    • Help
    • Status
    • Events
    • Podcasts
    • Compliance Center
    Heroku Blog

    Heroku Blog

    Find out what's new with Heroku on our blog.

    Visit Blog
  • Log in or Sign up
View categories

Categories

  • Heroku Architecture
    • Compute (Dynos)
      • Dyno Management
      • Dyno Concepts
      • Dyno Behavior
      • Dyno Reference
      • Dyno Troubleshooting
    • Stacks (operating system images)
    • Networking & DNS
    • Platform Policies
    • Buildpacks
    • Platform Principles
  • Developer Tools
    • Command Line
    • Heroku VS Code Extension
  • Deployment
    • Deploying with Git
    • Deploying with Docker
    • Deployment Integrations
  • Continuous Delivery & Integration (Heroku Flow)
    • Continuous Integration
  • Language Support
    • Node.js
      • Node.js Behavior in Heroku
      • Troubleshooting Node.js Apps
      • Working with Node.js
    • Ruby
      • Rails Support
        • Working with Rails
      • Working with Bundler
      • Working with Ruby
      • Ruby Behavior in Heroku
      • Troubleshooting Ruby Apps
    • Python
      • Working with Python
      • Background Jobs in Python
      • Python Behavior in Heroku
      • Working with Django
    • Java
      • Java Behavior in Heroku
      • Working with Java
      • Working with Maven
      • Working with Spring Boot
      • Troubleshooting Java Apps
    • PHP
      • Working with PHP
      • PHP Behavior in Heroku
    • Go
      • Go Dependency Management
    • Scala
    • Clojure
    • .NET
      • Working with .NET
  • Databases & Data Management
    • Heroku Postgres
      • Postgres Basics
      • Postgres Getting Started
      • Postgres Performance
      • Postgres Data Transfer & Preservation
      • Postgres Availability
      • Postgres Special Topics
      • Migrating to Heroku Postgres
    • Heroku Key-Value Store
    • Apache Kafka on Heroku
    • Other Data Stores
  • AI
    • Working with AI
    • Heroku Inference
      • AI Models
      • Heroku Inference Quick Start Guides
      • Inference API
      • Inference Essentials
    • Tool Use
    • Vector Database
    • AI Integrations
  • Monitoring & Metrics
    • Logging
  • App Performance
  • Add-ons
    • All Add-ons
  • Collaboration
  • Security
    • App Security
    • Identities & Authentication
      • Single Sign-on (SSO)
    • Private Spaces
      • Infrastructure Networking
    • Compliance
  • Heroku Enterprise
    • Enterprise Accounts
    • Enterprise Teams
  • Patterns & Best Practices
  • Extending Heroku
    • Platform API
    • App Webhooks
    • Heroku Labs
    • Building Add-ons
      • Add-on Development Tasks
      • Add-on APIs
      • Add-on Guidelines & Requirements
    • Building CLI Plugins
    • Developing Buildpacks
    • Dev Center
  • Accounts & Billing
  • Troubleshooting & Support
  • Integrating with Salesforce
    • Heroku AppLink
      • Getting Started with Heroku AppLink
      • Heroku AppLink Reference
      • Working with Heroku AppLink
    • Heroku Connect (Salesforce sync)
      • Heroku Connect Administration
      • Heroku Connect Reference
      • Heroku Connect Troubleshooting
    • Other Salesforce Integrations
  • AI
  • Heroku Inference
  • Heroku AI Studio

Heroku AI Studio

Last updated September 15, 2025

Table of Contents

  • Use Cases and Benefits
  • Get Started with AI Studio
  • Using AI Studio
  • Additional Resources

Heroku AI Studio is a web-based interface that enables developers to explore, test, and understand the capabilities of the Managed Inference and Agents add-on. AI Studio offers a real-time, no-code environment where you can interact with underlying models and tools. You can use AI Studio to prototype and optimize AI-powered features before you implement them. AI Studio enables you to streamline and accelerate your development process, helping you get the most value out of the Managed Inference and Agents add-on.

Use Cases and Benefits

AI Studio supports AI development, from model experimentation to integration:

  • Understand model nuances: Experiment with different prompts and parameters to understand the capabilities of the model you provisioned.
  • Tune prompts: Tune and refine prompts for your application before you implement them. Tuning enables you to iterate on your text and instructions without frequently redeploying code.
  • Manage tool use: Verify which tools are effective for your use case, so you can receive reliable and expected outputs.
  • Streamline integration: Integrate validated prompts and configurations into your app’s code with the help of built-in guidance and code snippets.

Get Started with AI Studio

To access AI Studio:

  1. Open the Heroku Dashboard.
  2. Select the app that has the Managed Inference and Agents add-on attached.
  3. Select the Resources tab.
  4. Select Heroku Managed Inference and Agents under Add-on Services. >note >If you don’t have the add-on yet, use the search bar to find and add the Heroku Managed Inference and Agents add-on.
  5. Select Open Playground.

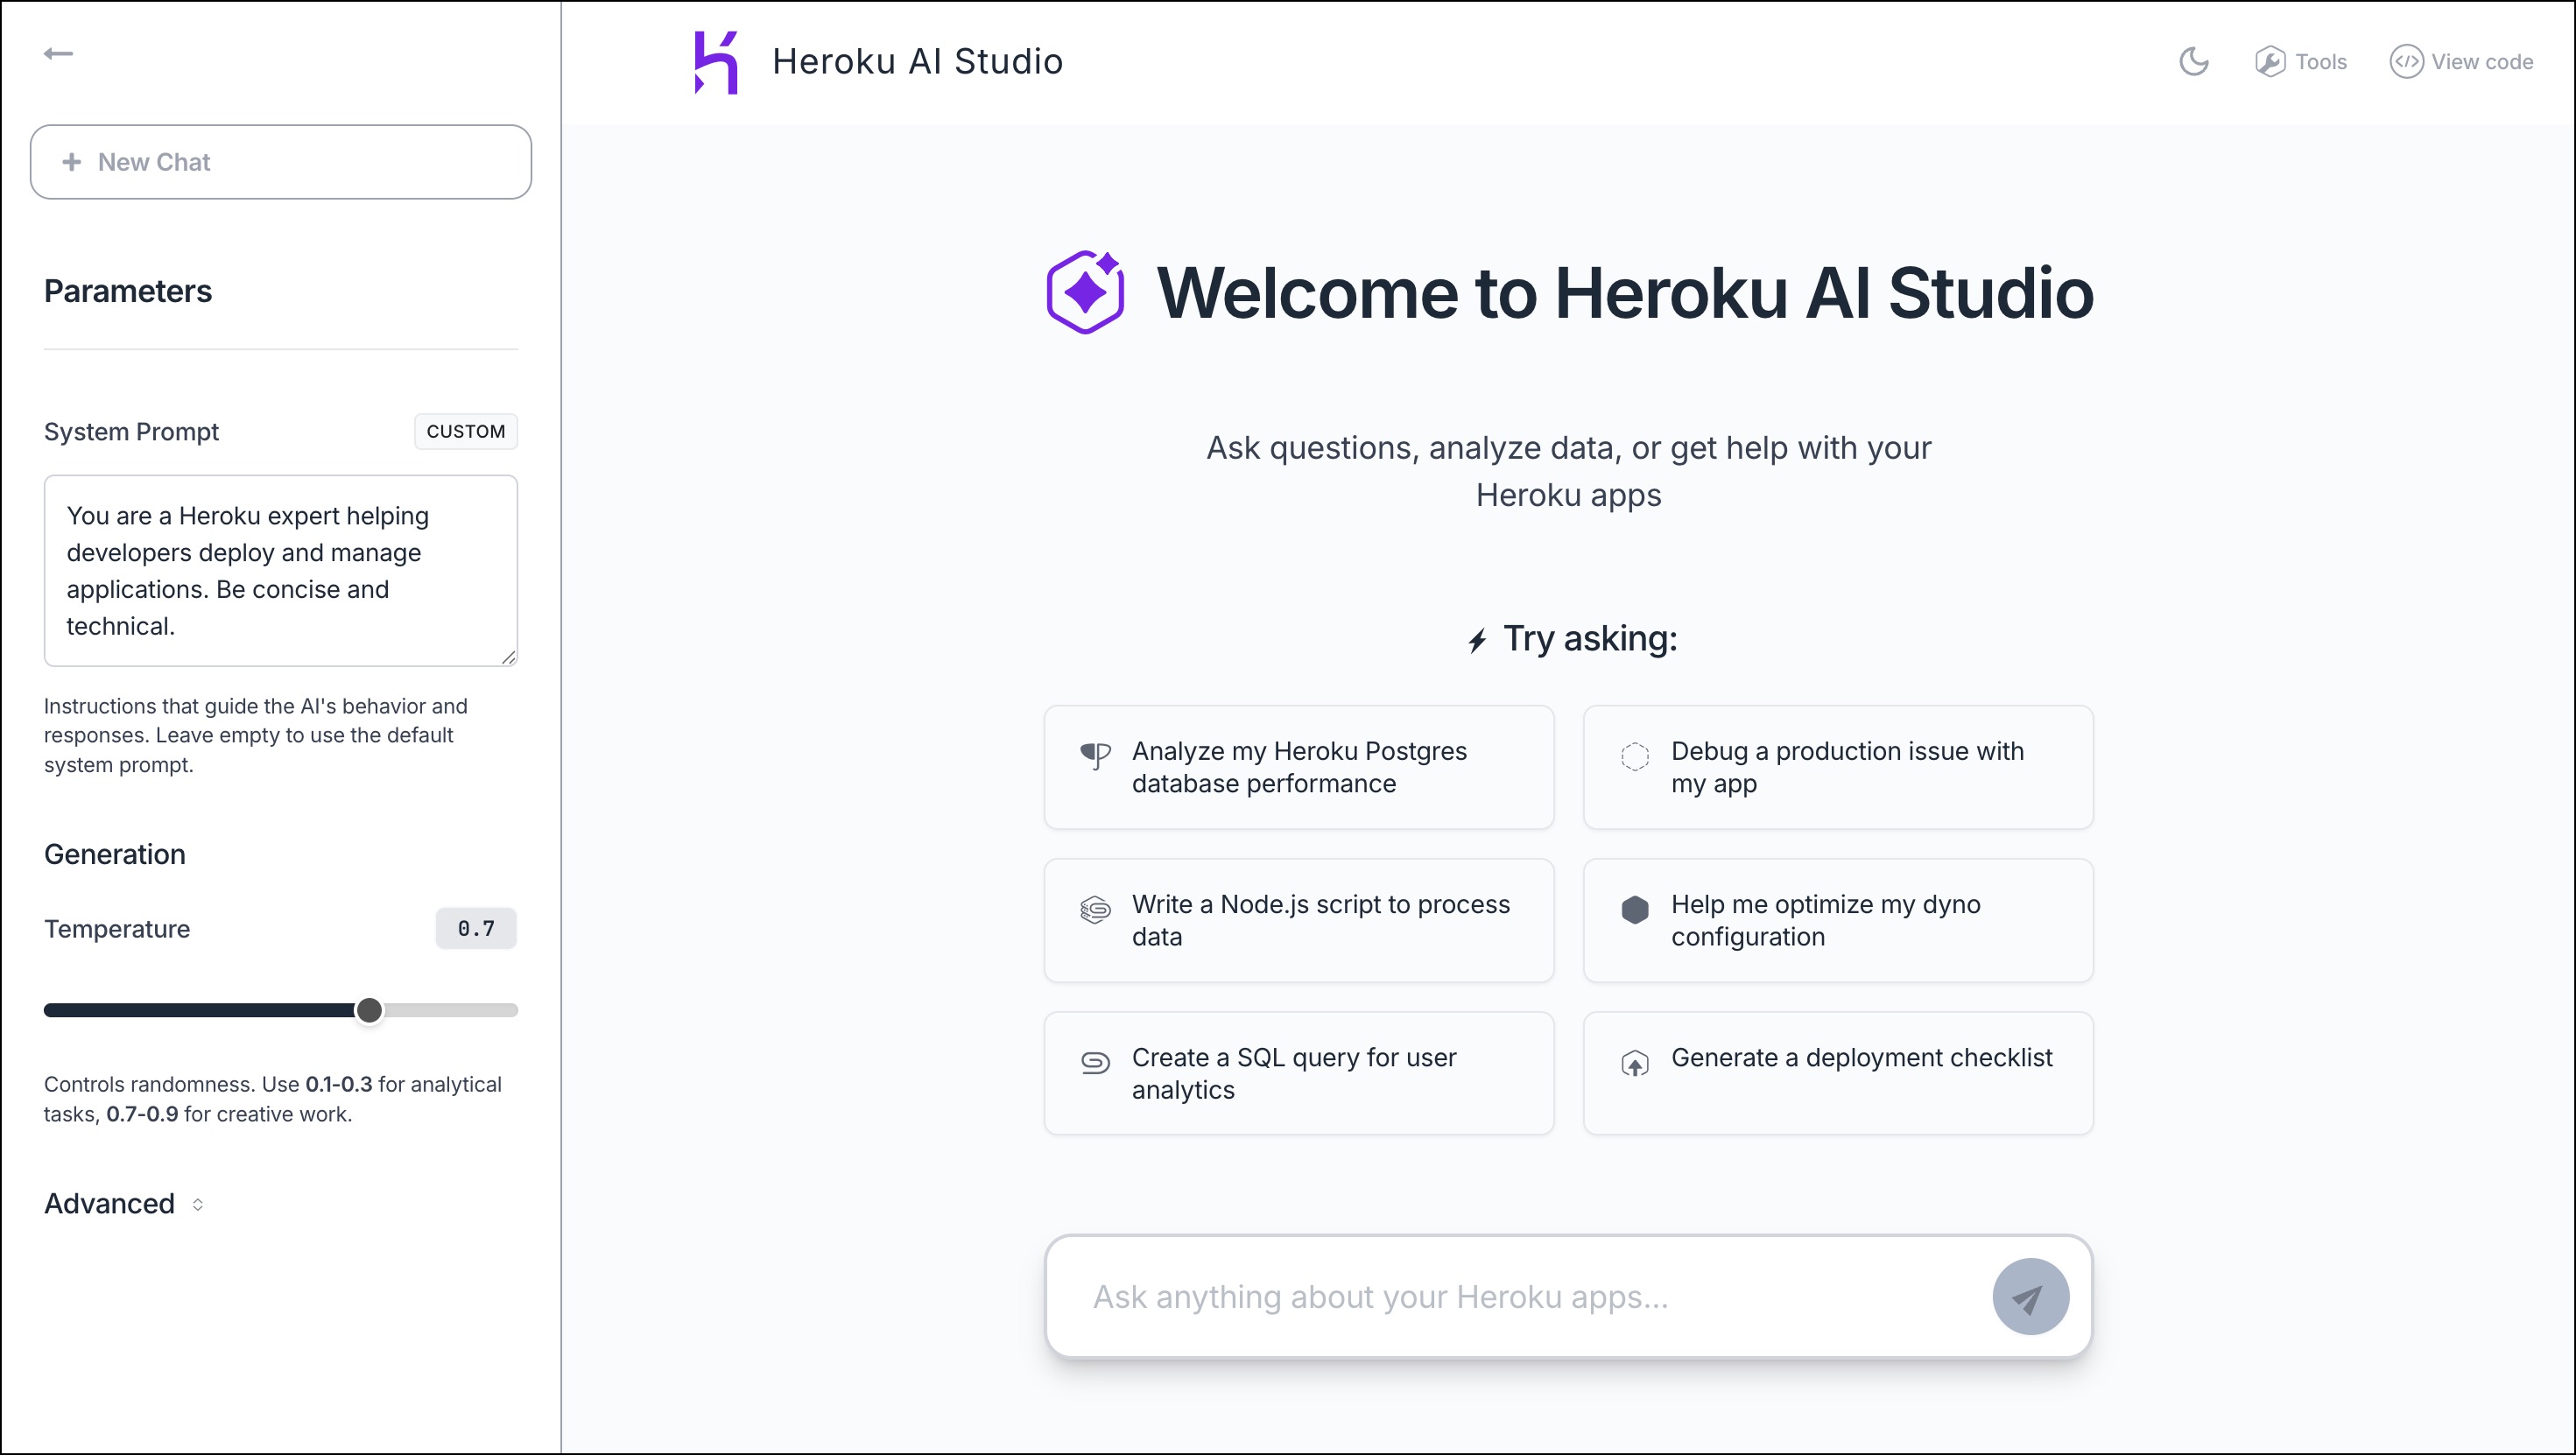
Heroku AI Studio welcome page

Using AI Studio

You can use the chat function in Heroku AI Studio to ask questions, analyze data, and get general help with Heroku apps. AI Studio can help with a variety of tasks, like analyzing app performance, debugging production issues, and optimizing configurations.

You can change Parameters to guide the AI’s behavior and responses:

  • System Prompt: instructions that guide the AI’s behavior and responses
  • Temperature: sets the randomness of responses
  • Top-p: nucleus sampling that limits the model to the most probable tokens
  • Max tokens: sets response length
  • Stop sequences: text patterns that stop generation immediately

When you chat with AI Studio, you can toggle Agent Mode on and off. Agent mode allows you to use tools. To enable Heroku tool use, click Tools in the upper-right corner. You can use tools for tasks like code execution, content conversion, computation, and database querying.

Heroku AI Studio toolbar

Select the moon (or sun) icon to switch between light and dark modes. Click View code to copy code snippets you can integrate into your app.

Additional Resources

  • Heroku Inference
  • Heroku AI

Keep reading

  • Heroku Inference

Feedback

Log in to submit feedback.

Information & Support

  • Getting Started
  • Documentation
  • Changelog
  • Compliance Center
  • Training & Education
  • Blog
  • Support Channels
  • Status

Language Reference

  • Node.js
  • Ruby
  • Java
  • PHP
  • Python
  • Go
  • Scala
  • Clojure
  • .NET

Other Resources

  • Careers
  • Elements
  • Products
  • Pricing
  • RSS
    • Dev Center Articles
    • Dev Center Changelog
    • Heroku Blog
    • Heroku News Blog
    • Heroku Engineering Blog
  • Twitter
    • Dev Center Articles
    • Dev Center Changelog
    • Heroku
    • Heroku Status
  • Github
  • LinkedIn
  • © 2025 Salesforce, Inc. All rights reserved. Various trademarks held by their respective owners. Salesforce Tower, 415 Mission Street, 3rd Floor, San Francisco, CA 94105, United States
  • heroku.com
  • Legal
  • Terms of Service
  • Privacy Information
  • Responsible Disclosure
  • Trust
  • Contact
  • Cookie Preferences
  • Your Privacy Choices