Table of Contents [expand]
- Provisioning the add-on
- Local setup
- Configure Redis on Java
- Configure Redis on Ruby
- Configure Redis on Python
- Configure Redis on PHP
- Configure Redis on Go
- Configure Redis on Node.js
- Dashboard and web UI (Redis Commander)
- Set eviction policy
- Upgrading your plan
- Removing the add-on
- Support
- Additional resources
Last updated April 04, 2025
This add-on is operated by Stackhero
Redis® on dedicated instances, up-to-date versions and super attractive prices.
Stackhero for Redis provides a managed Redis instance running on a fully dedicated instance.
With your Stackhero for Redis add-on you will get:
- A private instance (dedicated VM) for high performances and security
- TLS encryption (aka SSL)
- An automatic backup every 24 hours
- A graphical web UI (Redis Commander)
- One click to update to new Redis versions
All Redis clients can connect to Stackhero for Redis and there is a Redis client library for almost every language out there, including Ruby, Node.js, Java, Python, Clojure and Erlang.
When you will choose a Redis client library, prefer one that supports TLS encryption (aka SSL) for best security. We strongly discourage you to use Redis without TLS support unless you know exactly what you are doing.
Provisioning the add-on
Stackhero for Redis can be attached to a Heroku application via the CLI:
A list of all plans available can be found here.
$ heroku addons:create --wait stackhero-redis --app <your app name>
Creating stackhero-redis...
Your add-on is being provisioned on Stackhero. It will be available in around 2 minutes.
After you provision Stackhero for Redis, the STACKHERO_REDIS_URL_TLS and STACKHERO_REDIS_URL_CLEAR config variables are available in your app’s configuration. They contain the URLs to your Redis instance as its credentials.
STACKHERO_REDIS_URL_TLSis the URL to your Redis instance with TLS encryption. This is the recommended way to connect to your Redis instance.STACKHERO_REDIS_URL_CLEARis the URL to your Redis instance with no encryption (clear).
You can see the content of those variables via the heroku config:get command:
$ heroku config:get STACKHERO_REDIS_URL_TLS
rediss://user:password@domain:port
After you install Stackhero for Redis, your application should be configured to fully integrate with the add-on.
Local setup
After you provision the add-on, it’s necessary to locally replicate its config variables so your development environment can operate against the service.
Use the Heroku Local command-line tool to configure, run and manage process types specified in your app’s Procfile. Heroku Local reads configuration variables from a .env file. To view all of your app’s config variables, type heroku config. Use the following command for each value that you want to add to your .env file:
$ heroku config:get STACKHERO_REDIS_URL_TLS -s  >> .env
$ heroku config:get STACKHERO_REDIS_URL_CLEAR -s  >> .env
Credentials and other sensitive configuration values should not be committed to source-control. In Git, exclude the .env file with: echo .env >> .gitignore.
For more information, see the Heroku Local article.
Configure Redis on Java
You can use the environment variable STACKHERO_REDIS_URL_TLS to connect to Redis.
Here is an example of a connection using Jedis:
private static Jedis getConnection() throws URISyntaxException {
  URI redisURI = new URI(System.getenv("STACKHERO_REDIS_URL_TLS"));
  Jedis jedis = new Jedis(redisURI);
  return jedis;
}
You will find more information on the official Jedis repository and the official wiki.
In a multithreaded environment, like a webserver, you should use Jedis Pool:
public static JedisPool getPool() {
  URI redisURI = new URI(System.getenv("STACKHERO_REDIS_URL_TLS"));
  JedisPoolConfig poolConfig = new JedisPoolConfig();
  poolConfig.setMaxTotal(10);
  poolConfig.setMaxIdle(5);
  poolConfig.setMinIdle(1);
  poolConfig.setTestOnBorrow(true);
  poolConfig.setTestOnReturn(true);
  poolConfig.setTestWhileIdle(true);
  JedisPool pool = new JedisPool(poolConfig, redisURI);
  return pool;
}
See the official wiki for more information.
Configure Redis on Ruby
Install the Redis gem:
$ bundle add redis
With Rails, you have to create the initializer file config/initializers/redis.rb like this:
$redis = Redis.new(url: ENV["STACKHERO_REDIS_URL_TLS"])
To use Redis as a cache system, edit the config/environments/production.rb file and add this line:
config.cache_store = :redis_cache_store, { url: ENV['STACKHERO_REDIS_URL_TLS'] }
By default caching is only enabled on production environment.
If you need to test caching on development, edit the file config/environments/development.rb, add the configuration from above and add config.action_controller.perform_caching = true to enable caching.
A good way to test that caching works is to start a Rails console (with bin/rails console) and test writing with Rails.cache.write("foo", "bar").
Configure Redis on Sidekiq
To use Stackhero for Redis as your Sidekiq Redis server, set the environment variable REDIS_PROVIDER to STACKHERO_REDIS_URL_TLS:
$ heroku config:set REDIS_PROVIDER=STACKHERO_REDIS_URL_TLS
Sidekiq will automatically use Stackero for Redis then.
By default, Sidekiq is configured in a manner that doesn’t accommodate any tolerance during network disturbances.
To improve this, we suggest modifying the Sidekiq client configuration in config/initializers/sidekiq.rb to enhance stability:
# File config/initializers/sidekiq.rb
Sidekiq.configure_client do |config|
  config.redis = {
    network_timeout: 5, # Set the timeout to 5 seconds
    pool_timeout: 5, # Set the timeout to 5 seconds
    reconnect_attempts: Array.new(240, 0.5) # Try to reconnect 240 times, every 0.5 second (120 seconds/2 minutes in total) before triggering an error
  }
end
This configuration ensures that if your Redis server becomes unavailable, the client will attempt retries for a duration of 2 minutes before reporting an error. This gives the Redis server time to restart, for example. Depending on your Sidekiq’s usage, you may adjust this setting to better suit your specific requirements.
Configure Redis on Resque
Edit the file config/resque.yml and replace production: <%= ENV['REDIS_URL'] %> with this value:
production: <%= ENV['STACKHERO_REDIS_URL_TLS'] %>
Resque will then use Stackero for Redis.
Configure Redis on Python
Install the Redis package:
$ pip install redis
$ pip freeze > requirements.txt
import os
import redis

r = redis.from_url(os.environ.get("STACKHERO_REDIS_URL_TLS"))
You will get more information from the official Python redis package documentation.
How to avoid error “Connection closed by server” with Redis and Python
The error “redis.exceptions.ConnectionError: Connection closed by server” is potentially related to the fact that your Python app doesn’t exchange data with Redis for a certain time and the connection closes automatically. When your app tries to exchange again with Redis, the connection doesn’t work anymore and you get the error “Connection closed by server”.
To resolve this, you can pass the health_check_interval setting to your Redis connection like this:
r = redis.from_url(
  'rediss://default:<password>@XXXXXX.stackhero-network.com:<port>',
  health_check_interval=10,
  socket_connect_timeout=5,
  retry_on_timeout=True,
  socket_keepalive=True
)
If you use the Redis PubSub feature, the redis-py library assumes that you call functions get_message() or listen() more frequently than health_check_interval seconds.
In our example above, we have set health_check_interval to 10 seconds so your app has to call get_message() or listen() at least one time each 10 seconds (see the redis-py official documentation).
If it is not the case, you will get the error “Connection closed by server” too.
To avoid that, a trick is to call check_health() regularly.
Here is an example:
import redis
import threading

# Connection to Redis
r = redis.from_url(
  'rediss://default:<password>@XXXXXX.stackhero-network.com:<port>',
  health_check_interval=10,
  socket_connect_timeout=5,
  retry_on_timeout=True,
  socket_keepalive=True
)

# Create a PubSub instance
p = r.pubsub()

# Subscribe to the channel "test"
p.subscribe('test')

# Create a function that will call `check_health` every 5 seconds
def redis_auto_check(p):
  t = threading.Timer(5, redis_auto_check, [ p ])
  t.start()
  p.check_health()

# Call the redis_auto_check function
redis_auto_check(p)
Configure Redis on PHP
Retrieve the URL with getenv('STACKHERO_REDIS_URL_TLS') and pass it to your preferred Redis client library.
Handle PHP sessions with Redis
You can use the following code to store PHP sessions on Stackhero for Redis:
<?php

// Parse Heroku Redis URL from environment
$redis_url = parse_url(getenv('STACKHERO_REDIS_URL_TLS'));

// Configure session handler
ini_set('session.save_handler', 'redis');
ini_set('session.save_path', "tls://{$redis_url['host']}:{$redis_url['port']}?auth={$redis_url['pass']}&timeout=5");

// Start the session
session_start();

?>
Configure Redis on Go
First install the go-redis package:
$ go get github.com/go-redis/redis/v8
Then, import it in your code:
import "github.com/gomodule/redigo/redis"
Finally, connect to the Redis server using the STACKHERO_REDIS_URL_TLS variable:
opt, err := redis.ParseURL(os.Getenv("STACKHERO_REDIS_URL_TLS"))
if err != nil {
    panic(err)
}

rdb := redis.NewClient(opt)
You will find more information on the official go-redis repository
Configure Redis on Node.js
We recommend using ioredis.
Install the ioredis package:
$ npm install ioredis
const Ioredis = require('ioredis');

(async () => {

  const redis = new Ioredis(process.env.STACKHERO_REDIS_URL_TLS);

  // Set key "stackhero-example-key" to "abcd"
  await redis.set('stackhero-example-key', 'abcd');

  // Get key "stackhero-example-key"
  const value = await redis.get('stackhero-example-key');
  console.log(`Key "stackhero-example-key" has value "${value}"`);

  // Finally delete key "stackhero-example-key"
  await redis.del('stackhero-example-key');

})().catch(error => {
  console.error('An error occurred!', error);
});
You will find a lot of other examples on the official ioredis repository.
Dashboard and web UI (Redis Commander)
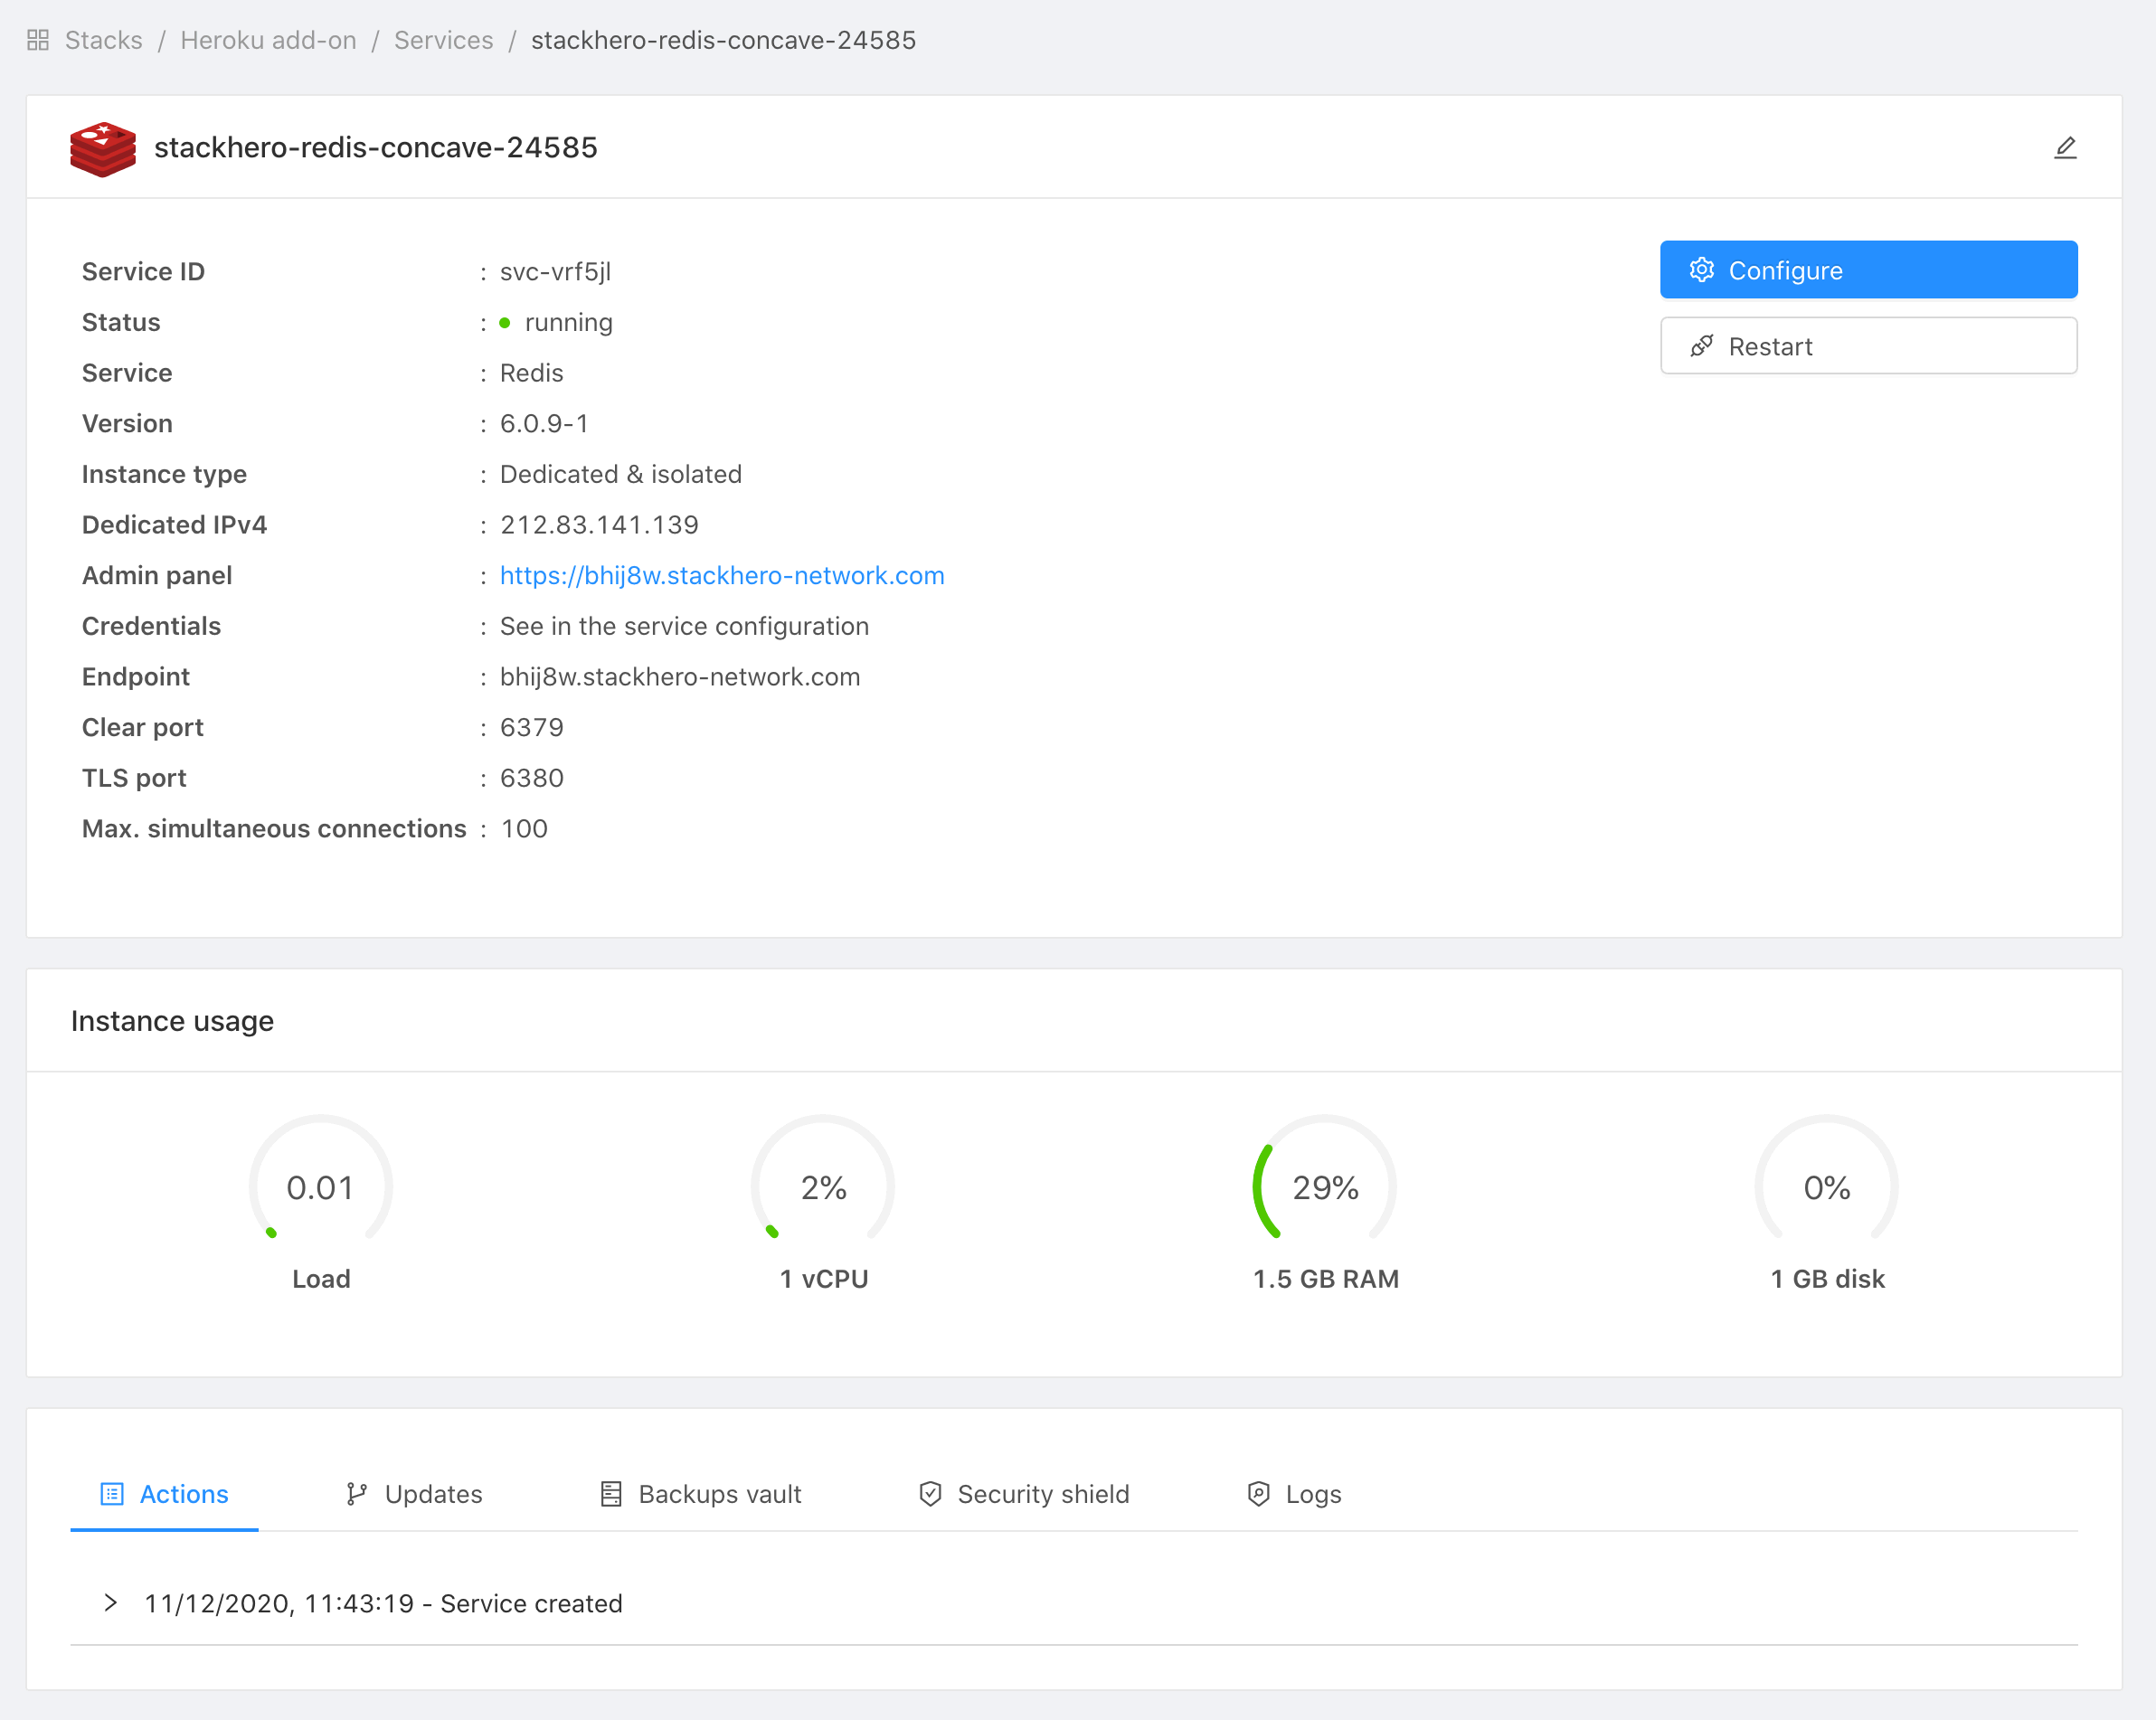
Stackhero dashboard allows you to see your instance usage, restart it, and apply updates. It also gives you the ability to access the web UI to consult your Redis data directly in a graphical way.
You can access the dashboard via the CLI:
$ heroku addons:open stackhero-redis
Opening stackhero-redis for sharp-mountain-4005
or by visiting the Heroku Dashboard and selecting the application in question. Select Stackhero for Redis from the Add-ons menu.
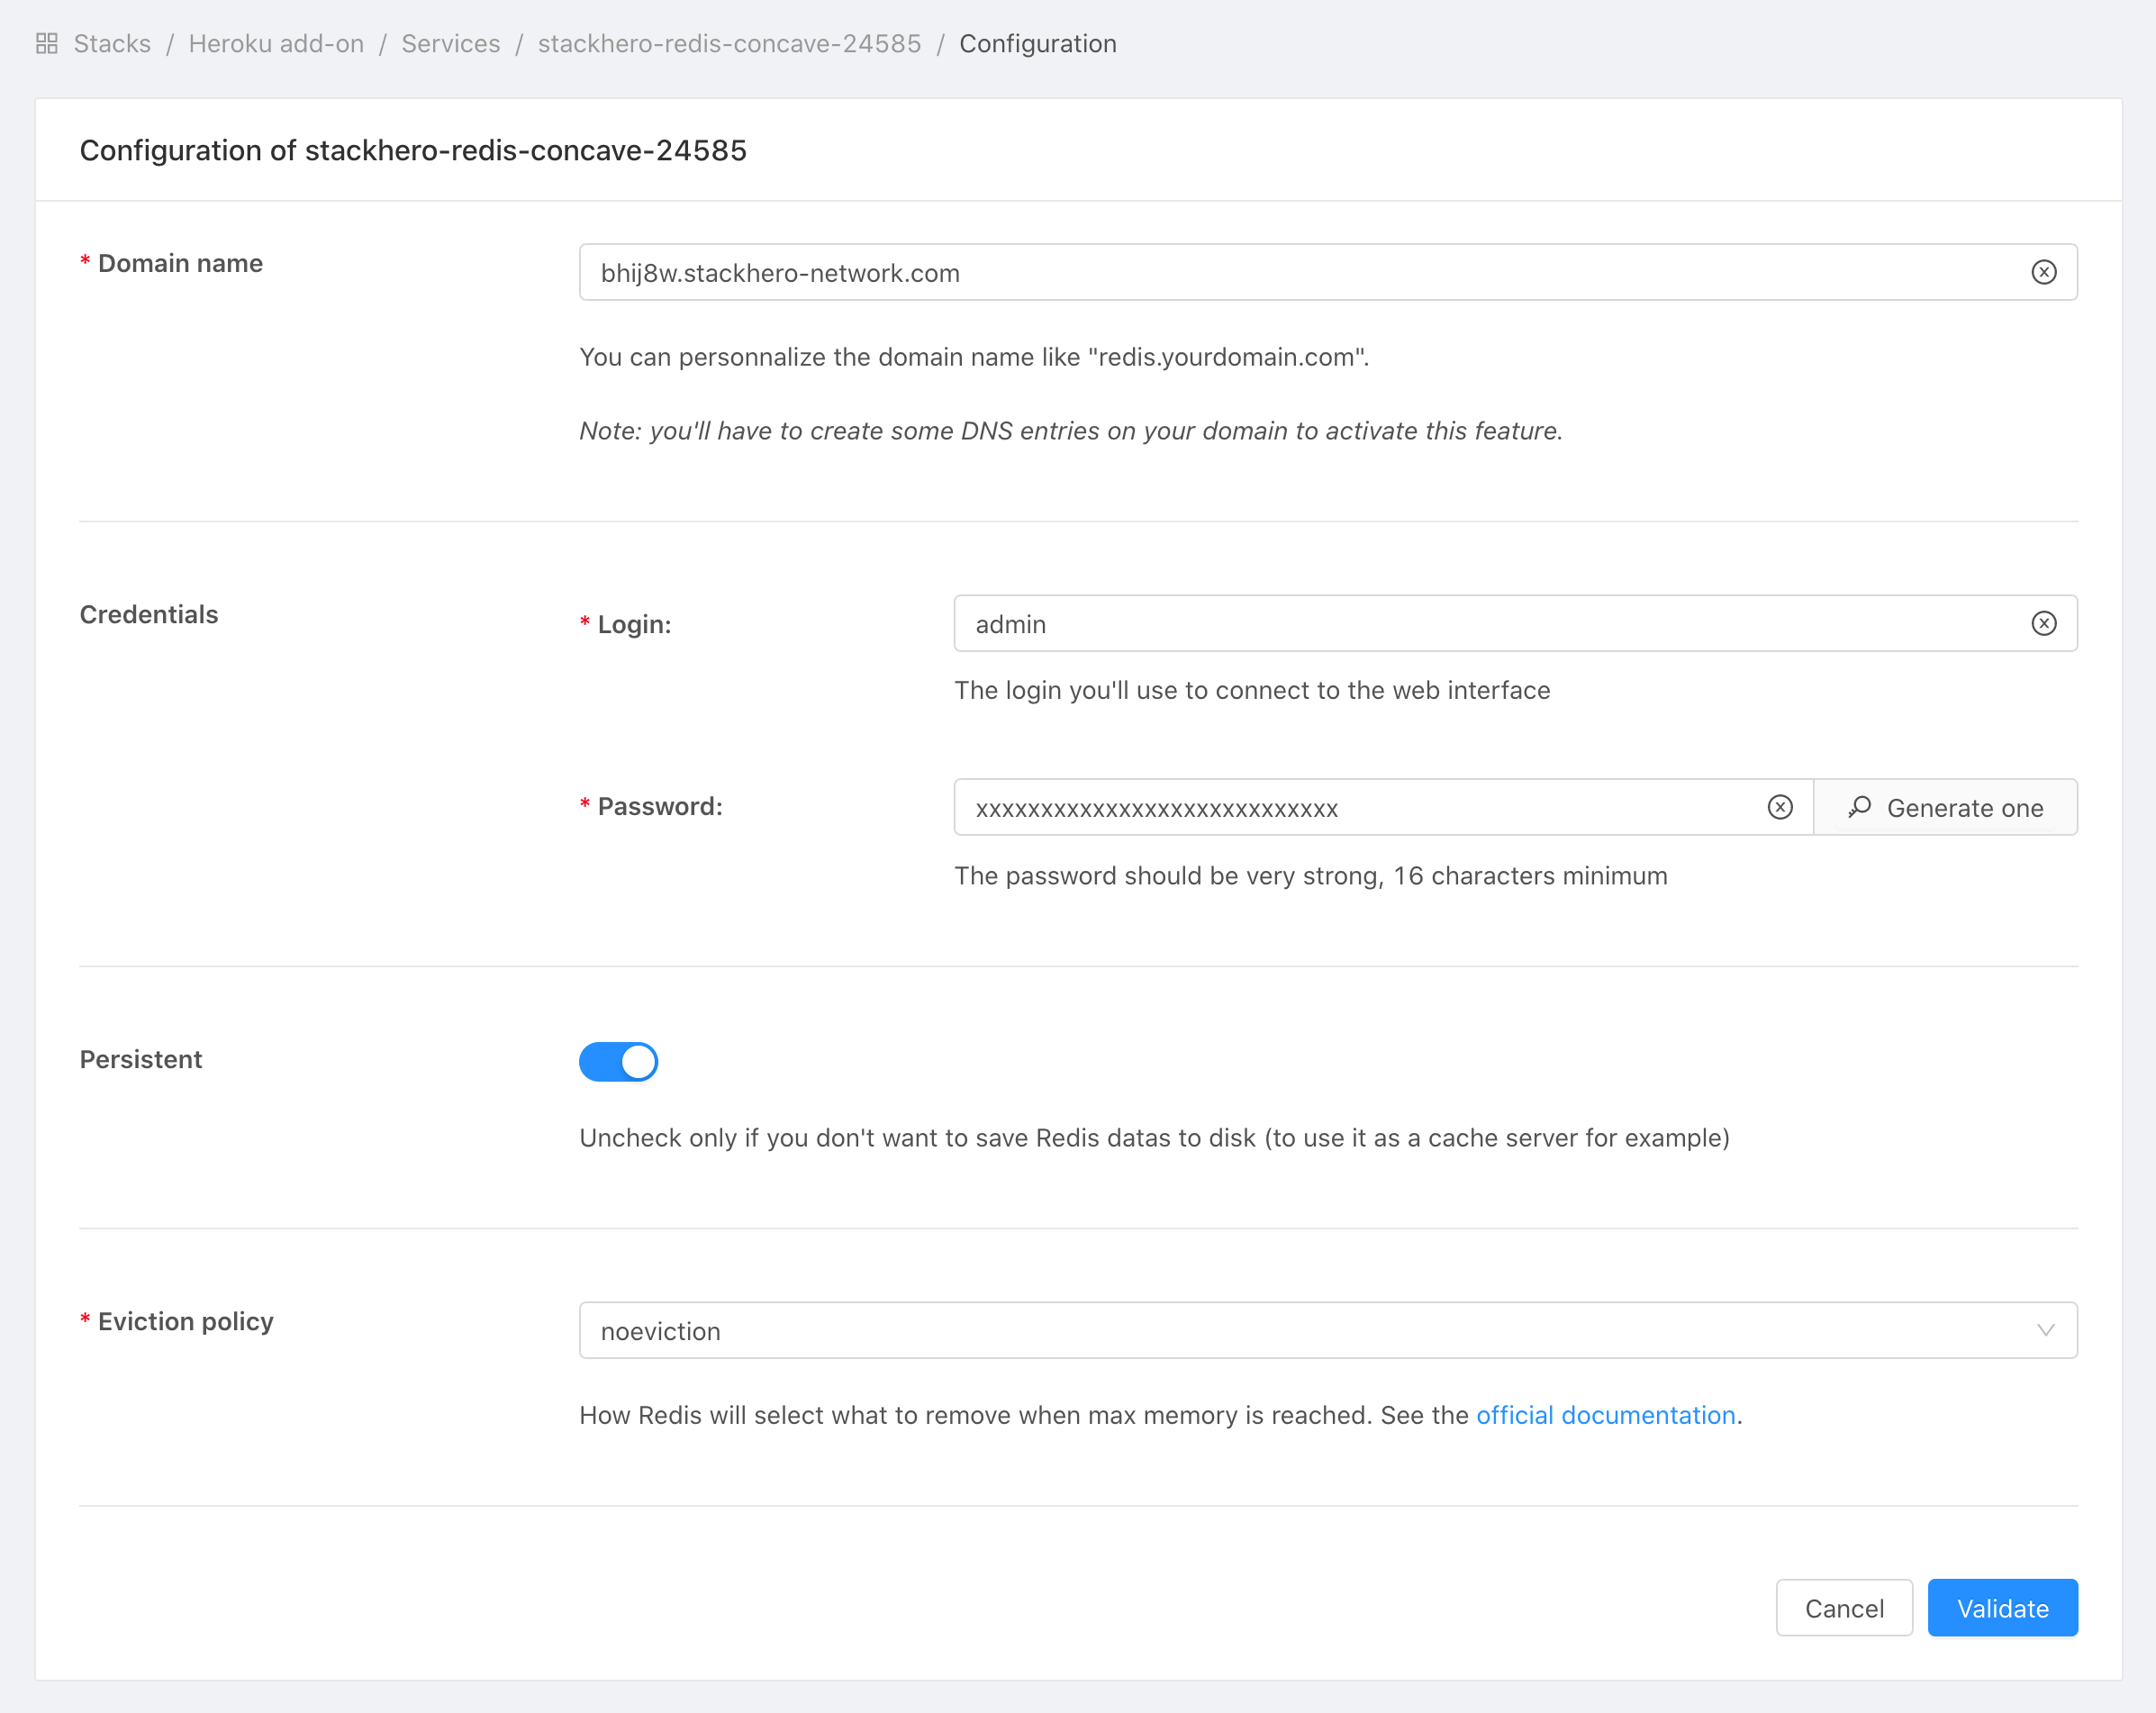
Set eviction policy
Yon can define how Redis will react when you consume more memory than available on your plan.
To do this, connect to your Stackhero dashboard (see above), select your Redis service, then click on Configure and set the Eviction policy setting.
Upgrading your plan
You cannot downgrade an existing add-on.
Application owners should carefully manage the migration timing to ensure proper application function during the migration process.
Use the heroku addons:upgrade command to migrate to a new plan.
$ heroku addons:upgrade stackhero-redis:newplan
-----> Upgrading stackhero-redis:newplan to sharp-mountain-4005... done
       Your plan has been updated to: stackhero-redis:newplan
Removing the add-on
You can remove Stackhero for Redis via the CLI:
This will destroy all associated data and cannot be undone!
$ heroku addons:destroy stackhero-redis
-----> Removing stackhero-redis from sharp-mountain-4005... done
Support
Stackhero for Redis support and runtime issues should be submitted via one of the Heroku Support channels. We recommend adding support@stackhero.io in copy for urgent issues.
Additional resources
- Redis documentation by Stackhero
- Redis managed cloud