Table of Contents [expand]
Last updated June 03, 2021
This add-on is operated by Loadmill Inc.
Automated testing built for Heroku. Generate behavior-driven tests.
Loadmill is a cloud service for automated back-end testing.
Effective automated tests are essential for agile software development and continuous delivery. A quick feedback loop plays a critical role in your ability to move fast without breaking things. Unlike automated front-end tests (Selenium, Cypress, etc.), which take a long while to run and can brake from minor UI changes, automated back-end tests are a great fit for continuous testing.
Loadmill automatically validates your Heroku app every time you release by running a set of automated API tests. Test scenarios can be created using the Loadmill web IDE or recorded using the Loadmill Chrome extension.
Provisioning the add-on
Loadmill can be added to a Heroku application via the CLI:
A list of all plans available can be found here.
$ heroku addons:create loadmill
Creating loadmill on ⬢ your-app-name... free
Resource has been created and is available!
Created loadmill-cool-123
After you install Loadmill, your application will be tested by the add-on every time you deploy. Test results will be sent to your Heroku account email address.
Dashboard
For more information on the features available within the Loadmill dashboard, please see the docs at docs.loadmill.com.
The Loadmill dashboard and web IDE allow you to create API tests and review test run results.
You can access the dashboard via the CLI:
$ heroku addons:open loadmill
Opening loadmill for your-app-name
or by visiting the Heroku Dashboard and selecting the application in question. Select Loadmill from the Add-ons menu.
Create and manage tests
When installing Loadmill for the first time, a default test suite is created in your team’s account.
The suite contains a sample test which sends an HTTP GET request to your application web_url.
The value of the web_url parameter is set to be the test application URL every time an app is deployed.
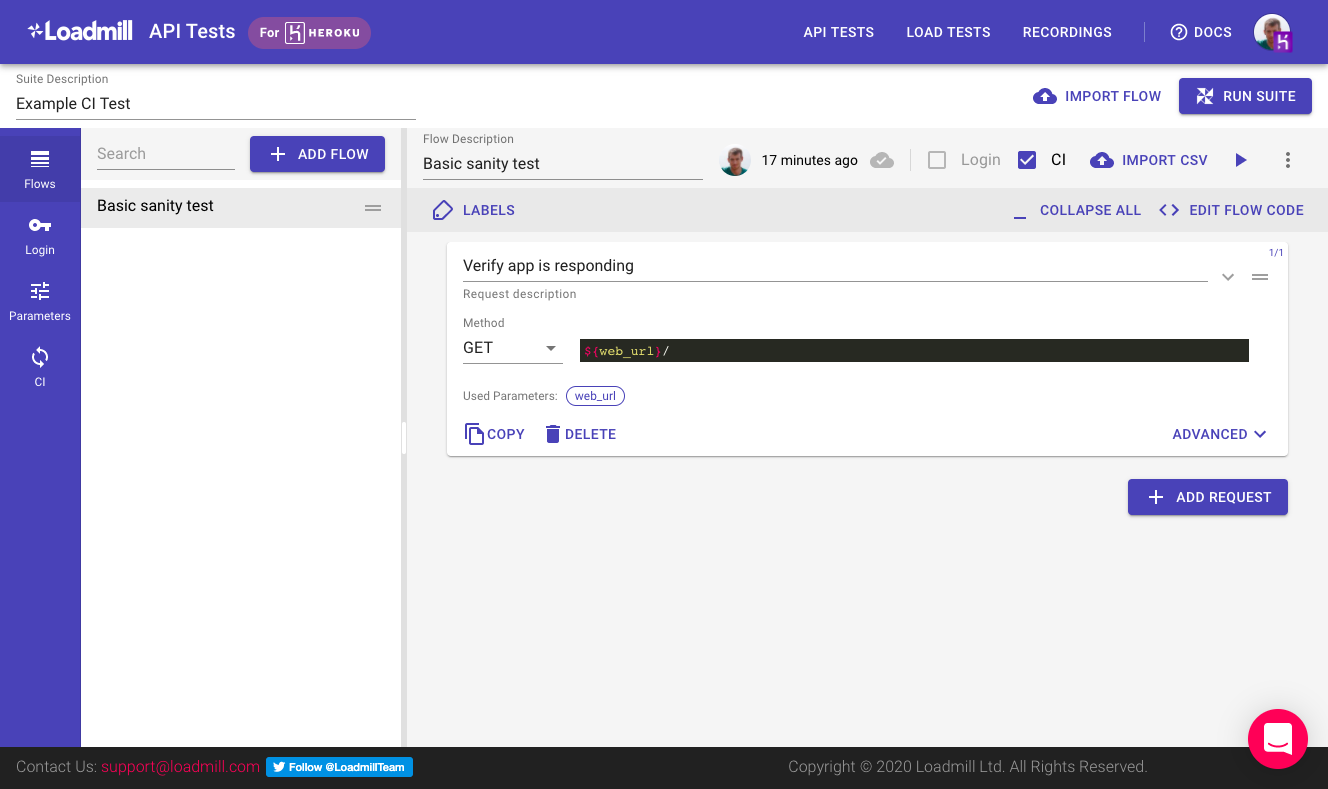
You can use the Loadmill web IDE to add test requests, extract parameters from their responses, and define assertions about their values.
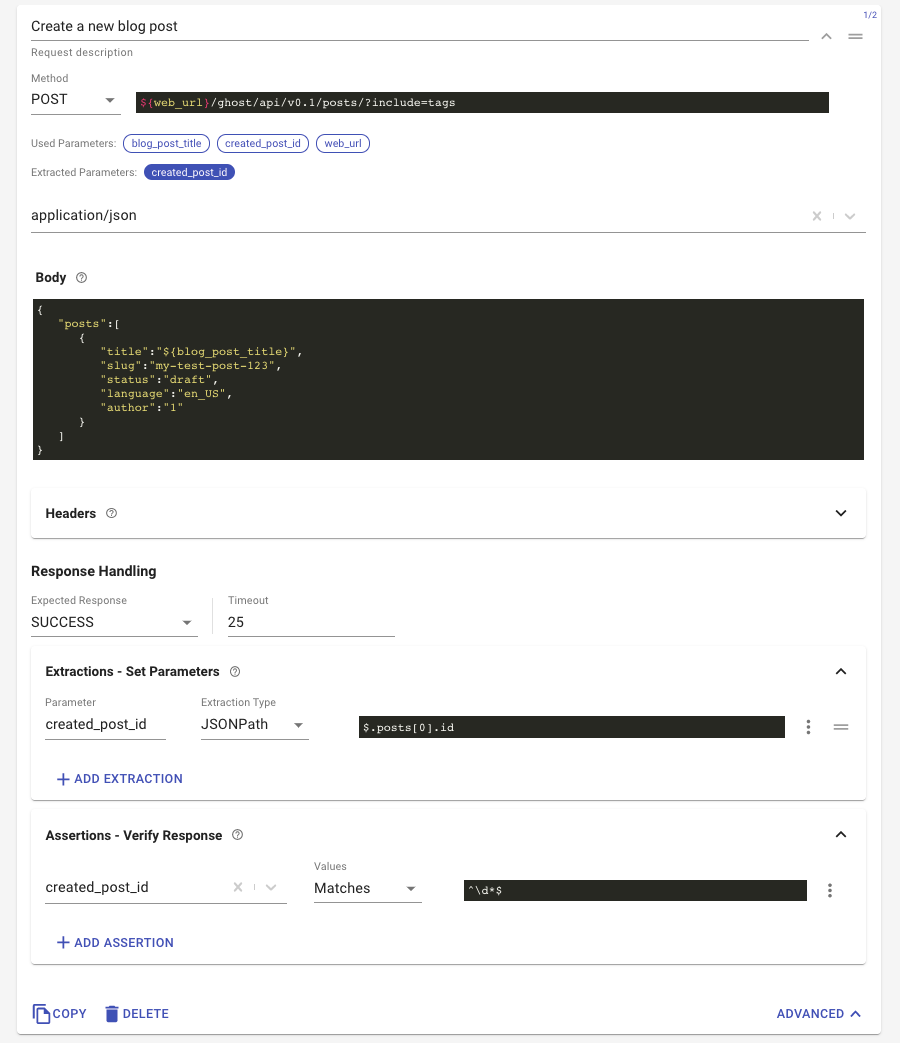
For example, the following POST request to create a blog post, is using a JSON body with a dynamic parameter (blog_post_title), extracts the created blog post ID from the response using JSONPath, and validates that it is a valid number using Regex.
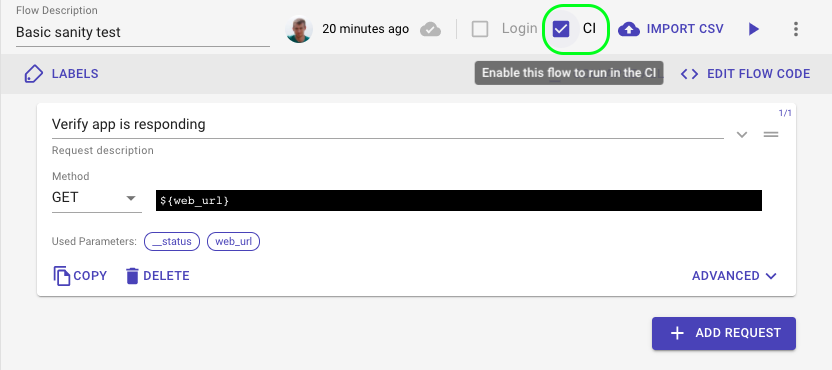
Newly created test flows will not run automatically by default
To configure a test to run automatically when your app is deployed, check the CI checkbox in the test flow top menu.
Recording new tests
The easiest way to record an API test is to use the Loadmill recorder Chrome extension.
The Chrome dev-tools extension automatically analyzes HTTP requests sent from the browser, extract URL and body elements into parameters and extractors, and creates replayable API tests. Read more about it here.
Review test results
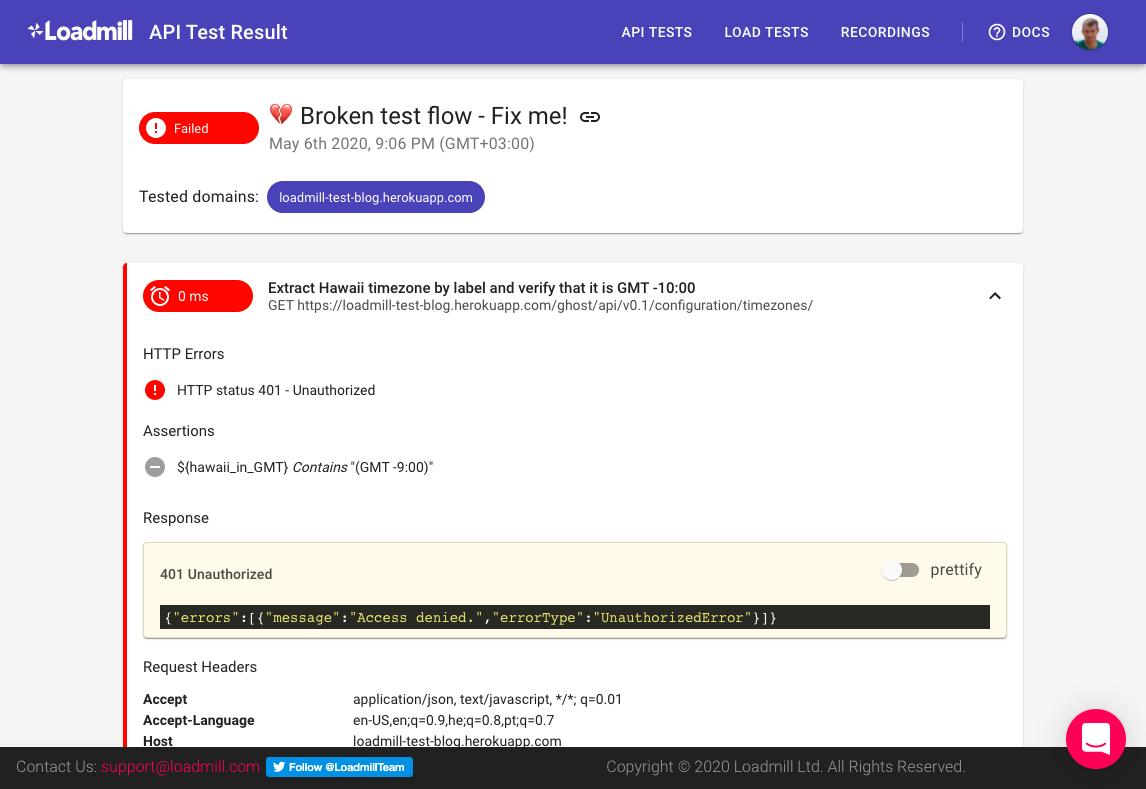
The test suite run report shows the status of each test flow run.
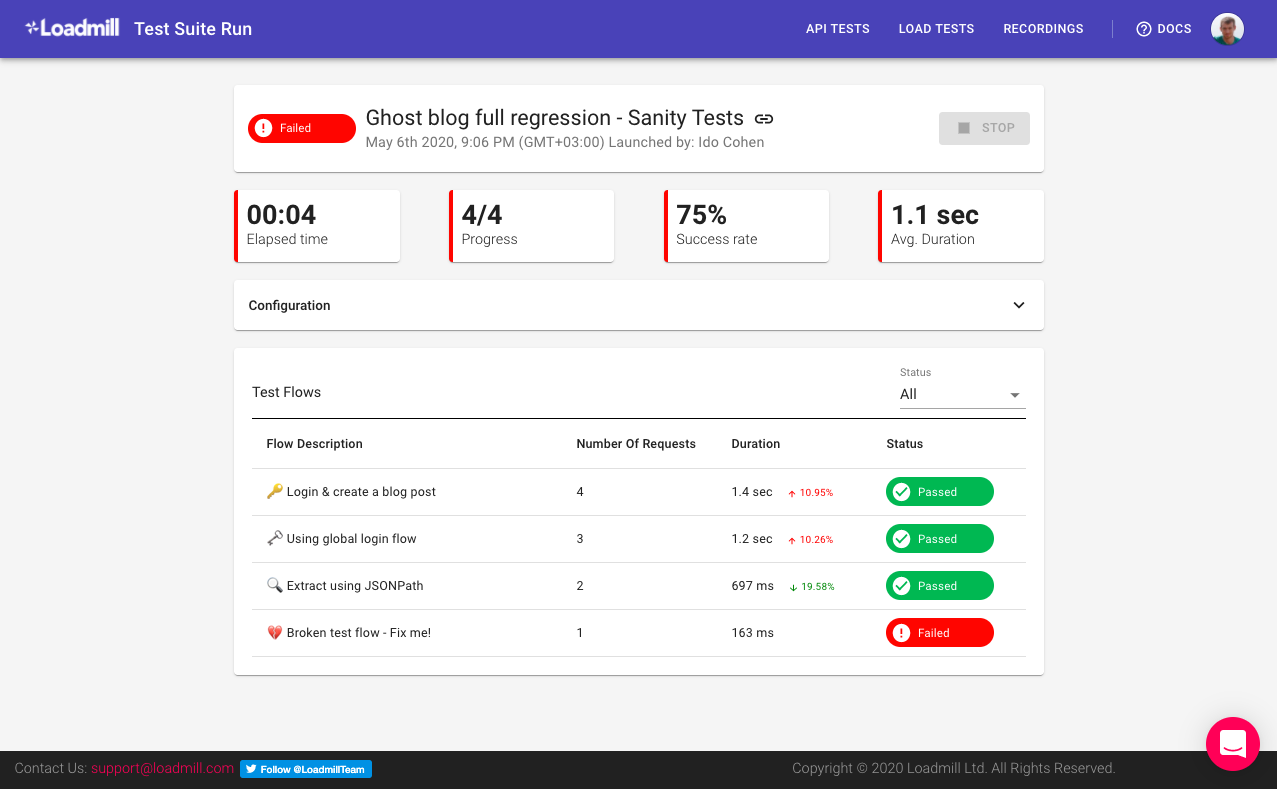
You can drill down into a specific test flow run report and see in full detail all of its HTTP responses and parameter values. This is especially useful when debugging failed tests and identifying new bugs introduced by your latest deployment.
Migrating between plans
Use the heroku addons:upgrade command to migrate to a new plan.
$ heroku addons:upgrade loadmill:newplan
Changing loadmill on your-app-name from loadmill:free to loadmill:newplan...
Your plan has been updated to: loadmill:newplan
Removing the add-on
You can remove Loadmill via the CLI:
This will destroy all associated data and cannot be undone!
$ heroku addons:destroy loadmill
Removing loadmill from your-app-name... done
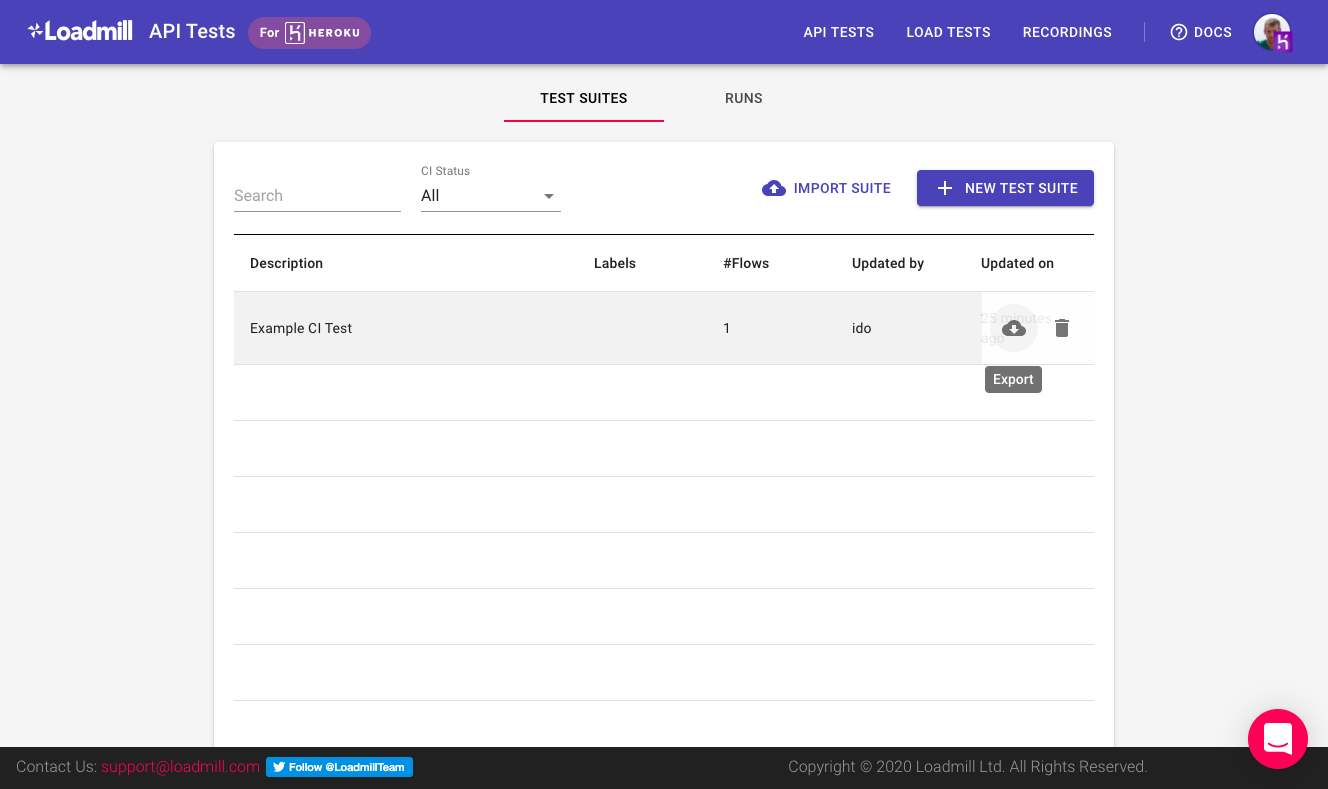
Before removing Loadmill, you can export your data by hovering over the desired test suite and clicking the export button.
Support
All Loadmill support and runtime issues should be submitted via one of the Heroku Support channels. Any non-support related issues or product feedback is welcome at support@loadmill.com or via Twitter @LoadmillTeam. Some of our paid plans include 24/7 support with a 60-minute response time and a call-in phone number.