Last updated May 21, 2021
The HostedHooks add-on is currently in beta.
HostedHooks is an add-on for providing webhook sending functionality to your web application.
Adding webhooks to an application provides a sustainable means to asynchronously share data and state changes with other web applications (subscribers). HostedHooks’ event-driven service handles the routing, delivery, error handling, security and retries of your webhook messages.
HostedHooks gives your subscribers a self-serve portal to manage their webhook subscriptions. When events occur on a provider’s application, it sends an API request to the HostedHooks service where the platform routes and delivers that message to the correct subscriber(s).
HostedHooks is accessible via an API. Code examples for Ruby are included in this article.
Provisioning the Add-on
HostedHooks can be attached to a Heroku application via the CLI:
A list of all plans available can be found here.
$ heroku addons:create hosted-hooks
Creating hosted-hooks on sharp-mountain-4005... free
Your add-on has been provisioned successfully
After you provision HostedHooks, the HOSTEDHOOKS_API_KEY config var is available in your app’s configuration. It contains the API Key needed for all API requests to the newly provisioned HostedHooks instance. You can confirm this via the heroku config:get command:
$ heroku config:get HOSTEDHOOKS_API_KEY
http://user:pass@instance.ip/resourceid
Dashboard
For more information on the features available within the HostedHooks dashboard, please see the docs at https://developers.hostedhooks.com.
The HostedHooks dashboard allows you to manage your apps, subscribers and webhook events.
You can access the dashboard via the CLI:
$ heroku addons:open hosted-hooks
Opening hosted-hooks for sharp-mountain-4005
or by visiting the Heroku Dashboard and selecting the application in question. Select HostedHooks from the Add-ons menu.
Setting Up Your Instance
After provisioning the HostedHooks add-on, you must complete the setup process on the HostedHooks dashboard.
To get started quickly, see the Getting Started Guide.
If you’ve already completed the Getting Started Guide or want to dive into setting up your custom instance, see the following instructions.
Set Up an App
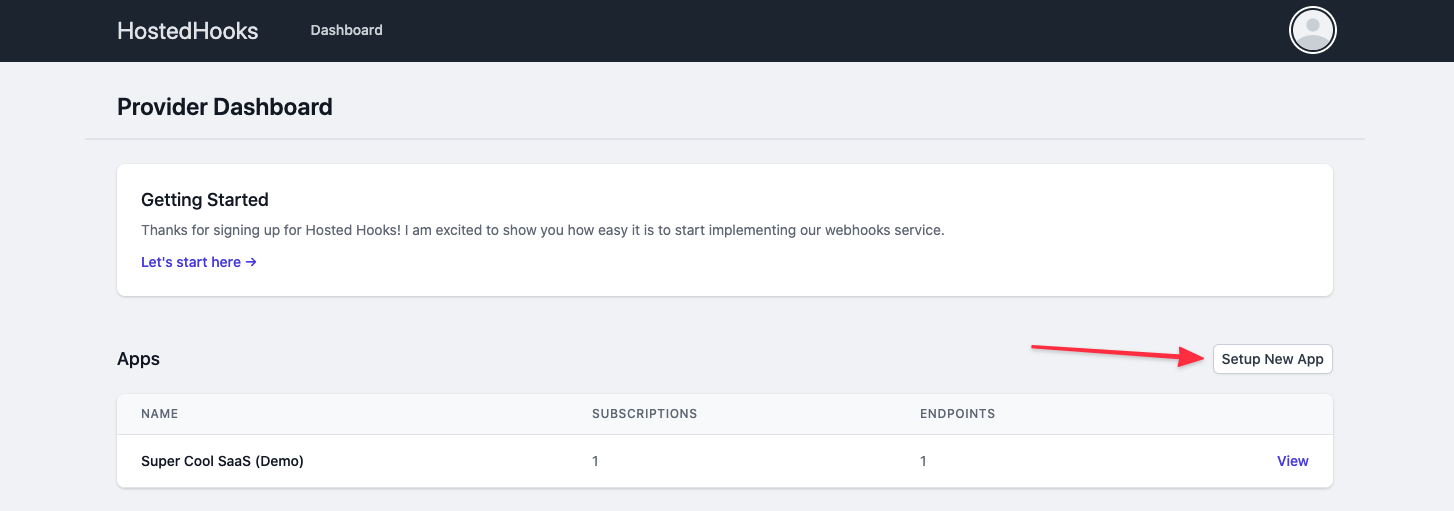
After logging in to the HostedHooks dashboard, click Setup New App. You can use the same name as your Heroku app. This app name is what your webhook subscribers see when subscribing to your webhook events.

Enter your app name and save it. This takes you to your app details page where you set up the events that you want to send webhooks for.
Set Up Webhook Events
These events are things like user.created, order.shipped, payment.completed, etc. They’re the events occurring on your platform and HostedHooks notifies your subscribers when they get triggered.
On the app details page, click Add More Events. When creating an event you must update the event name and the data payload tied to that event. Include all the data required for your subscribers to dynamically retrieve the record and run some business logic on it in this payload.

Set Up Subscribers
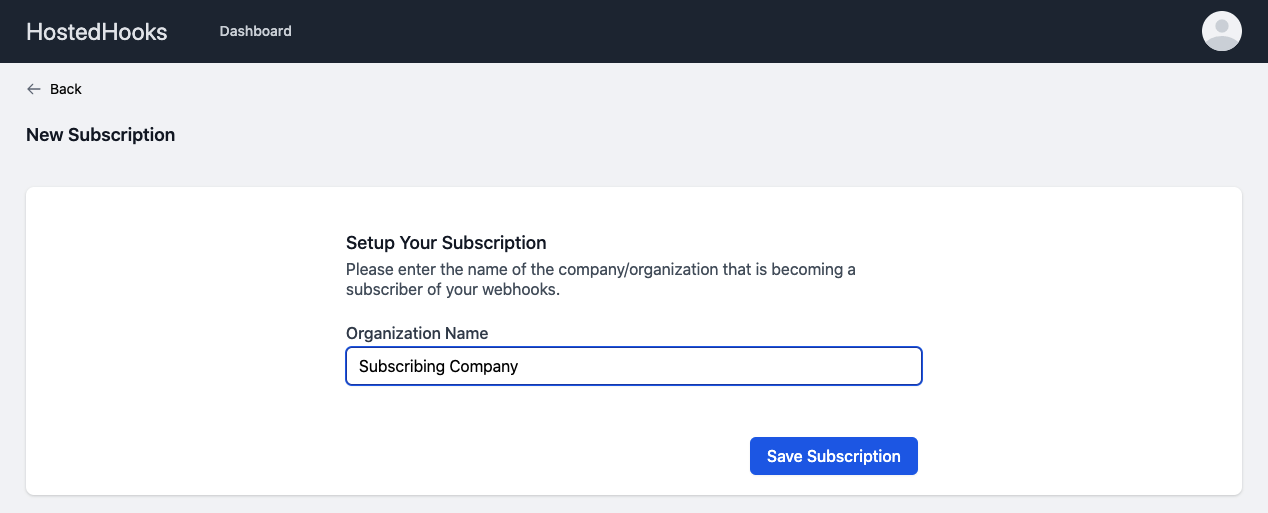
After creating your webhook event, start adding subscribers. Subscribers are the users that receive webhook messages from HostedHooks when an event occurs on your platform. Click Add New Subscriber on the app details page to add one.

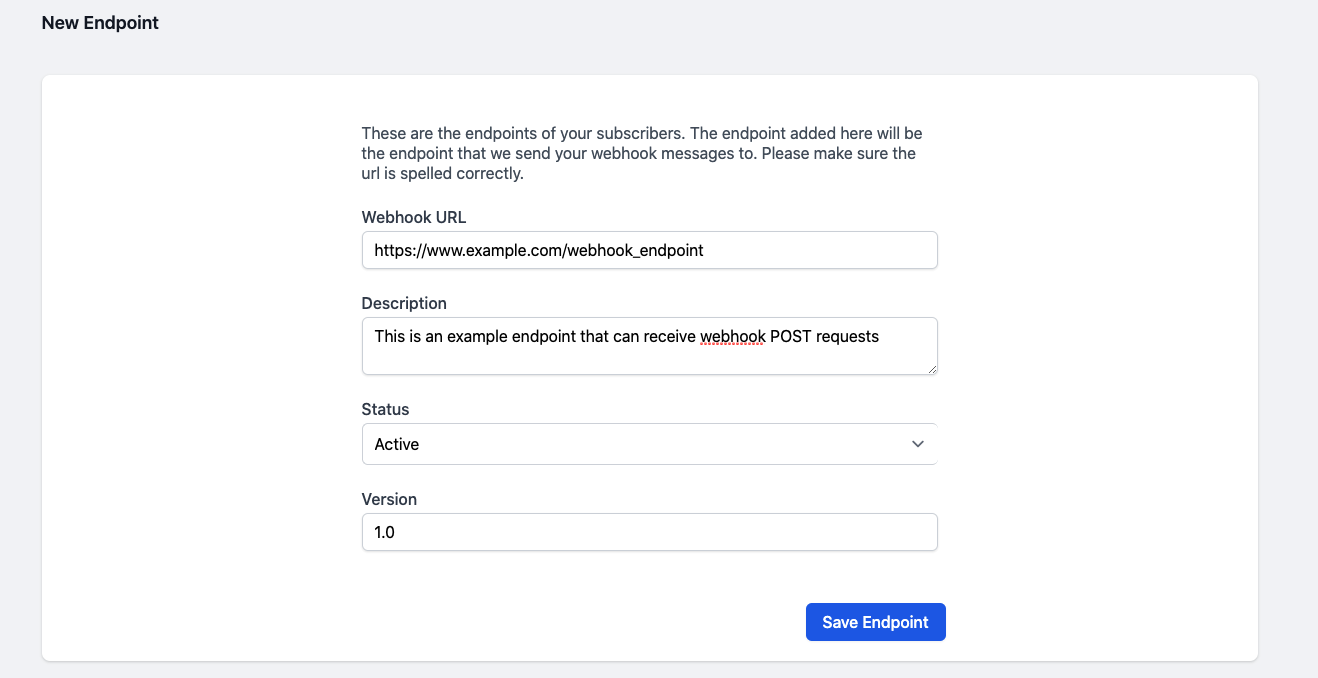
After creating the subscriber, define where to send the webhook messages. This is called an endpoint.
Set Up Endpoints
Within the endpoint there are a few attributes that must be set:
- URL - This is the destination URL on your subscriber’s application. It must be able to receive POST requests and return a 200.
- Version - This allows you to send non-breaking updates to your endpoints.
- Status - This lets you turn the endpoint on or off to start and stop receiving messages.

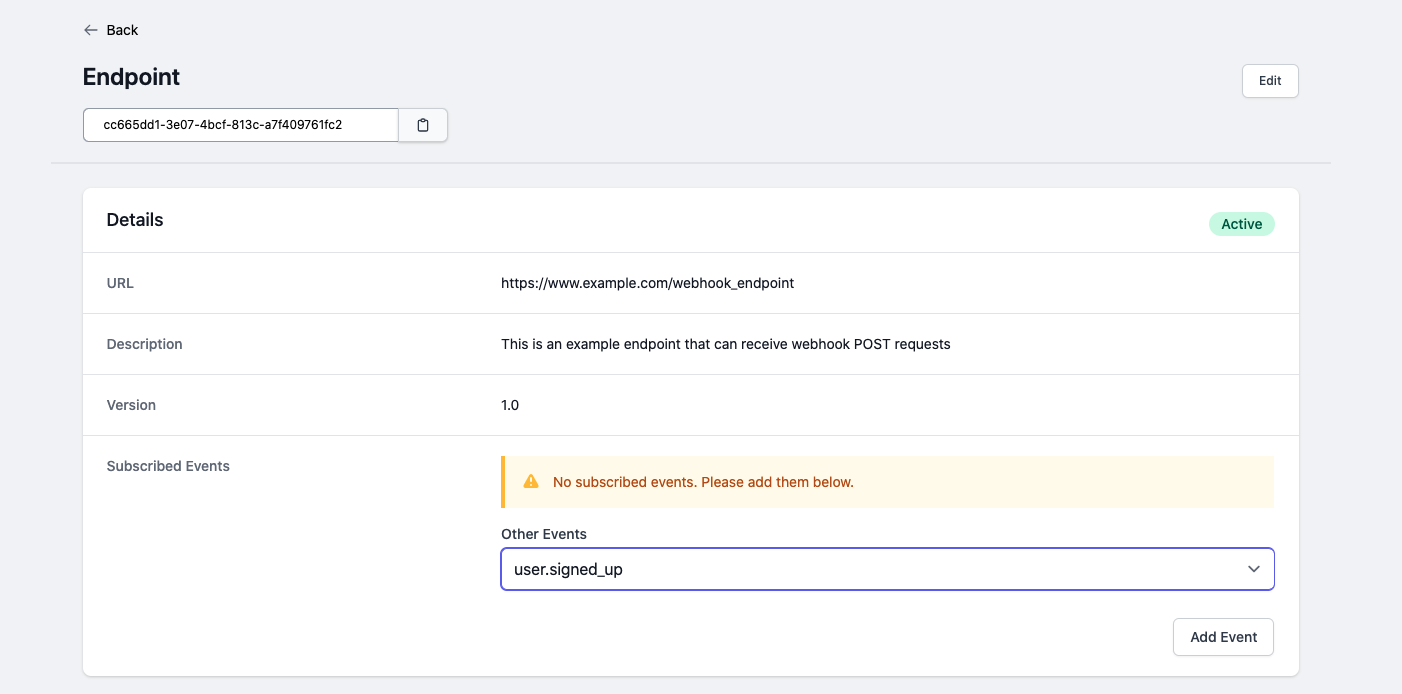
After creating the endpoint, click View which takes you to the endpoint screen. Choose the webhook event you want to subscribe your endpoint to from the dropdown and click Add Event.

Everything is setup to start sending webhook messages for that event. If you want to add more events, endpoints or subscribers, review the previous steps and repeat.
The following steps show you how to send the webhook messages via the HostedHooks API.
Sending A Webhook Message
There are two ways to send messages:
- Send a message via the app you created. This message goes to all of the apps’ subscribers that have subscribed to the webhook event you are triggering.
- Send a message via an endpoint. This message is only sent to the subscriber that owns that endpoint.
This is the payload for sending a message:
{
    "data": {
        "note": "this is a test",
        "id": 123123123,
        "other_id": 1231231123
      },
      "version": "1.0",
      "event_type": "user.created",
      "event_id": "07a1cf3fd7cced67a7fd"
    }
  }
Here are the payload value definitions
data: This is your custom payload which contains the contents of your webhook message. Whatever is in the data payload is passed on to your subscribers. You can put whatever you want in this payload as long as it is valid JSON.version: The version of the endpoint that you are triggering. HostedHooks checks to make sure that subscribers are only receiving the correct version of the payload.event_type: The webhook event for this messageevent_id: This is a custom id (optional) that ensures idempotent messages. HostedHooks checks this id before ingesting a new message to prevent ingesting duplicates.
When sending a message to an app, the API url looks like this:
https://www.hostedhooks.com/api/v1/app/:app_uuid/messages
When sending a message to an endpoint, the API url looks like this:
https://hostedhooks.com/api/v1/subscriptions/:subscription_id/endpoints/:endpoint_id/messages
Read more in our extensive API documentation here
Using with Ruby
Ruby applications must build an integration with the HostedHooks API.
The following Ruby code is a sample of how to send a webhook message to the HostedHooks API.
require 'net/https'
require 'uri'

# POST Messages

def send_webhook_message
  uri = URI("https://www.hostedhooks.com/api/v1/app/:app_uuid/messages")

  # Set Headers
  headers = {"Content-Type": "text/json", "Authorization": "Bearer #{ENV['HOSTEDHOOKS_API_KEY']}"}

  # Build Message JSON payload

  message_payload = {
    "data": {
        "note": "this is a test",
        "id": 123123123,
        "other_id": 1231231123
      },
      "version": "1.0",
      "event_type": "user.created",
      "event_id": "07a1cf3fd7cced67a7fd"
    }
  }

  # Create Request
  http = Net::HTTP.new(uri.host, uri.port)
  request = Net::HTTP::Post.new(uri.request_uri, headers)
  request.body = message_payload.to_json

  # Send the request
  response = http.request(request)

  puts "Response HTTP Status Code: #{ response.code }"
  puts "Response HTTP Response Body: #{ response.body }"
rescue StandardError => e
  puts "HTTP Request failed (#{ e.message })"
end

send_webhook_message()
Using with Rails
A gem isn’t available yet. See the code example for Ruby instead.
Using with cURL
If you want to make raw cURL requests, this is what the request looks like:
curl -XPOST -H "Authorization: Bearer API_TOKEN" -H "Content-type: application/json" -d '{ "data":{ "note":"this is a test", "id":123123123, "other_id":1231231123 }, "version": "1.0", "event_type":"user.created", "event_id":"cdac9ace8d8bcec79bd5" }' "https://www.hostedhooks.com/api/v1/apps/APP_ID/messages"
Migrating between plans
Application owners should carefully manage the migration timing to ensure proper application function during the migration process.
Use the heroku addons:upgrade command to migrate to a new plan.
$ heroku addons:upgrade hosted-hooks:newplan
-----> Upgrading hosted-hooks:newplan to sharp-mountain-4005... done, v18 ($49/mo)
       Your plan has been updated to: hosted-hooks:newplan
Removing the add-on
You can remove HostedHooks via the CLI:
This destroys all associated data and can’t be undone!
$ heroku addons:destroy hosted-hooks
-----> Removing hosted-hooks from sharp-mountain-4005... done, v20 (free)
Before removing HostedHooks, you can export your data by using the API to export all of your messages and subscribers.
Support
All HostedHooks support and runtime issues should be submitted via one of the Heroku Support channels. Any non-support related issues or product feedback is welcome at support@hostedhooks.com.