Last updated May 18, 2026
Postgres manages database access using the concept of roles. You can grant and revoke specific privileges to roles that define what they can do when connected to the database.
Heroku Postgres provides a management layer around these roles called credentials. Each credential corresponds to a different Postgres role and its specific set of database privileges.
You can manage credentials from the Heroku Dashboard, or from the Heroku CLI. Credentials are available only to production plans (Advanced (Limited GA), Standard, Premium, Private, and Shield). Essential plans only have the default owner credential, which can’t create other credentials or manage permissions. Postgres credential passwords are dynamically generated, 65-byte alphanumeric character strings.
The Default Credential
Every newly provisioned Heroku Postgres database includes a default credential named owner. This credential corresponds to a permissive role that is one step below the superuser. This credential is the owner of the database. It can:
- Create new schemas and objects in the database and manage or alter any of the schemas and objects it owns.
GRANTprivileges to other credentials.- Read statistics and monitoring data. The
ownercredential is a member ofpg_monitor,pg_read_all_settings, andpg_read_all_stats. - Cancel or terminate other non-superuser backend processes. The
ownercredential is a member ofpg_signal_backend. - Install supported extensions.
Creating a Credential
To protect against CVE-2018-1058, new credentials don’t have access to the public schema for ALL users by default. You must re-grant access to the public schema to any users that need access to it.
You can create credentials through the Heroku CLI and the Heroku Dashboard.
Create Using the Heroku Dashboard
You can only use the dashboard to create credentials on classic Postgres databases, which include Standard, Premium, Private, and Shield tiers.
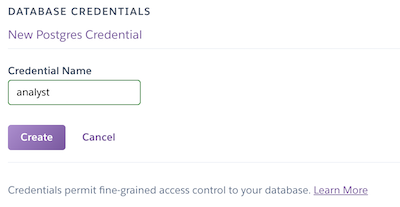
- Open a Heroku Postgres database from the
Datastorestab on the Heroku Dashboard. - Select the
Credentialstab. - Click the
Create Credentialbutton.
Create Using the CLI
You can also create the credential with the data:pg:credentials:create on Advanced (Limited GA) databases or pg:credentials:create CLI command on classic databases:
$ heroku data:pg:credentials:create postgresql-sunny-1234 --name limited_user -a example-app
Creating credential limited_user... done

Please attach the credential to the apps you want to use it in by running heroku addons:attach  postgresql-sunny-1234 --credential limited_user -a example-app.
Please define the new grants for the credential within Postgres: heroku pg:psql  postgresql-sunny-1234 -a example-app.
The name parameter is the name of the credential or role within the database. We recommend setting a credential name that reflects the purpose of the credential. In the example, limited_user is the credential’s username when connecting to the database.
The credential password is a dynamically generated, 65-byte alphanumeric character string.
You can use custom credentials to log in to the database, but they can’t read from or write to any of your tables by default. You can manage credential permissions through the Heroku CLI.
When you first create a credential, it only has the CONNECT privilege. To configure more database privileges for a credential, see Managing Permissions.
Managing Permissions
You can view and configure permissions for new and existing credentials through the Heroku CLI.
View Permissions
To view privileges via the CLI, use the default credential to log in to the psql console.
For example, this query returns the privileges on regular tables, views, materialized views, foreign tables, and partitioned tables:
SELECT r.rolname AS user_name,
       nsp.nspname AS schema_name,
       c.relname AS table_name,
       c.relkind AS relkind,
       array_agg(distinct p.perm) AS privilege_types
FROM pg_class AS c
    CROSS JOIN pg_roles AS r
    CROSS JOIN unnest(
        ARRAY[
            'SELECT',
            'INSERT',
            'UPDATE',
            'DELETE',
            'TRUNCATE',
            'REFERENCES',
            'TRIGGER'
        ]
    ) AS p (perm)
    INNER JOIN pg_namespace AS nsp ON nsp.oid = c.relnamespace
-- get all regular, view, mat view, foreign and partitioned tables
WHERE relkind IN ('r', 'v', 'm', 'f', 'p')
AND nspname NOT IN ('pg_catalog', 'information_schema')
AND has_table_privilege(rolname, c.oid, p.perm)
GROUP BY 1, 2, 3, 4
ORDER BY 1 ASC;
This query returns the privileges on schemas:
SELECT r.rolname AS user_name,
       nsp.nspname AS schema_name,
       array_agg(distinct p.perm) AS privilege_types
FROM pg_namespace AS nsp
    CROSS JOIN pg_roles AS r
    CROSS JOIN unnest(
        ARRAY[
            'CREATE',
            'USAGE'
        ]
    ) AS p (perm)
WHERE nspname NOT IN ('pg_catalog', 'information_schema')
AND has_schema_privilege(rolname, nsp.oid, p.perm)
GROUP BY 1, 2
ORDER BY 1 ASC;
Configure Permissions
To configure privileges via the CLI, use the default credential to log in to the psql console, and run the standard Postgres GRANT, REVOKE, and ALTER DEFAULT PRIVILEGES commands.
For example, you can grant the limited_user credential in the example the privileges for read-only access to the public schema. This process follows standard Postgres conventions. To open a psql console, use data:pg:psql on Advanced (Limited GA) databases or pg:psql on classic databases:
$ heroku data:pg:psql postgresql-sunny-1234 -a example-app
--> Connecting to postgresql-sunny-1234
psql (17.2 (Postgres.app), server 16.9 (Ubuntu 16.9-1.pgdg20.04+1))

SSL connection (protocol: TLSv1.3, cipher: TLS_AES_256_GCM_SHA384, compression: off, ALPN: none)
Type "help" for help.

example-app::CYAN=> GRANT USAGE ON SCHEMA public TO limited_user;
GRANT
example-app::CYAN=> GRANT SELECT ON ALL TABLES IN SCHEMA public TO limited_user;
GRANT
example-app::CYAN=> ALTER DEFAULT PRIVILEGES IN SCHEMA public
  GRANT SELECT ON TABLES TO limited_user;
ALTER PRIVILEGES
example-app::CYAN=> \q
In this example, the limited_user credential has been granted the privileges to run read-only queries on any of the tables within the public schema. At this point, limited_user can be used to log into the database and interact with the data.
Breaking this down step by step:
-
This command allows the credential to look up tables and other database objects within the
publicschema.GRANT USAGE ON SCHEMA public TO limited_user; -
This command allows the credential to run
SELECTon any table, view, materialized view, or foreign table in the defaultpublicschema.GRANT SELECT ON ALL TABLES IN SCHEMA public TO limited_user;If you’re using additional schemas and want to grant access to those, you can add them separated by commas:
GRANT SELECT ON ALL TABLES IN SCHEMA public, my_schema TO limited_user;You can’t grant access to all schemas at once. You must list each schema explicitly. You can also grant access to only specific tables:
GRANT SELECT ON TABLE public.users TO limited_user; -
Finally, this command allows the credential to automatically receive
SELECTprivileges on any new table, view, materialized view, or foreign table created by the default user in thepublicschema. TheALTER DEFAULT PRIVILEGEScommand allows you to pre-configure privileges for tables and other database objects that haven’t been created.ALTER DEFAULT PRIVILEGES IN SCHEMA public GRANT SELECT ON TABLES TO limited_user;Unlike the above
GRANT, you can also alter the default privileges for all schemas:ALTER DEFAULT PRIVILEGES GRANT SELECT ON TABLES TO limited_user;If you want to limit a role’s privileges, you must revoke existing access before granting more limited privileges. For example, to change the privileges of a user who previously had been granted
SELECTandUPDATEon tables in the public schema, run:REVOKE ALL PRIVILEGES ON ALL TABLES IN SCHEMA public FROM limited_user; GRANT SELECT ON ALL TABLES IN SCHEMA public TO limited_user;
For more information on how to configure credentials, see the Postgres Community Documentation on roles, privileges, and the GRANT, REVOKE, and ALTER DEFAULT PRIVILEGES commands.
Attaching Credentials to Apps
After you create a credential in your Heroku Postgres database, you can attach it to apps as a config var. You can attach credentials to any number of applications within Heroku. The application can be the billing application or any other application that needs access.
Attach a Credential
Advanced Databases
Heroku Postgres Advanced is in limited general availability. To start creating and using Advanced databases, open a ticket with Heroku Support to request access. Subscribe to our changelog to stay informed of when Heroku Postgres Advanced is generally available.
On Advanced databases, use the data:pg:attachments:create command. You can attach the leader instance pool and follower instance pools on your database between multiple apps.
To attach your Advanced database leader instance pool to another app with an analyst credential, run the command:
$ heroku data:pg:attachments:create HEROKU_POSTGRESQL_COBALT -a attached-app --as ATTACHED_DB --credential=analyst
Attaching HEROKU_POSTGRESQL_COBALT to example-app... done
Setting ATTACHED_DB config vars and restarting attached-app... done
To attach an Advanced follower pool to another app with an analyst credential, use the --pool flag and provide the name of the follower pool:
$ heroku data:pg:attachments:create postgresql-rectangular-1234 --pool=analytics-pool -a attached-app --as FOLLOWER_DB --credential=analyst
Attaching analytics-pool to attached-app... done
Setting FOLLOWER_DB config vars and restarting attached-app... done
Classic Databases
After you create a credential in your classic Heroku Postgres database, you can attach it to apps as a config var via the addons:attach command. You can attach it to any number of applications within Heroku. The application can be the billing app or any other app that needs access.
Use the addons:attach command to attach an analyst credential:
$ heroku addons:attach postgresql-sunny-1234 --credential analyst -a example-app
Attaching analyst of postgresql-sunny-1234 to ⬢ example-app... done
Setting DATABASE config vars and restarting ⬢ example-app... done, v24
If no other Heroku Postgres add-ons exist on the application that you’re attaching the database credential to, the credential is assigned to the DATABASE_URL config var. If DATABASE_URL already exists on the application, the credential is attached to the application using the format HEROKU_POSTGRESQL_[COLOR]_URL. You can provide an attachment name using the --as flag of addons:attach:
$ heroku addons:attach postgresql-sunny-1234 --credential analyst --as ANALYST_CREDENTIAL -a example-app
Attaching analyst of postgresql-sunny-1234 to ⬢ example-app... done
Setting ANALYST_CREDENTIAL config vars and restarting ⬢ example-app... done, v25
Detach a Credential
If you created an attachment for a credential on an application and you no longer need it, you can delete the attachment.
For example on Advanced (Limited GA) databases, use the data:pg:attachments:destroy command with the config var containing the credential:
heroku data:pg:attachments:destroy ATTACHED_DB -a example-app
Detaching ATTACHED_DB from postgresql-rectangular-1234 from ⬢ example-app... done
Unsetting ATTACHED_DB config vars and restarting ⬢ example-app... done, v23
For example on classic databases, to remove the previously created ANALYST_CREDENTIAL attachment on the example-app app, use the addons:detach command with the attachment name to detach:
$ heroku addons:detach ANALYST_CREDENTIAL -a example-app
Detaching ANALYST_CREDENTIAL from postgresql-sunny-1234 from ⬢ example-app... done
Unsetting ANALYST_CREDENTIAL config vars and restarting ⬢ example-app... done, v26
Managing Credentials
The Heroku CLI provides several commands for managing your Postgres credentials. This functionality is also available through the Credentials tab on a Postgres database from the Heroku Dashboard.
List Credentials
Use the data:pg:credentials command on Advanced (Limited GA) databases or pg:credentials command on classic databases to list the name and state of every credential that has been created for a particular database.
$ heroku data:pg:credentials DATABASE_URL -a example-app
 Credential                    State
 ───────────────────────────── ──────
 default                       active
  ├─ as DATABASE
 analyst                       active
  └─ as ANALYST_CREDENTIAL
The database in the example has one custom credential (analyst), along with the owner credential. Possible credential states, such as active in the example, are covered in Credential Rotation State Details.
Get Credential Details
The data:pg:credentials:url command on Advanced (Limited GA) databases or pg:credentials:url command on classic databases provides convenient access to your database’s location and login credentials so you can access it with any number of visualization tools.
$ heroku data:pg:credentials:url DATABASE --name analyst -a example-app
Connection information for analyst credential

Connection info string:
   "dbname=dee932clc3mg8h host=ec2-123-73-145-214.compute-1.amazonaws.com port=6212 user=analyst password=98kd8a9 sslmode=require"
Connection URL:
   postgres://analyst:98kd8a9@ec2-123-73-145-214.compute-1.amazonaws.com:6212/dee932clc3mg8h
If you don’t provide a credential name for the --name argument, the connection details for the owner credential are printed to stdout.
Destroy Credentials
Removing a credential reassigns all database objects owned by this credential to the default database credential. This ownership change can result in lock contention that can impact your database operations. To limit or control the lock contention caused by the reassignment, consider manually deleting the objects owned by the credential you’re removing if they’re not needed. Or, you can also run your own migration to reassign those objects.
Remove a credential from Postgres with the data:pg:credentials:destroy command on Advanced (Limited GA) databases or pg:credentials:destroy command on classic databases.
$ heroku data:pg:credentials:destroy DATABASE --name analyst -a example-app
 ▸    WARNING: Destructive action
 ▸    To proceed, type example-app or re-run this command with --confirm example-app
> example-app
Destroying credential analyst... done
The credential has been destroyed within postgresql-sunny-1234 and detached from all apps.
Database objects owned by analyst will be assigned to the default credential
Confirmation is required to remove credentials from the database. If the credential has any attachments, you must detach it from those applications before destroying it. For classic databases, see the Help article on heroku addons:detach for more information on how to remove a credential from a secondary application.
Rotate Credentials
In some cases, you must replace the passwords associated with your credentials. In general, rotating credentials on a regular basis is a good security practice.
The data:pg:credentials:rotate command on Advanced (Limited GA) databases or pg:credentials:rotate command on classic databases lets you change some or all of the credential passwords within the database at one time. When a credential rotation occurs, Heroku Postgres updates the config vars associated with the rotated credentials on all affected apps. This config var update triggers an app restart that allows the app dynos to get the new credentials.
To rotate a single credential:
$ heroku data:pg:credentials:rotate DATABASE --name analyst -a example-app
 ▸    WARNING: Destructive action
 ▸    To proceed, type example-app or re-run this command with --confirm example-app
> example-app
Rotating analyst on postgresql-sunny-1234... done
If you don’t provide a credential name for the --name argument, the default credential is rotated:
$ heroku data:pg:credentials:rotate DATABASE -a example-app
 ▸    WARNING: Destructive action
 ▸    To proceed, type example-app or re-run this command with --confirm example-app
> example-app
Rotating default on postgresql-sunny-1234... done
To rotate all credentials, pass the –all flag into the data:pg:credentials:rotatecommand on Advanced (Limited GA) databases and into the pg:credentials:rotate command on classic databases:
$ heroku data:pg:credentials:rotate DATABASE --all -a example-app
 ▸    WARNING: Destructive action
 ▸    To proceed, type example-app or re-run this command with --confirm example-app
> example-app
Rotating all credentials on postgresql-sunny-1234... done
Credential Rotation State Details
When a credential rotation is requested, applications can still have open connections to the database. The old credential expires as soon as there are no existing connections using it. If there are in-progress transactions, Heroku Postgres waits up to 30 minutes before killing existing connections and requiring clients to use new login details.
If in-progress transactions exist during a credential rotation, Heroku Postgres provisions temporary “rotating” usernames alongside the usernames currently in use. During the rotation, the data:pg:credentials:rotate and pg:credentials:rotate command displays these usernames, which all end with -rotating to indicate that they’re temporary:
$ heroku data:pg:credentials:rotate DATABASE --name analyst -a example-app --confirm
Rotating analyst on postgresql-sunny-1234... done

$ heroku data:pg:credentials -a example-app
 Credential                    State
 ───────────────────────────── ────────
 default                       rotating
  ├─ as DATABASE
 analyst                       rotating
  └─ as ANALYST_CREDENTIAL
       Usernames currently active for this credential:
       analyst-rotating  active                                    0 connections
       analyst           waiting for no connections to be revoked  0 connections
After these in-progress transactions are complete and their associated connections are closed, the “rotating” username is renamed to the original username. Any connections that were created during the rotation are allowed to stop before this renaming occurs.
Force Rotation
In some cases, waiting for 30 minutes for connections to close can be too long. In those circumstances, you can use the --force flag. --force immediately kills all connections to the credential and performs the rotation.
$ heroku data:pg:credentials:rotate DATABASE --name analyst --force -a example-app --confirm
Rotating analyst on postgresql-sunny-1234... done
Restore Default Credential
pg:credentials:repair-default isn’t supported on Advanced (Limited GA) databases. Subscribe to our changelog to stay informed of when this feature is available for Advanced databases.
Use the pg:credentials:repair-default command to restore your database’s default credential in the event that default permissions or database object ownership are accidentally altered. This command makes the default credential the owner of all objects in the database, restores default permissions, and grants the default credential admin option on all additional credentials in the database.
$ heroku pg:credentials:repair-default DATABASE -a example-app
Resetting permissions and object ownership for default role to factory settings... done
Forks and Followers
Follower databases on classic Heroku Postgres are (almost) exact copies of their corresponding primary database. As changes are made to the primary database, those changes are streamed to the follower in real-time. Consequently, any credentials created on a primary database automatically cascade to the follower.
Follower database credentials match primary database credentials, but followers are inherently read-only and can’t be written to by any role, even if it has write permissions. If you run the unfollow command, the follower becomes a fork, and any credentials with appropriate permissions are able to write.
If credential commands like create, destroy, or rotate are run against a follower, an error message is given indicating the command can’t run against the database:
$ heroku pg:credentials:create postgresql-moonlight-5678 -a example-app
This operation is not supported for follower databases.
A fork is an entirely new database that contains a snapshot of the data from another existing Heroku Postgres database. Unlike a follower database, a fork doesn’t stay up to date with the primary database and is therefore writeable.
When a fork is created, any credentials in the primary database at the time of the fork are included in the fork. However, future modifications to primary database credentials aren’t reflected in the fork.
Best Practices
Using the Default Credential
Applications that use Heroku Postgres as their data store must use the default owner credential when creating connections to the database. This goes for any schema modifications as well. The owner credential is meant to work seamlessly with the entirety of the Heroku platform.
Read-Only Users
A common pattern for credentials within Postgres is to give a user read-only access to all of the information within the schema. Read-only access means the credential can’t INSERT, UPDATE, or DELETE data or make schema changes. You can create read-only users via the Heroku Dashboard Credentials tab, or via the CLI.
To add a read-only user through the CLI, first, create the credential. Then, using the owner credential, log in to the Postgres console for the database:
$ heroku pg:psql postgresql-sunny-1234 -a example-app
--> Connecting to postgresql-sunny-1234
psql (17.2 (Postgres.app), server 16.9 (Ubuntu 16.9-1.pgdg20.04+1))

SSL connection (protocol: TLSv1.3, cipher: TLS_AES_256_GCM_SHA384, compression: off, ALPN: none)
Type "help" for help.

example-app::CYAN=> GRANT USAGE ON SCHEMA public TO analyst;
GRANT
example-app::CYAN=> GRANT SELECT ON ALL TABLES IN SCHEMA public
  TO analyst; -- give access to the existing tables
GRANT
example-app::CYAN=> ALTER DEFAULT PRIVILEGES IN SCHEMA public
  GRANT SELECT ON TABLES TO analyst; -- give access to future tables
ALTER PRIVILEGES
See Managing Permissions earlier for more information about the details of the statements and the permissions granted.
Caveats and Considerations
- Permissions configuration isn’t permanent. You can update them at any time by the
defaultcredential or any other credential that hasWITH GRANT OPTIONprivileges. - The permissions management assumes the
ownercredential creates all tables and other database objects. Creating objects with other credentials can mean users aren’t automatically granted the access their permissions configuration dictates. - Credentials must be created and destroyed via the CLI, or from the Heroku Dashboard instead of using
CREATE ROLEand associated DDL statements directly, but otherwise behave like standard Postgres credentials. - Credential names are restricted to alphanumeric characters (
-and_are also supported) and can’t be longer than 50 characters. - Credential names can’t start with
rdsorpg_, end in-rotating, or includepostgres. - You can’t name credentials
heroku,owner,default,admin, orcollectd. - Credentials aren’t backed up by PGBackups and aren’t available when restoring from those backups.
By October 31, 2025, all existing credential names can’t start with rds and can’t be named heroku.
Limits
The maximum number of credentials Heroku Postgres supports is 120.
We strongly recommend that you use as few credentials as possible for security and operational reasons. Be sure to track where you’re using the credentials.