Skip Navigation
Show nav
Dev Center
  • Get Started
  • Documentation
  • Changelog
  • Search
  • Get Started
    • Node.js
    • Ruby on Rails
    • Ruby
    • Python
    • Java
    • PHP
    • Go
    • Scala
    • Clojure
    • .NET
  • Documentation
  • Changelog
  • More
    Additional Resources
    • Home
    • Elements
    • Products
    • Pricing
    • Careers
    • Help
    • Status
    • Events
    • Podcasts
    • Compliance Center
    Heroku Blog

    Heroku Blog

    Find out what's new with Heroku on our blog.

    Visit Blog
  • Log inorSign up
View categories

Categories

  • Heroku Architecture
    • Compute (Dynos)
      • Dyno Management
      • Dyno Concepts
      • Dyno Behavior
      • Dyno Reference
      • Dyno Troubleshooting
    • Stacks (operating system images)
    • Networking & DNS
    • Platform Policies
    • Platform Principles
  • Developer Tools
    • Command Line
    • Heroku VS Code Extension
  • Deployment
    • Deploying with Git
    • Deploying with Docker
    • Deployment Integrations
  • Continuous Delivery & Integration (Heroku Flow)
    • Continuous Integration
  • Language Support
    • Node.js
      • Troubleshooting Node.js Apps
      • Node.js Behavior in Heroku
      • Working with Node.js
    • Ruby
      • Rails Support
      • Working with Bundler
      • Working with Ruby
      • Ruby Behavior in Heroku
      • Troubleshooting Ruby Apps
    • Python
      • Working with Python
      • Background Jobs in Python
      • Python Behavior in Heroku
      • Working with Django
    • Java
      • Java Behavior in Heroku
      • Working with Java
      • Working with Maven
      • Working with Spring Boot
      • Troubleshooting Java Apps
    • PHP
      • PHP Behavior in Heroku
      • Working with PHP
    • Go
      • Go Dependency Management
    • Scala
    • Clojure
    • .NET
      • Working with .NET
  • Databases & Data Management
    • Heroku Postgres
      • Postgres Basics
      • Postgres Getting Started
      • Postgres Performance
      • Postgres Data Transfer & Preservation
      • Postgres Availability
      • Postgres Special Topics
      • Migrating to Heroku Postgres
    • Heroku Key-Value Store
    • Apache Kafka on Heroku
    • Other Data Stores
  • AI
    • Model Context Protocol
    • Heroku Inference
      • Inference API
      • Heroku Inference Quick Start Guides
      • AI Models
      • Inference Essentials
    • Vector Database
    • Working with AI
  • Monitoring & Metrics
    • Logging
  • App Performance
  • Add-ons
    • All Add-ons
  • Collaboration
  • Security
    • App Security
    • Identities & Authentication
      • Single Sign-on (SSO)
    • Private Spaces
      • Infrastructure Networking
    • Compliance
  • Heroku Enterprise
    • Enterprise Accounts
    • Enterprise Teams
    • Heroku Connect (Salesforce sync)
      • Heroku Connect Administration
      • Heroku Connect Reference
      • Heroku Connect Troubleshooting
  • Patterns & Best Practices
  • Extending Heroku
    • Platform API
    • App Webhooks
    • Heroku Labs
    • Building Add-ons
      • Add-on Development Tasks
      • Add-on APIs
      • Add-on Guidelines & Requirements
    • Building CLI Plugins
    • Developing Buildpacks
    • Dev Center
  • Accounts & Billing
  • Troubleshooting & Support
  • Integrating with Salesforce
DataVisor by Raiquun

This add-on is operated by Raiquun

Intelligently manage and optimize your Applications and Data Services

DataVisor by Raiquun

Last updated June 18, 2025

This is a draft article - the text and URL may change in the future. This article is unlisted. Only contributors can access it.

The DataVisor by Raiquun add-on is currently in beta.

Table of Contents

  • Provisioning the Add-on
  • DataVisor Dashboard
  • Migrating Between Plans
  • Removing the Add-on
  • Support

DataVisor by Raiquun enables you to intelligently manage and optimize your organization’s Applications and Data Services in one place. With DataVisor, your organization can control and right-size its ever-changing Heroku environment.

DataVisor actively monitors your:

  • Application dynos
  • Heroku Postgres databases with support for Heroku Connect
  • Heroku Key-Value Store instances
  • Apache Kafka on Heroku clusters

Provisioning the Add-on

DataVisor monitors all of your organization’s Applications and Data Services, regardless of which app you attach it to. Therefore, you only need to add DataVisor to one of your organization’s apps. We recommend adding DataVisor to an app that perpetually exists in your organization’s account, such as an app specifically dedicated to DataVisor.

Reference the DataVisor Elements Page for a list of available plans and regions.

Using the Heroku Elements Marketplace

Click Install DataVisor by Raiquun on the DataVisor Elements Page.

Using the Heroku CLI

Attach DataVisor to a Heroku application via the CLI:

$ heroku addons:create raiquun:<plan> --app <app>

See the Managing Add-ons dev center article for more CLI installation instructions.

DataVisor Dashboard

DataVisor Dashboard

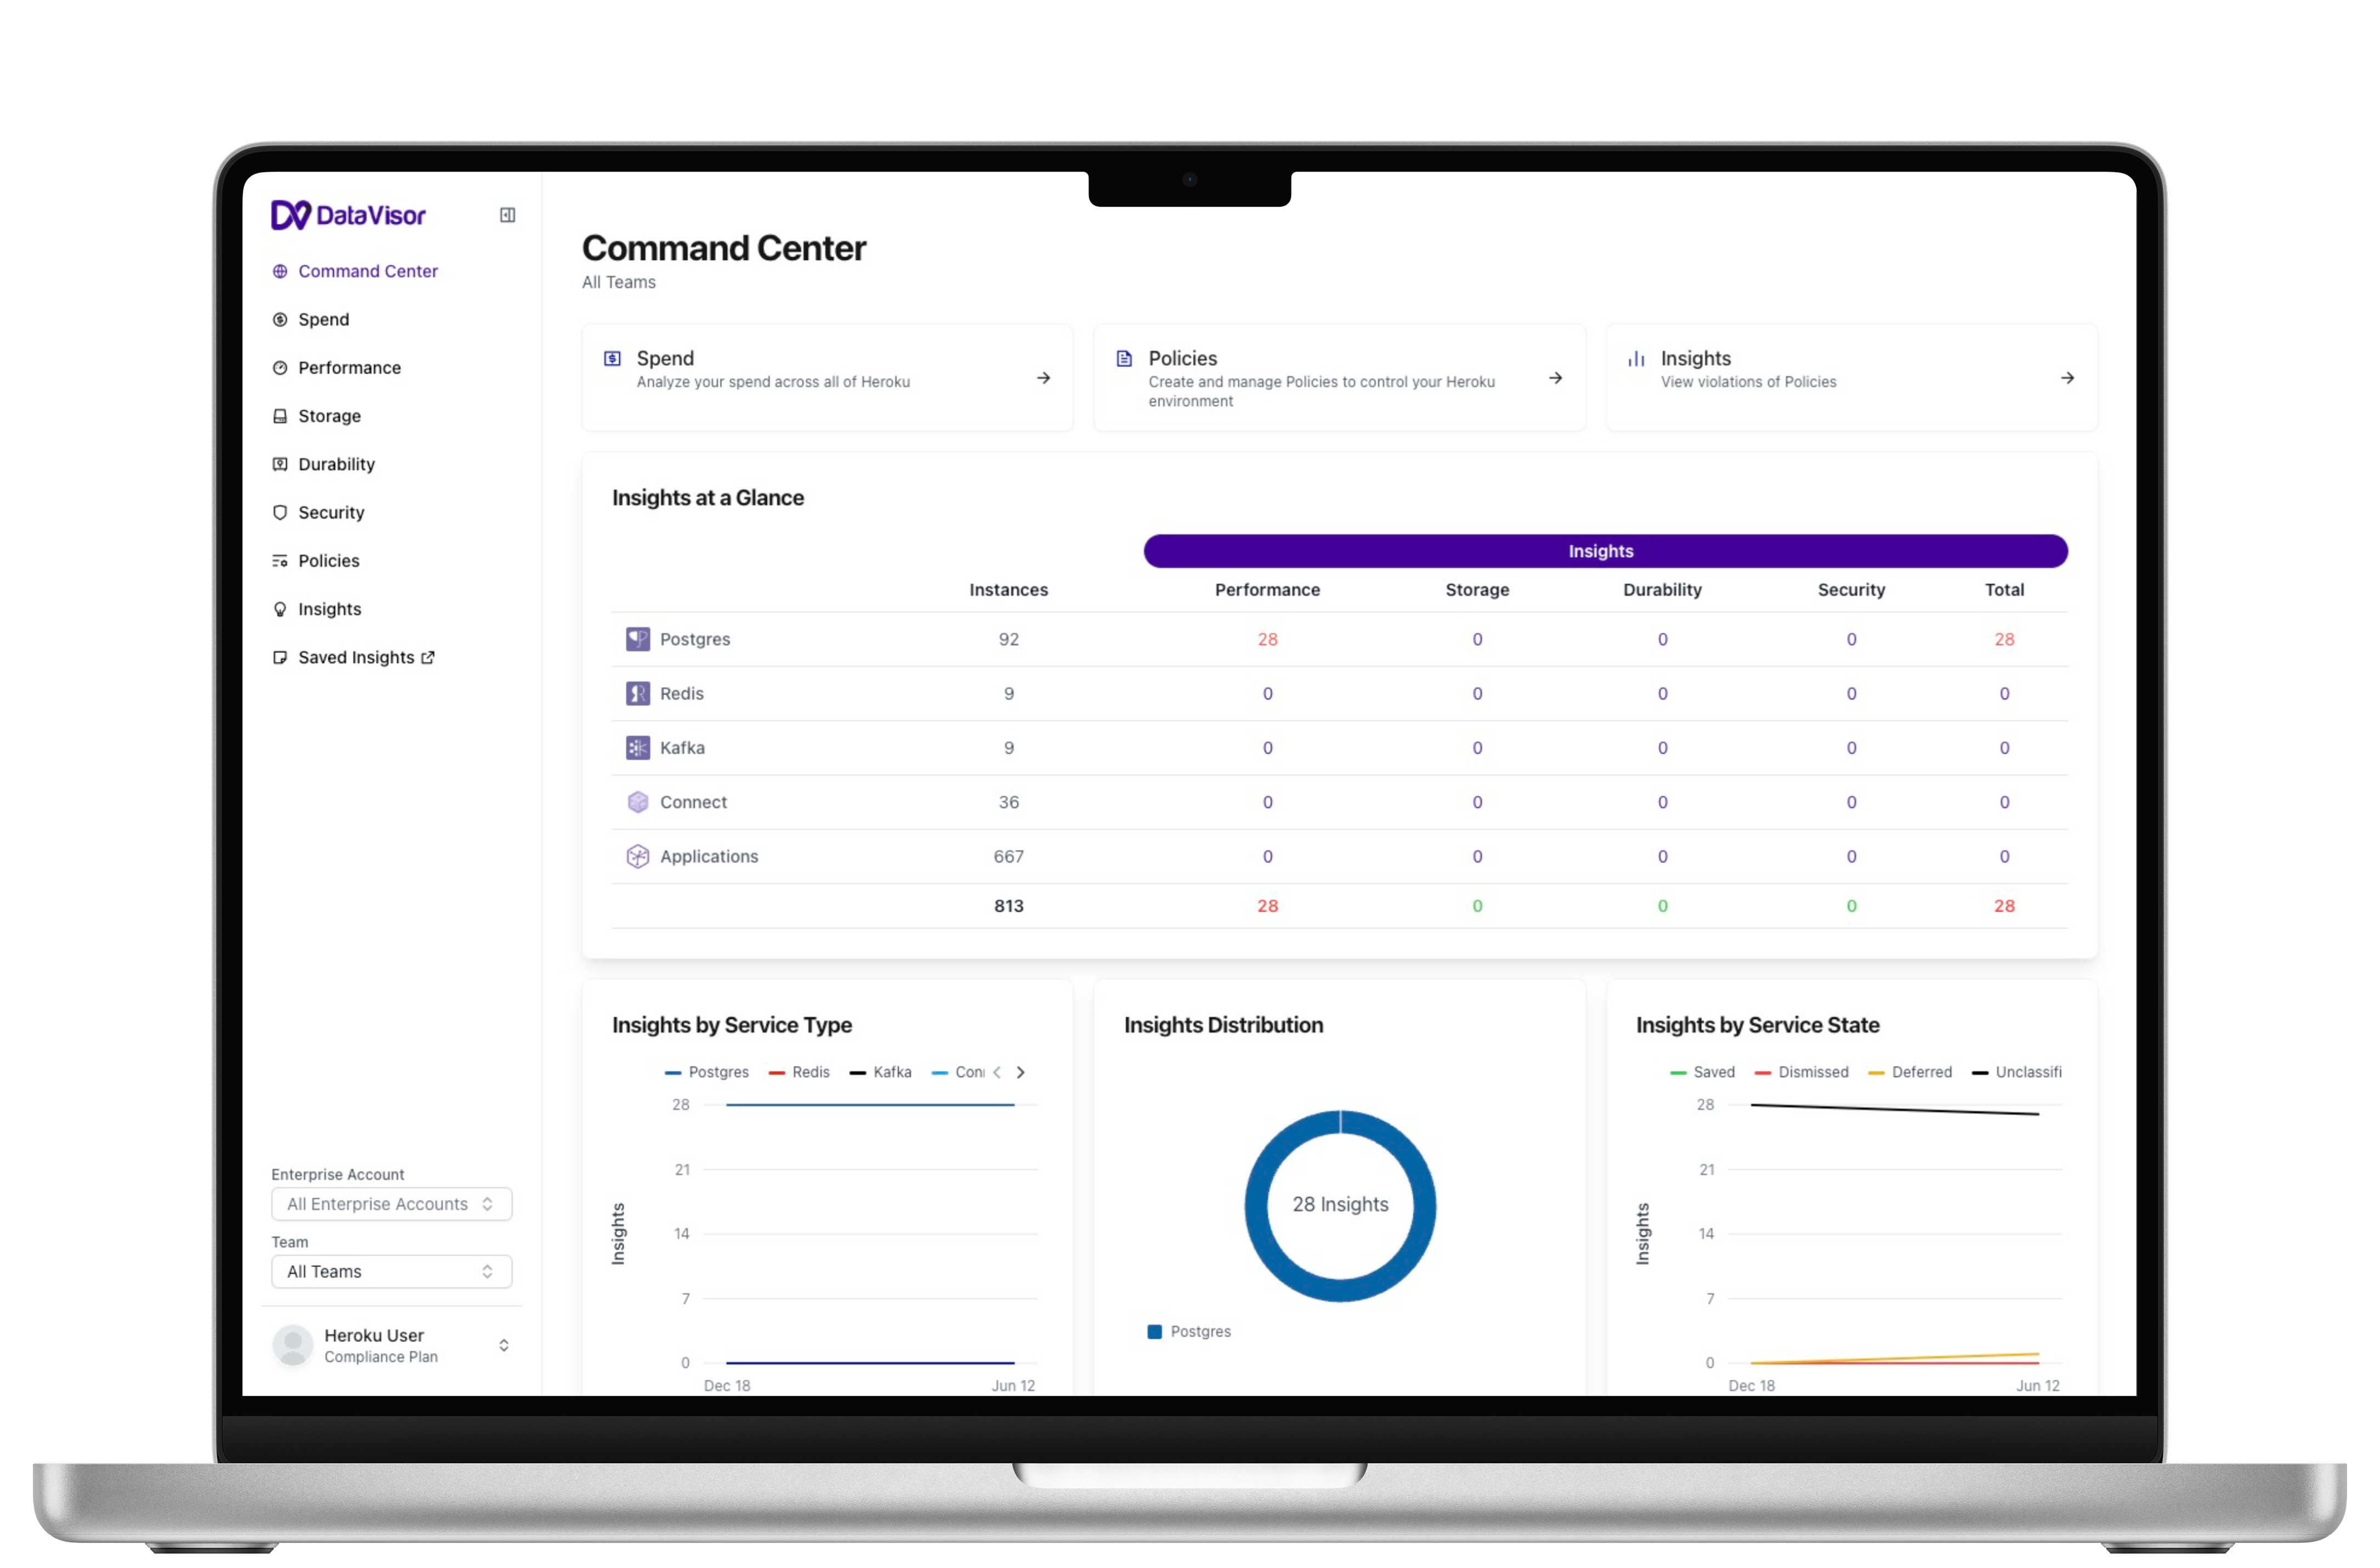
DataVisor provides an interface to view and interact with your organization’s Heroku environment via its dashboard. Access the DataVisor dashboard by clicking the DataVisor by Raiquun add-on in your app from the Heroku Dashboard, or with the heroku addons:open raiquun command.

DataVisor provides a detailed, intelligent view of the telemetry of your organization’s Applications and Data Services on the Spend, Performance, Storage, Durability, and Security pages of the dashboard.

DataVisor actively monitors your organization’s Heroku environment via Policies and Rules you create, and Insights generated from those Policies. Policies are a set of Rules, created on a Service type basis. You can apply Policies to one or all of the Services within that Service type. Rules are metric thresholds that when triggered, create Insights surfaced in the UI throughout the dashboard.

The dashboard provides these pages:

  • Policies: create, view, update, and delete Policies and Rules
  • Insights: view and take action on Insights
  • Saved Insights: view and share Insights your organization has saved

Migrating Between Plans

Using the Heroku Dashboard

To migrate to a new plan through the dashboard:

  1. Click the app with DataVisor installed in the Heroku Dashboard.
  2. Find DataVisor by Raiquun in the Add-ons section of the Resources tab on the app’s dashboard.
  3. Click Actions on the add-on listing, and then click Modify Plan.

Using the Heroku CLI

Through the CLI, use the heroku addons:upgrade command to migrate to a new plan:

$ heroku addons:upgrade raiquun:<upgraded or downgraded plan>

Removing the Add-on

Remove DataVisor via the CLI:

This action destroys all associated data and you can’t undo it! To request a copy of your data, email support@raiquun.com.

$ heroku addons:destroy raiquun

Support

Submit all DataVisor support and runtime issues via one of the Heroku Support channels. If you’re experiencing issues with the DataVisor dashboard or have product feedback to share, contact our support team at support@raiquun.com.

Feedback

Log in to submit feedback.

Information & Support

  • Getting Started
  • Documentation
  • Changelog
  • Compliance Center
  • Training & Education
  • Blog
  • Support Channels
  • Status

Language Reference

  • Node.js
  • Ruby
  • Java
  • PHP
  • Python
  • Go
  • Scala
  • Clojure
  • .NET

Other Resources

  • Careers
  • Elements
  • Products
  • Pricing
  • RSS
    • Dev Center Articles
    • Dev Center Changelog
    • Heroku Blog
    • Heroku News Blog
    • Heroku Engineering Blog
  • Twitter
    • Dev Center Articles
    • Dev Center Changelog
    • Heroku
    • Heroku Status
  • Github
  • LinkedIn
  • © 2025 Salesforce, Inc. All rights reserved. Various trademarks held by their respective owners. Salesforce Tower, 415 Mission Street, 3rd Floor, San Francisco, CA 94105, United States
  • heroku.com
  • Legal
  • Terms of Service
  • Privacy Information
  • Responsible Disclosure
  • Trust
  • Contact
  • Cookie Preferences
  • Your Privacy Choices