This add-on is operated by Cloud Copy, LLC
Import address books from Yahoo, Gmail, Outlook.com, AOL, Outlook and Mac OS X.
CloudSponge Contact Importer
Last updated July 27, 2023
This article is a work in progress, or documents a feature that is not yet released to all users. This article is unlisted. Only those with the link can access it.
Table of Contents
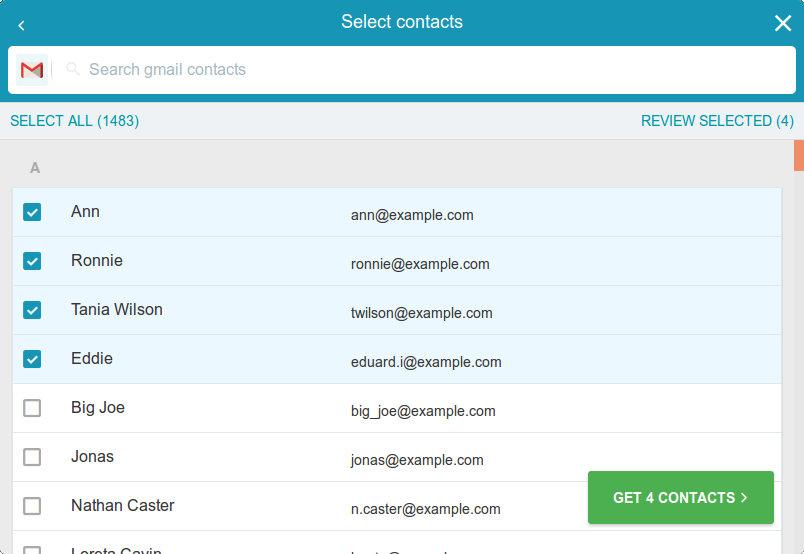
The CloudSponge Contact Picker is a Heroku add-on to import address books from Gmail, Yahoo, Outlook.com, iCloud, AOL, LinkedIn, Outlook desktop, Mac OS X Address Book and many others.
You can use these email addresses to invite Friends, find Friends, or whatever other application you need.
The simplest way to use CloudSponge is using the JavaScript widget importer with our default snippet: it will add an “Add from Address Book” link to your email form, allowing the user to click, select an address book provider (Gmail, Yahoo, Hotmail, Windows Live, etc.) and then select contacts to automatically fill your email recipient field.

You can see it in action on our test drive page.
Additionally, our HTML widget importer can easily be plugged into your website in less than 5 minutes, just using a simple copy/paste.
Later, you can replace our branding with your own company name in addition to several other customization options. You can even use one of supported APIs to take full control of the importer process.
Provisioning the add-on
The CloudSponge Contact Picker can be attached to a Heroku application via the CLI:
$ heroku addons:create cloudsponge
-----> Adding cloudsponge to sharp-mountain-4005... done, v18 (free)
Once it has been provisioned, a CLOUDSPONGE_KEY setting will be available in the app configuration and will contain
your Account Key. This can be confirmed using the heroku config:get command.
$ heroku config:get CLOUDSPONGE_KEY
1234
After installing CloudSponge, the application should be configured to fully integrate with the add-on.
Because your CLOUDSPONGE_KEY is generated asynchronously after the add-on has been provisioned, there will
be a short delay before it is available. If you get an empty value for CLOUDSPONGE_KEY, wait a moment and try again.
Local setup
At Heroku, the config var CLOUDSPONGE_KEY is now automatically filled after install. In this sample, our CLOUDSPONGE_KEY is 1234.
You can now simulate the same Heroku behavior in your local environment, specifying your key when running the application (or any other command) by prepending the shell command:
$ CLOUDSPONGE_KEY="1234" rails s
If you need a different way to setup your local config vars, visit the Heroku Local article.
Now it’s time to setup your importer.
Setup The Contact Picker
Our Contact Picker is appropriate for developers who want to get up and running quickly. You can see it in action on our test drive page.
Basic installation
Add this script to your site in the HEAD of the page:
<script src="//api.cloudsponge.com/widget/<%= ENV['CLOUDSPONGE_KEY'] %>.js"></script>
Provide a widget launcher hyperlink:
<!-- Any link with a class="cloudsponge-launch" will start the import process -->
<a class="cloudsponge-launch">Add From Address Book</a>
Display user’s selected contacts:
<input type="textarea" class="cloudsponge-contacts"/>
Customization
The user experience is fully customizable to suit your needs.
The CloudSponge widget’s look and behavior can be customized in many ways to blend in with your application. Read more about our current widget customizations in our documentation.
The user experience can also be white-labeled so that your users don’t see the CloudSponge brand anywhere. You can read more about this advanced topic on our online documentation.
Our server API eases the burden of maintaining multiple provider integrations while giving you full control over every pixel of the user experience.
Dashboard
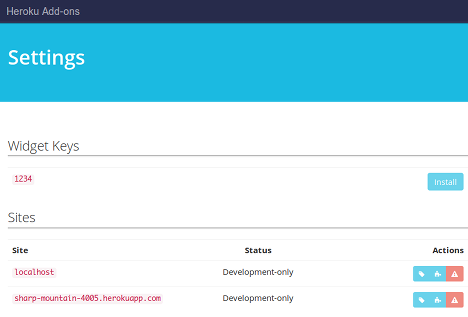
The CloudSponge Contact Picker dashboard allows you to manage your sites, manage users and check address books import statistics.

The dashboard can be accessed via the CLI:
$ heroku addons:open cloudsponge
Opening cloudsponge for sharp-mountain-4005…
or by visiting the Heroku Dashboard and selecting the application in question. Select CloudSponge Contact Picker from the Add-ons menu.
Adding a new domain
If you Heroku app has a top level domain, like example.com, you’re not required to do any changes to your code.
Once you test the widget in your new domain, it’ll be automatically recognized and added to your domain list.
See your domain list in your CloudSponge Dashboard:
$ heroku addons:open cloudsponge
Opening cloudsponge for sharp-mountain-4005...
Removing the add-on
The CloudSponge Contact Picker can be removed via the CLI.
This will destroy all associated data and cannot be undone!
$ heroku addons:destroy cloudsponge
-----> Removing cloudsponge from sharp-mountain-4005... done, v20 (free)
Support
Heroku support should be sent via Heroku Support channels. CloudSponge Contact Picker related issues or product feedback is welcome at support@cloudsponge.com.