This add-on is operated by Searchify
Awesome search & autocomplete, with real-time updates and customizable results.
Searchify
Last updated July 28, 2023
This article is a work in progress, or documents a feature that is not yet released to all users. This article is unlisted. Only those with the link can access it.
Table of Contents
Searchify is an add-on that provides hosted full-text search.
Searchify allows developers to easily add search to their applications, without having to deal with Solr or Lucene, and without the hassle of managing a search infrastructure. Searchify is fast. Most search queries will be answered in under 100 milliseconds. Searchify offers true real-time search, so documents added are immediately searchable. Searchify is a drop-in replacement for existing IndexTank users.
Searchify has client libraries for Ruby, Python, Java, PHP, and others, all of which communicate with Searchify’s REST API.
Installing the add-on
Searchify can be installed using the following addons:create command, and replacing <PLAN> with the name of the searchify plan desired:
Searchify offers plans based on the number of documents stored. A list of all plans available can be found on the Searchify add-on page.
$ heroku addons:create searchify:<PLAN>
-----> Adding searchify:<PLAN> to mycoolapp... done
This will create an account on Searchify associated with the Heroku user, with one empty index called “idx”. You may use this “idx” index or delete it and create a new one anytime.
Once Searchify has been added, a SEARCHIFY_API_URL setting will be available in the app configuration, and will contain the private API URL used to access the newly-provisioned Searchify service from within your application.
$ heroku config | grep SEARCHIFY_API_URL
SEARCHIFY_API_URL    => http://:secret@xyz.api.searchify.com
Local workstation setup
To test the service in a local development environment, retrieve the environment variables from heroku using the following command:
$ heroku config --long | grep SEARCHIFY
The SEARCHIFY_API_URL is the private URL used to access the Searchify service from within a local environment. Typically developers will create one search index for testing and one for production.
The next step is to install the appropriate language client library to develop locally with Searchify.
Installing the client library
Searchify may be accessed using one of the IndexTank client libraries.
Installing the IndexTank Gem (Ruby)
Ruby/Rails applications should add the following entry into their Gemfile specifying the IndexTank client library required to access Searchify:
gem 'indextank'
For local development, install the indextank gem:
$ gem install indextank
Now the client can be used to add documents to your index and perform searches. The following code sample demonstrates basic document indexing and search, and may be copied for use in apps you develop. Remember: <API_URL> must be replaced with the value of the SEARCHIFY_API_URL from the previous step, and <INDEX_NAME> with the name of an index you wish to search (such as the “idx” index initially created):
require 'rubygems'
require 'indextank'

# Obtain an IndexTank client
client = IndexTank::Client.new(ENV['SEARCHIFY_API_URL'] || '<API_URL>')
index = client.indexes('<INDEX_NAME>')

begin
    # Add documents to the index
    index.document("1").add({ :text => "some text here" })
    index.document("2").add({ :text => "some other text" })
    index.document("3").add({ :text => "something else here" })

    # Search the index
    results = index.search("some")

    print "#{results['matches']} documents found\\n"
    results['results'].each { |doc|
      print "docid: #{doc['docid']}\\n"
    }
rescue
    print "Error: ",$!,"\\n"
end
Using Searchify with PHP
Download the IndexTank PHP client from GitHub and require it in your code. Remember <API_URL> must be replaced with the SEARCHIFY_API_URL value from the previous step.
include_once "indextank.php";

// load the API URL from the environment if available.
$API_URL = getenv('SEARCHIFY_API_URL') ? getenv('SEARCHIFY_API_URL') : '<API_URL>';

$client = new Indextank_Api($API_URL);
$index = $client->get_index("<YOUR INDEX NAME>");

// Add documents to the index
$index->add_document("1", array("text"=>"some text here"));
$index->add_document("2", array("text"=>"some other text"));
$index->add_document("3", array("text"=>"something else here"));

// Search the index and show the results
$res = $index->search("some");
echo $res->matches . " results\n";
foreach($res->results as $doc) {
  print_r($doc);
  echo "\n";
}
Testing your application
Using the code pattern above, you should be able to test applications both locally and running on Heroku. Keep in mind that your tests affect the live search index. An index may be deleted and re-created anytime to clean it up, either from code as shown below or from Searchify’s dashboard:
Deleting an index (Ruby)
client = IndexTank::Client.new(ENV['SEARCHIFY_API_URL'] || '<API_URL>')
index = client.indexes('<INDEX_NAME>')
index.delete()
Creating a new index
client = IndexTank::Client.new(ENV['SEARCHIFY_API_URL'] || '<API_URL>')
index = client.indexes('<INDEX_NAME>')
index.add()

print "Waiting for index to be ready"
while not index.running?
    print "."
    STDOUT.flush
    sleep 0.5
end
print "\\n"
STDOUT.flush
Pushing to Heroku
You should be able to use Searchify from within applications running on Heroku after the usual push commands:
$ git commit
$ git push heroku master
Migrating between plans
If you require a plan larger than those listed, we can provide custom plans. Please contact us at support@searchify.com.
If you outgrow the limits of your current Searchify plan, it’s easy to change to a larger plan. Any data in your search indexes is preserved – no data is lost.
Use the CLI to migrate to a new plan.
$ heroku addons:upgrade searchify:plus
-----> Upgrading searchify:plus to myapp... done ($49/mo)
       Your plan has been updated to: searchify:plus
Dashboard
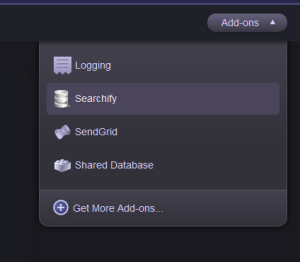
The Searchify dashboard allows you to manage your search indexes, allowing you to create, delete, and search indexes. Custom scoring functions can also be configured. The dashboard can be accessed by visiting the Heroku Dashboard and selecting Searchify from the add-ons menu.

Further reading
For more information on the features available from Searchify, including faceted search, geolocation, snippets, autocomplete, and custom scoring functions, please see the documentation at www.searchify.com/documentation.
More information: